Floral Arranging: Let your creativity bloom
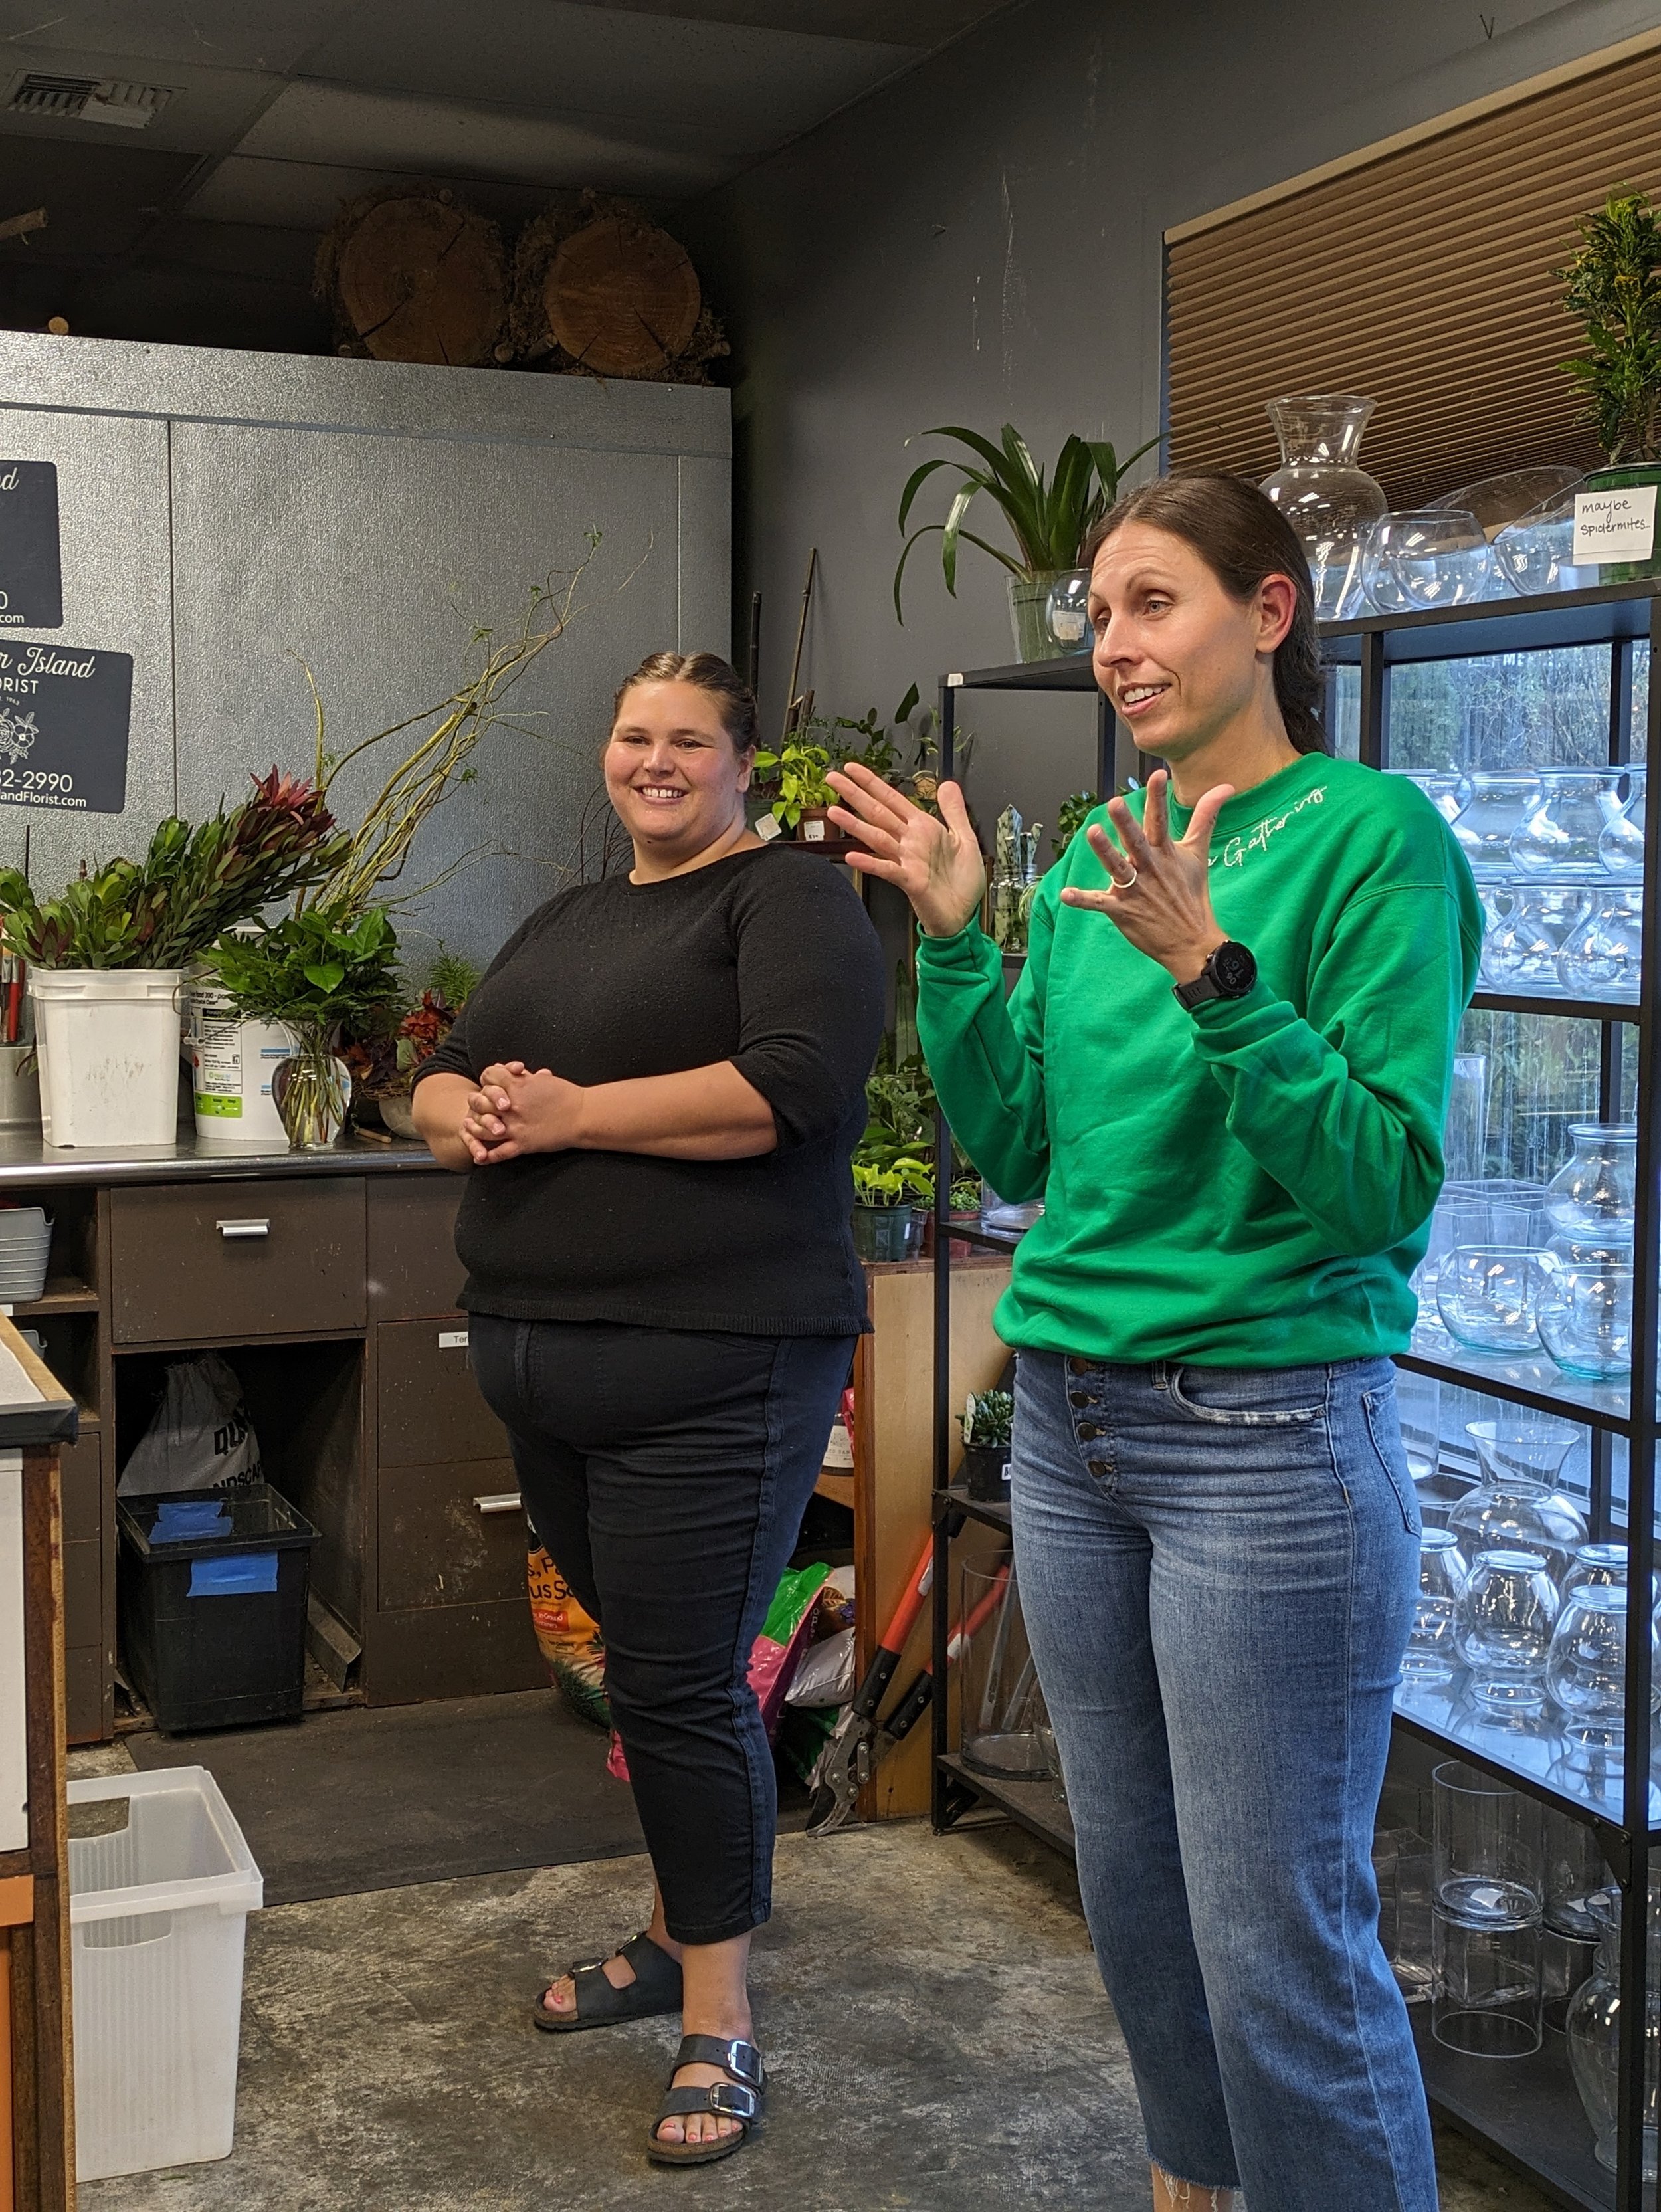
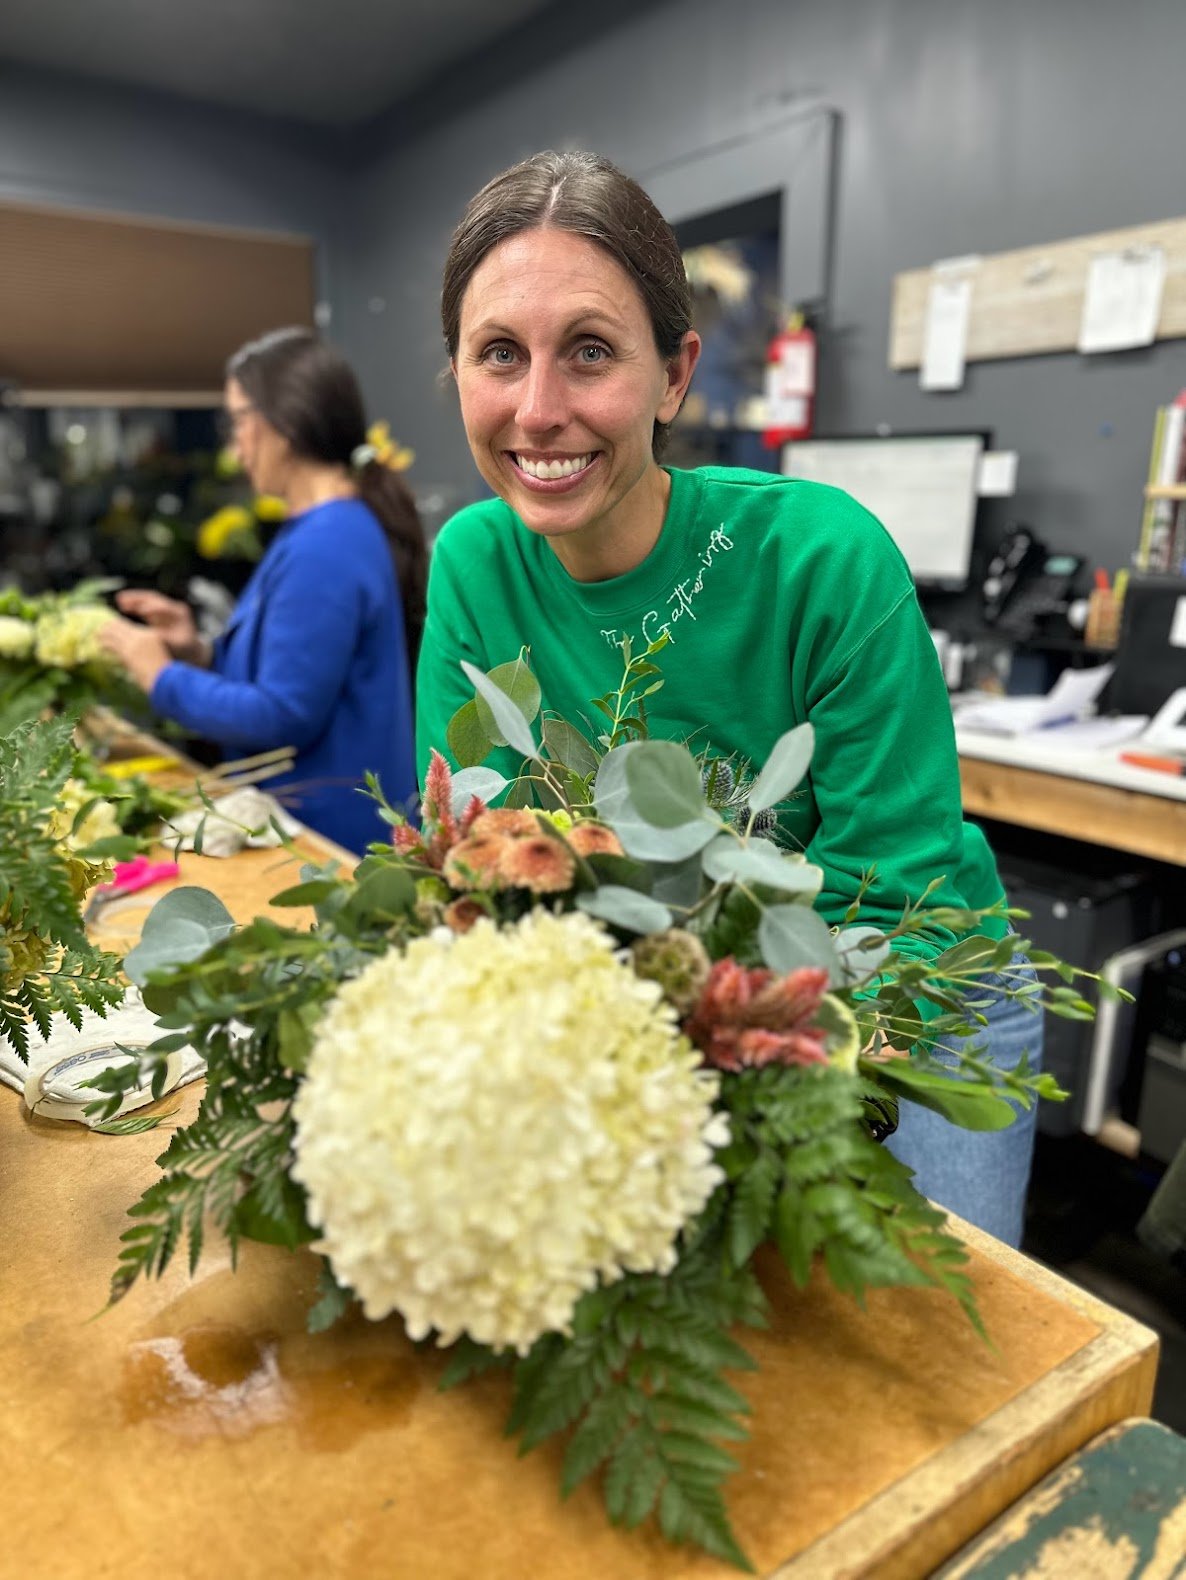
This past Thursday we had a lovely evening creating luscious floral arrangements with Jenna Weischedel at the Mercer Island Florist. Throughout the course of the workshop Jenna taught us tips and tricks for arranging at home, along with giving us a brief introduction to the fundamentals of floral design.
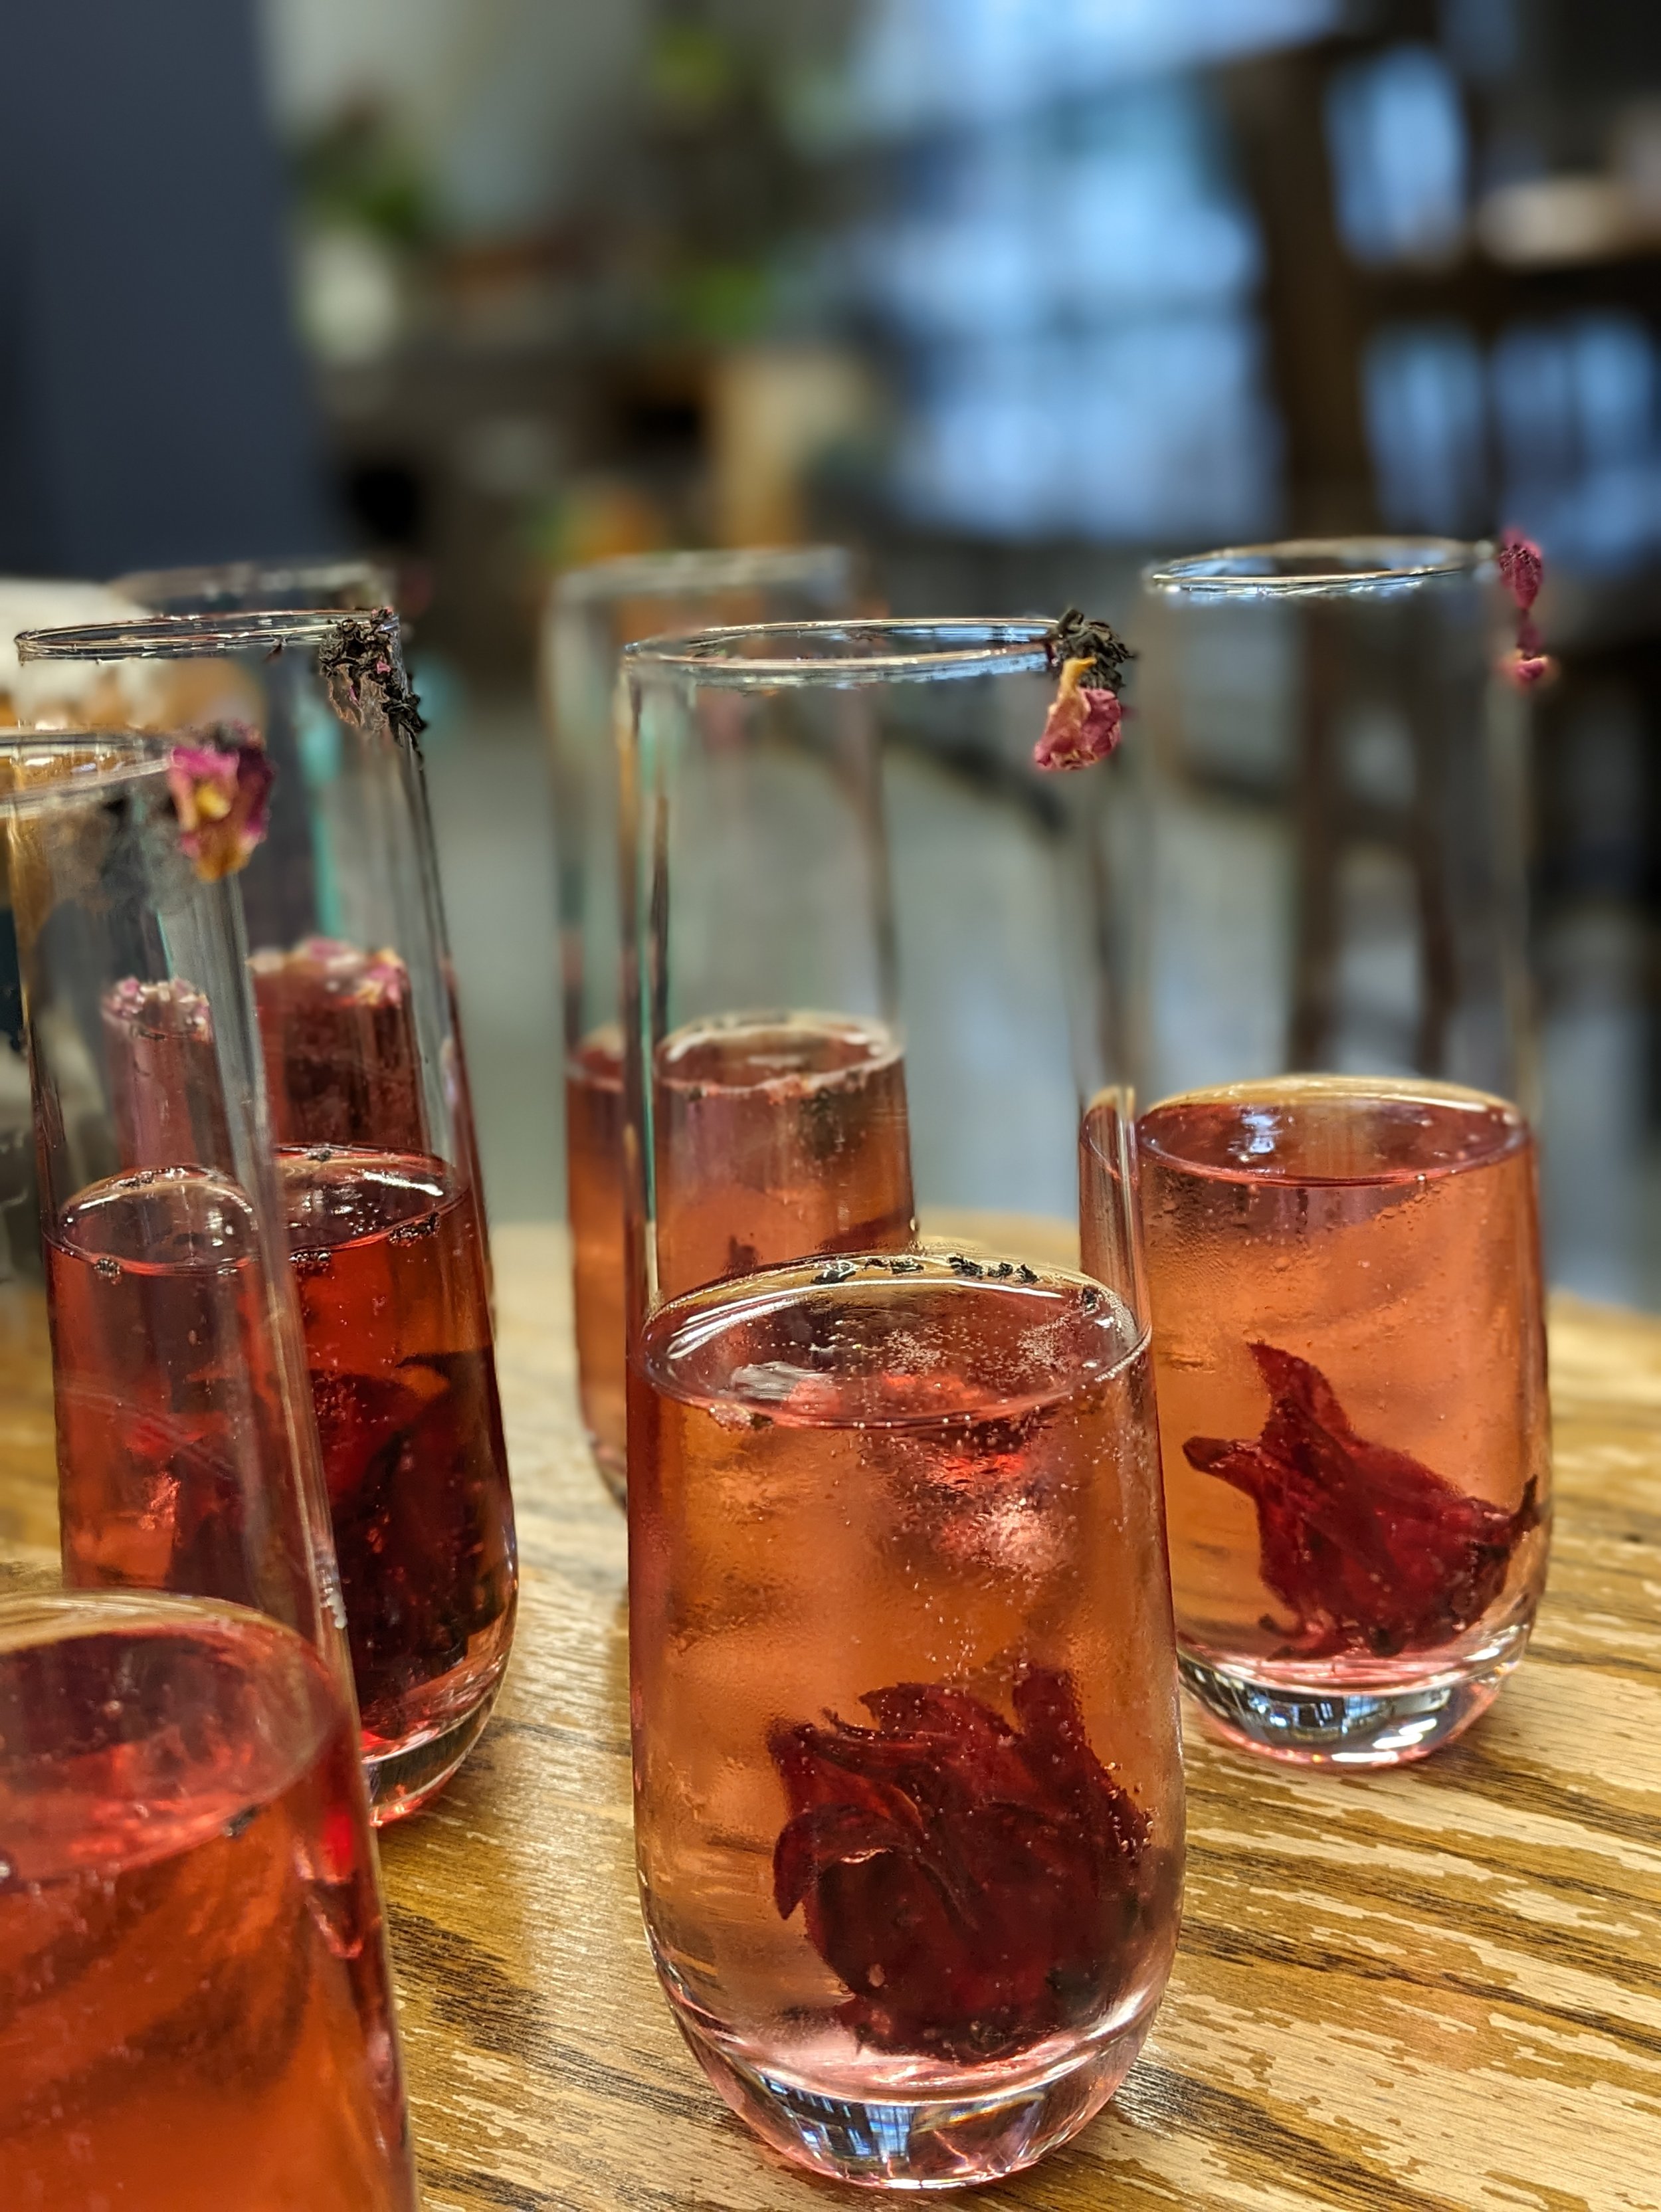
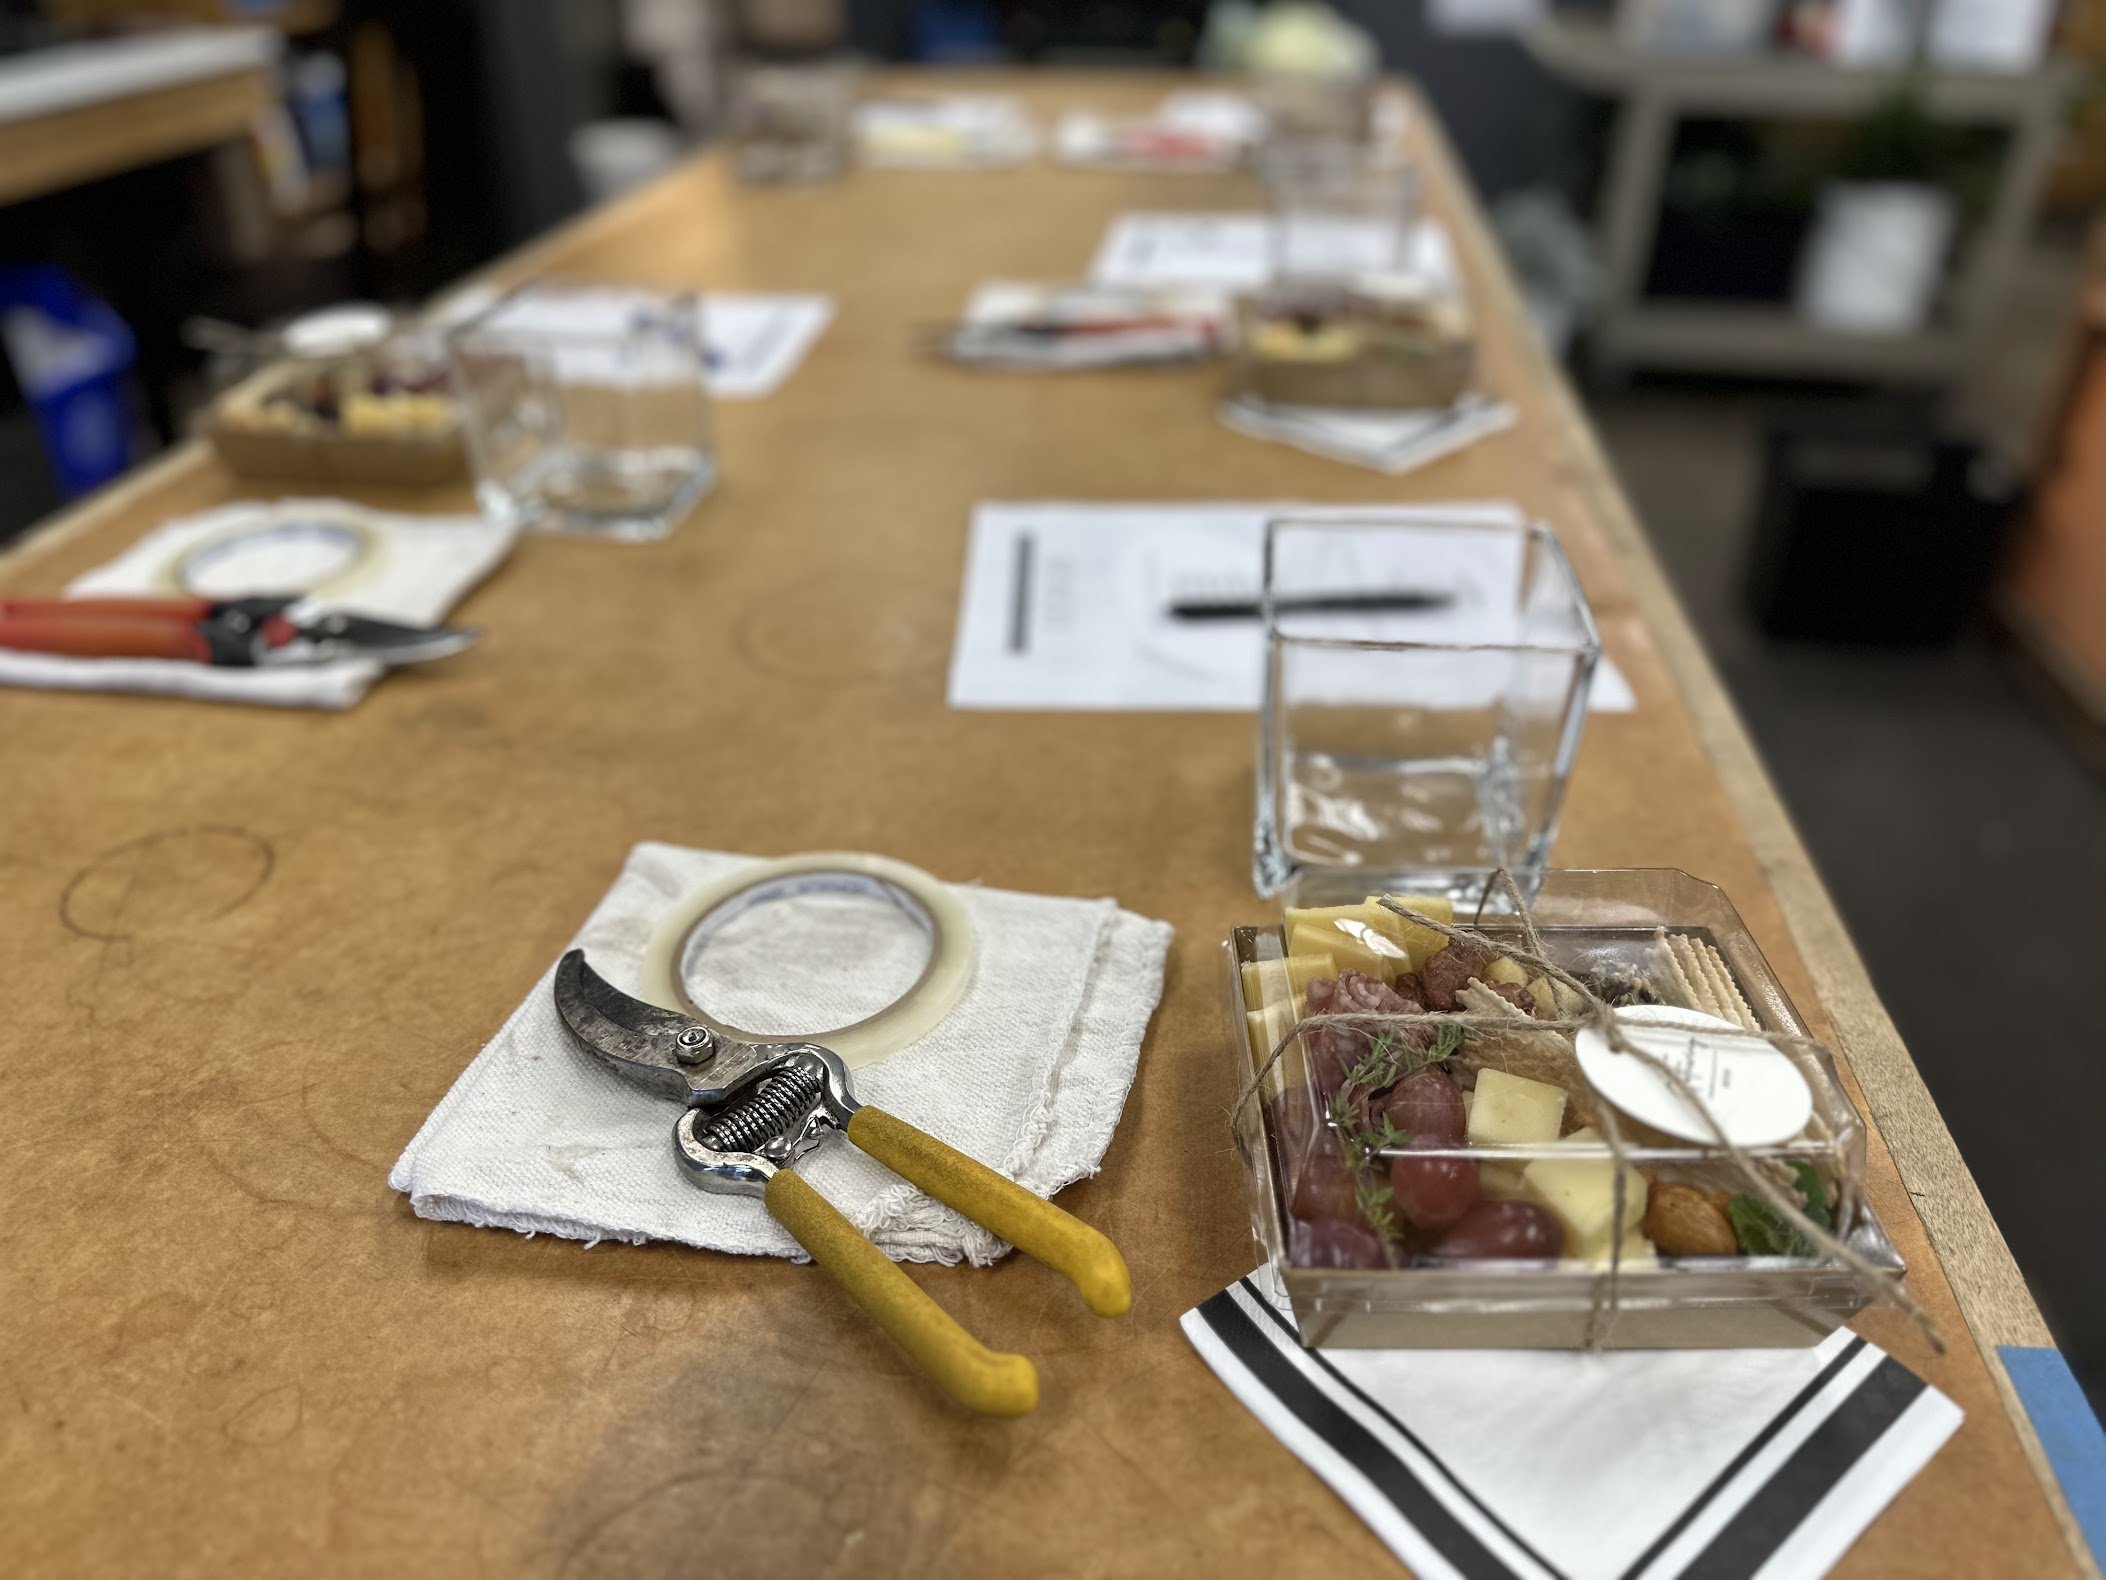
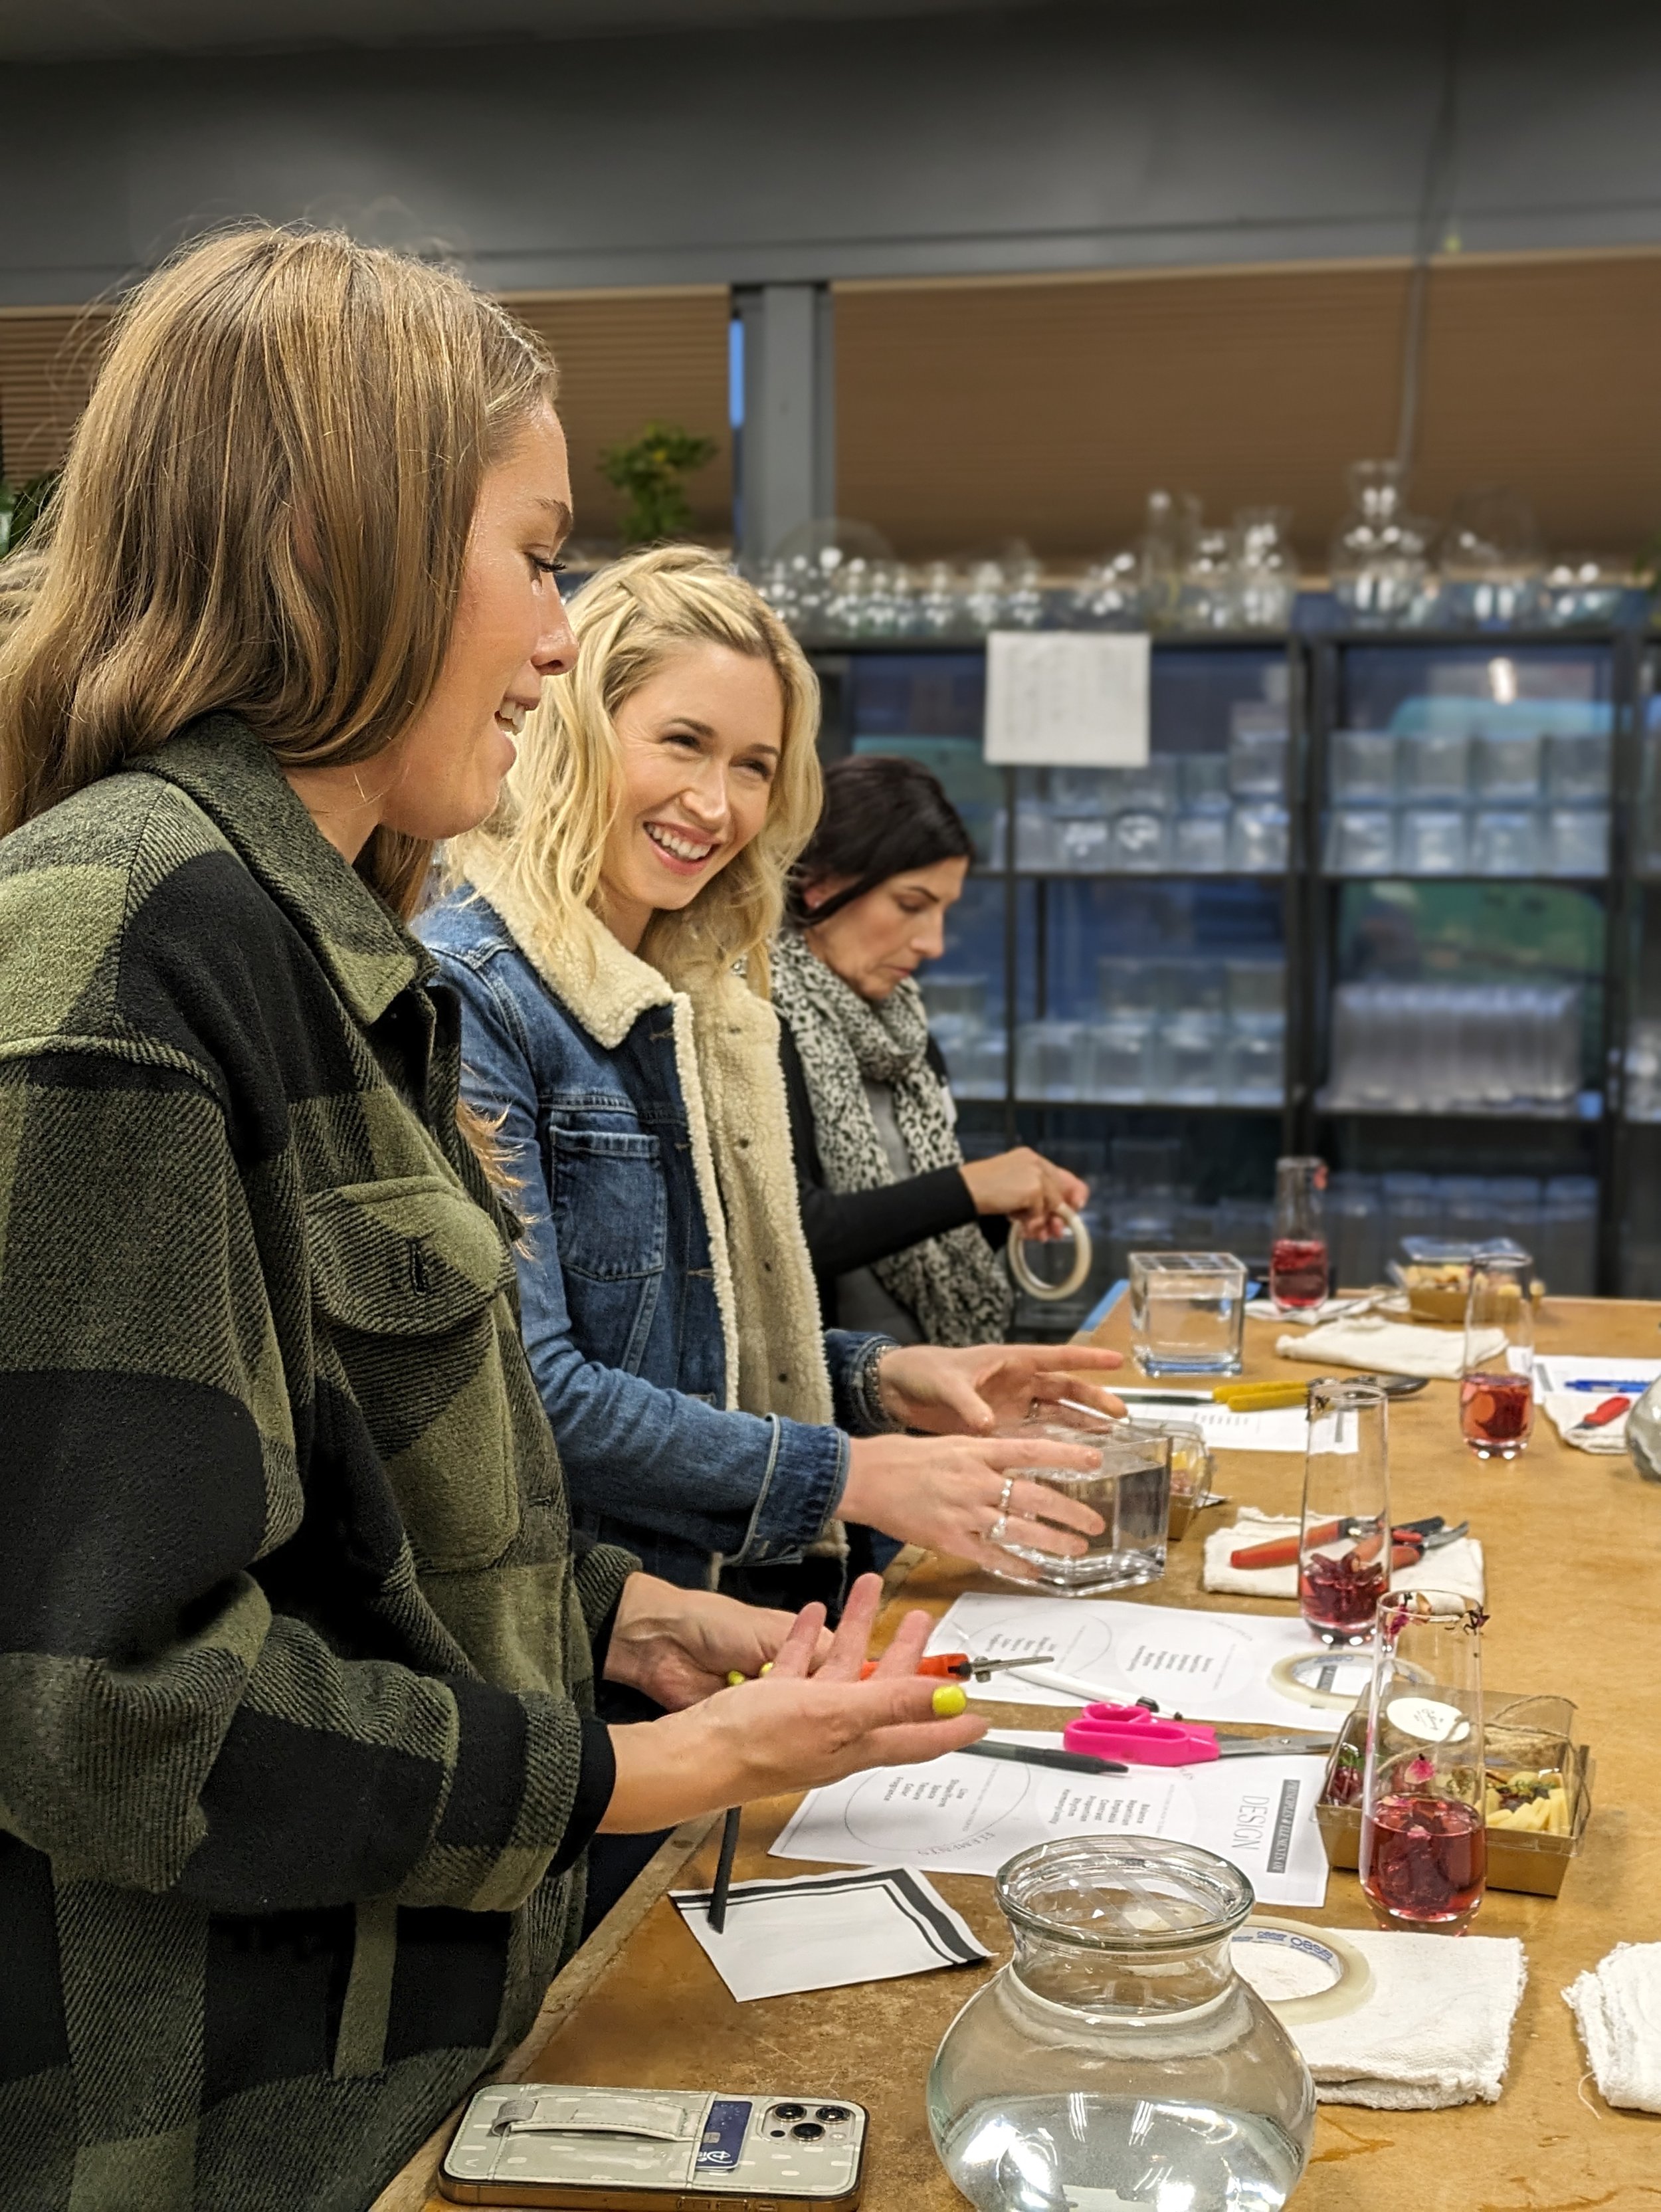
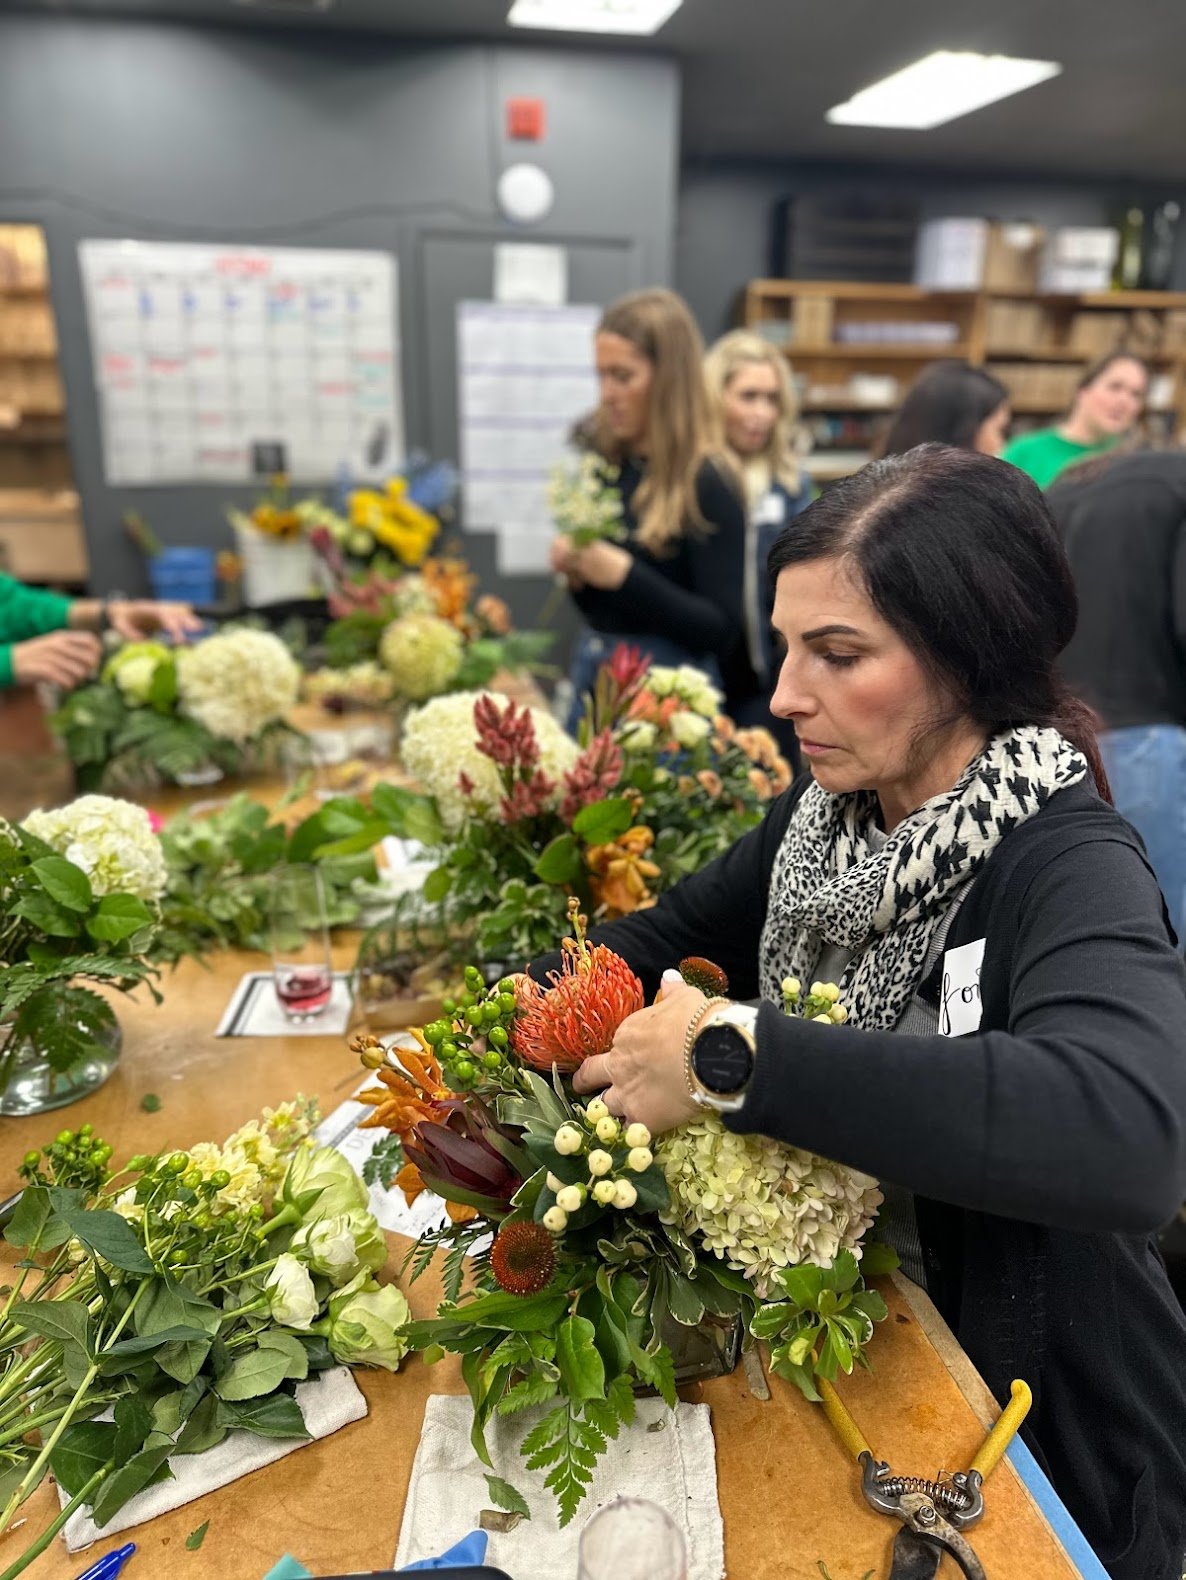
Attendees kicked off the evening with a little time to mingle, and explore the shop while sipping on prosecco and hibiscus flower cocktails. We then moved into the workshop space where Jenna Weischedel kicked off our event by reviewing the principles and elements of design. We snacked on our own mini charcuterie boxes while Jenna explained how these elements of design can help you identify the issue “when something feels off” in your arrangements. Read on for a full overview of these important design elements!
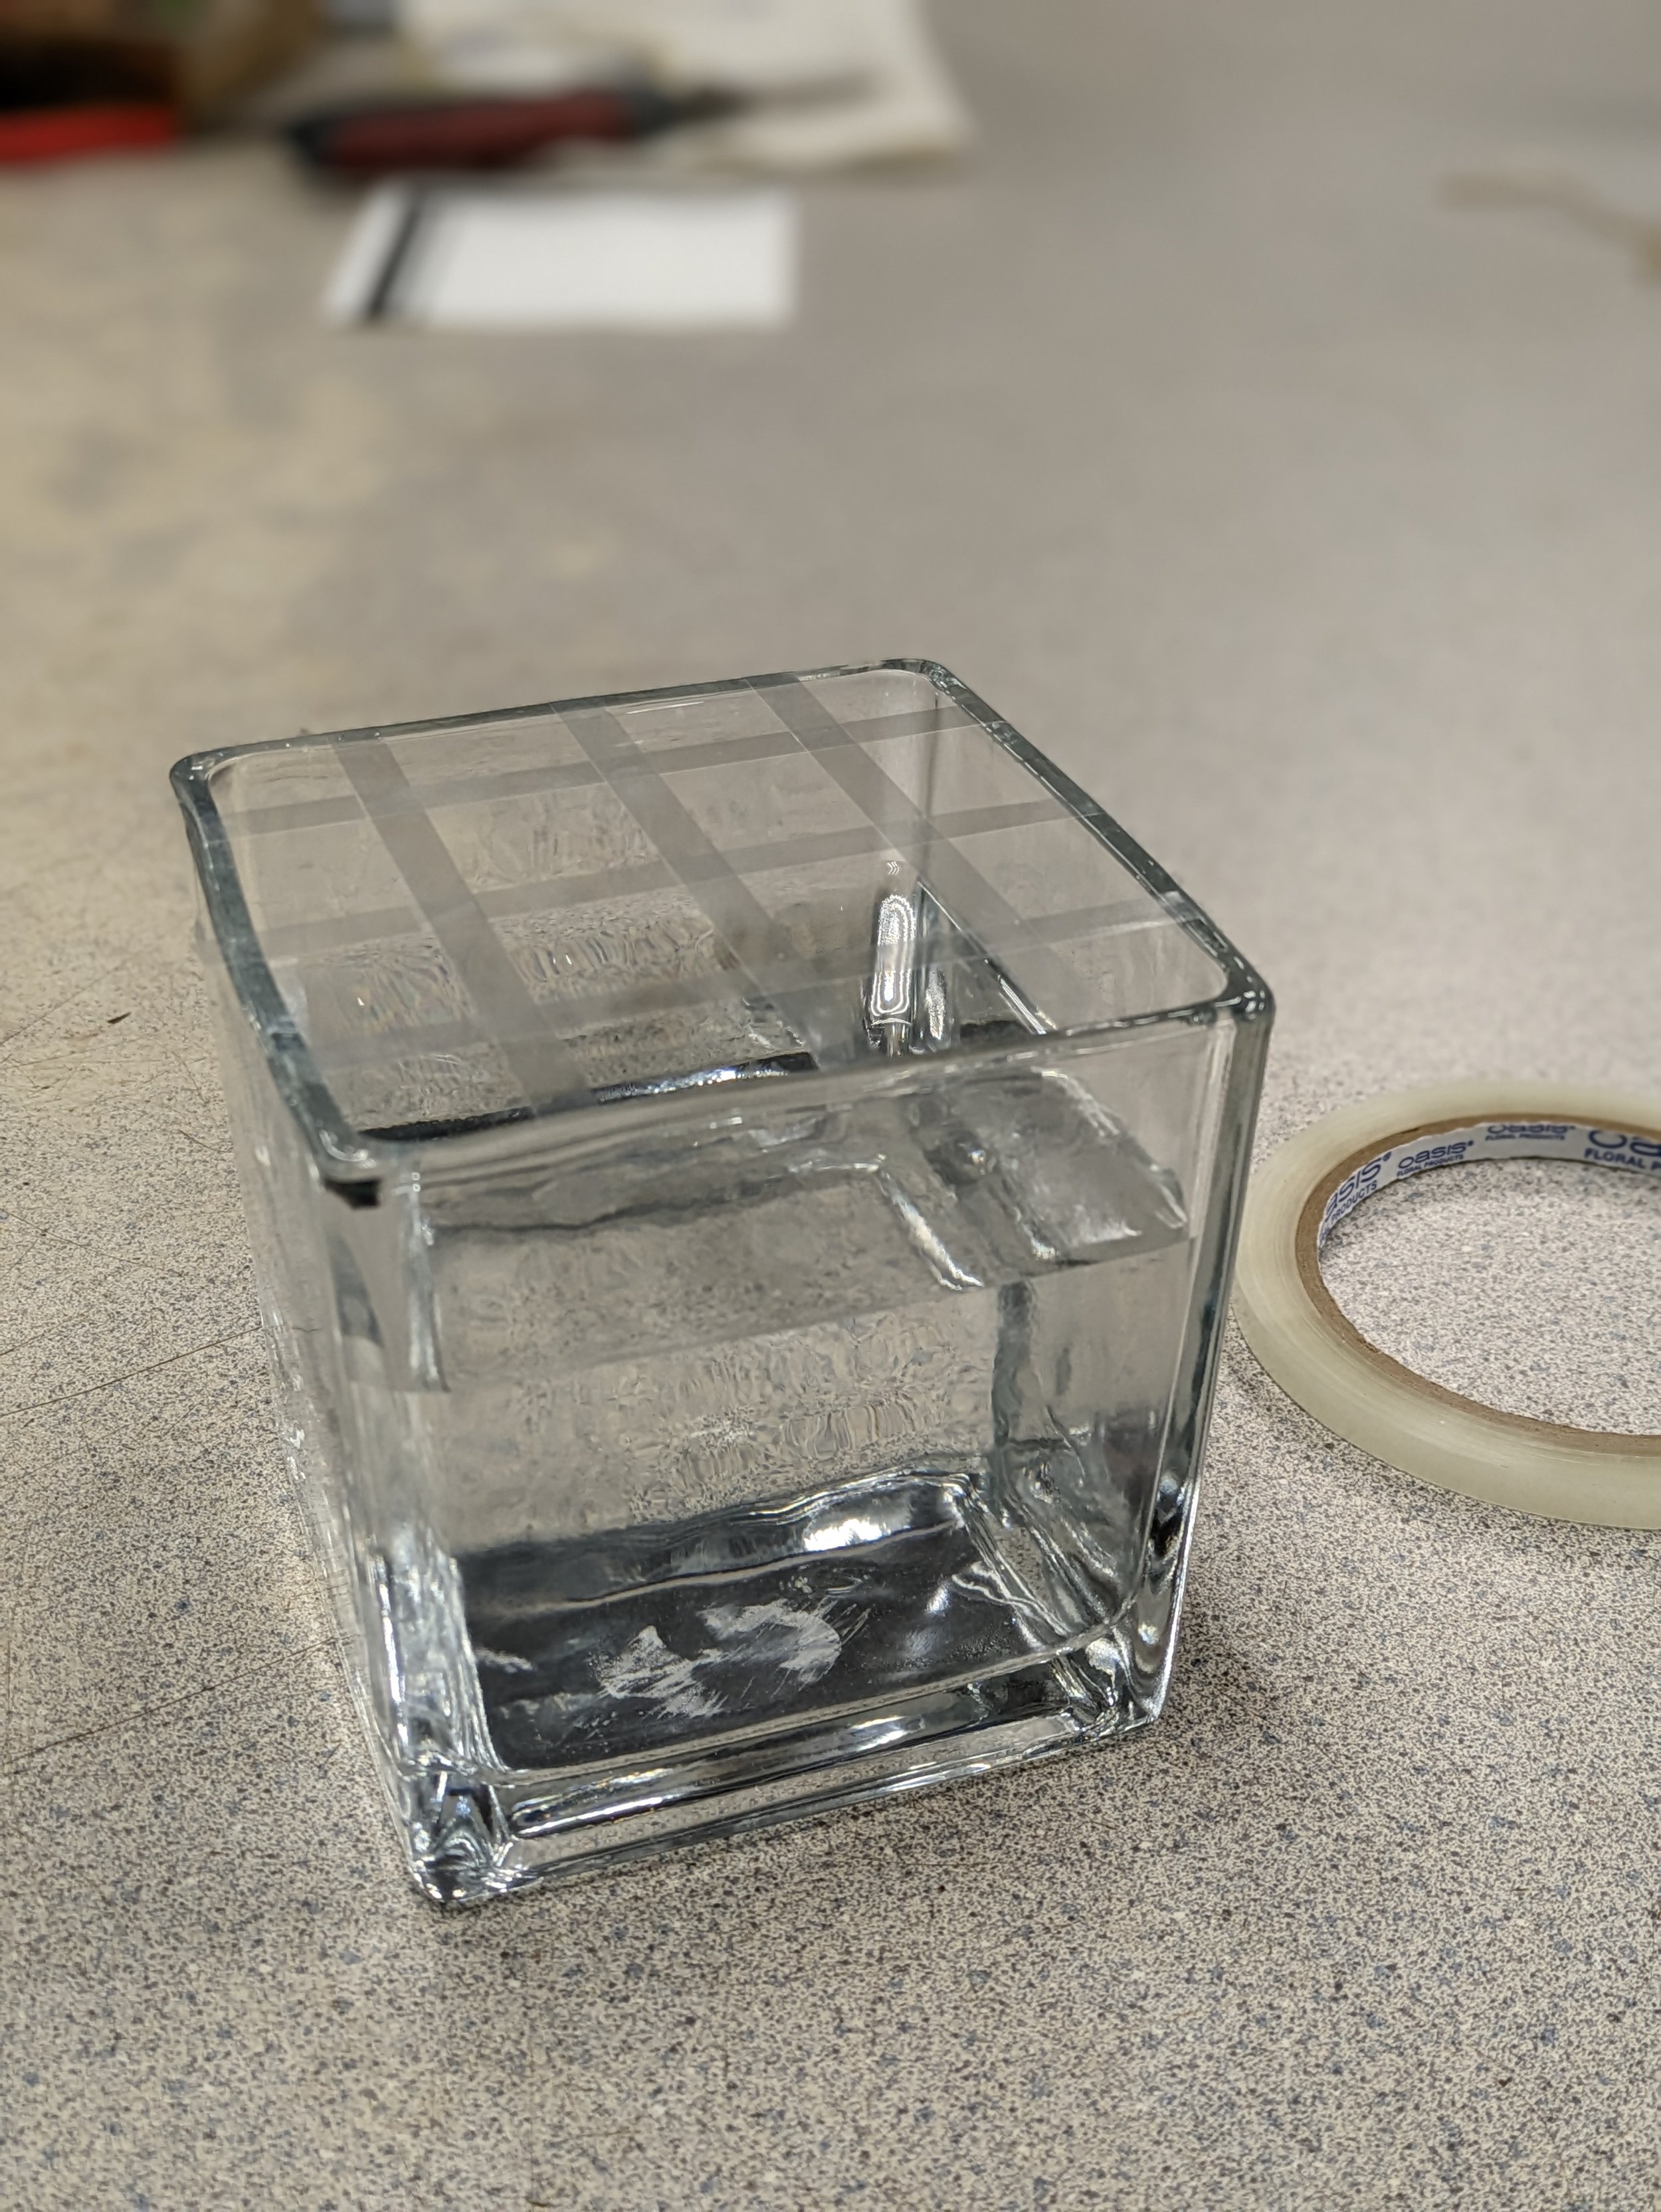
Our first step during the workshop was to make a grid on our vase opening with clear vase tape. Jenna likes to use a 3x3 grid pattern, but this can vary depending on the size of your vase and the amount of flowers you’re working with. The taped grid allows you to create symmetry and balance, while also providing support for individual stems and blooms.
Above: We began building our floral arrangement by “mirroring” leather ferns in our vase.
Guests snacked on personal charcuterie boxes that included two kinds of cheese, grapes, two types of crackers, macadamia nuts, candied almonds, chocolate almonds, dried cherries, salami and dried fruit rounds. Impress your guests by making these personal “boards in a box” on your next picnic. We love these paper to-go boxes that come with clear lids and twine (product link below).

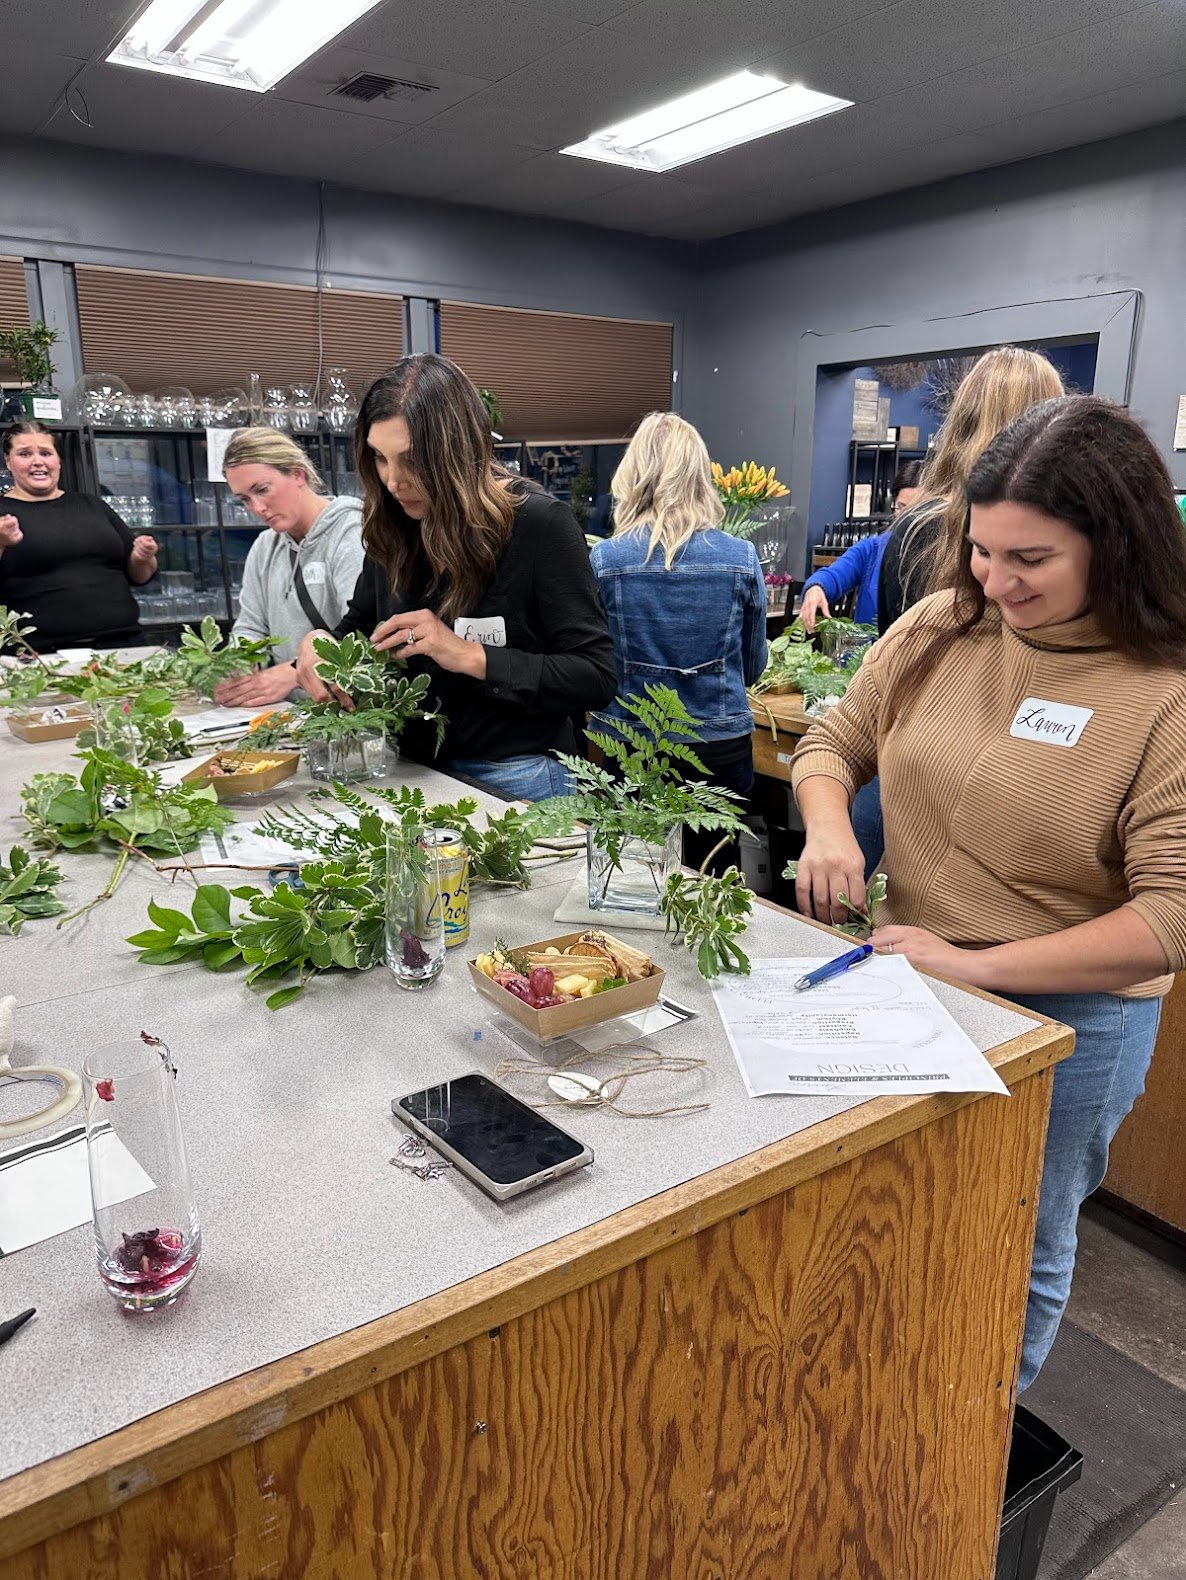
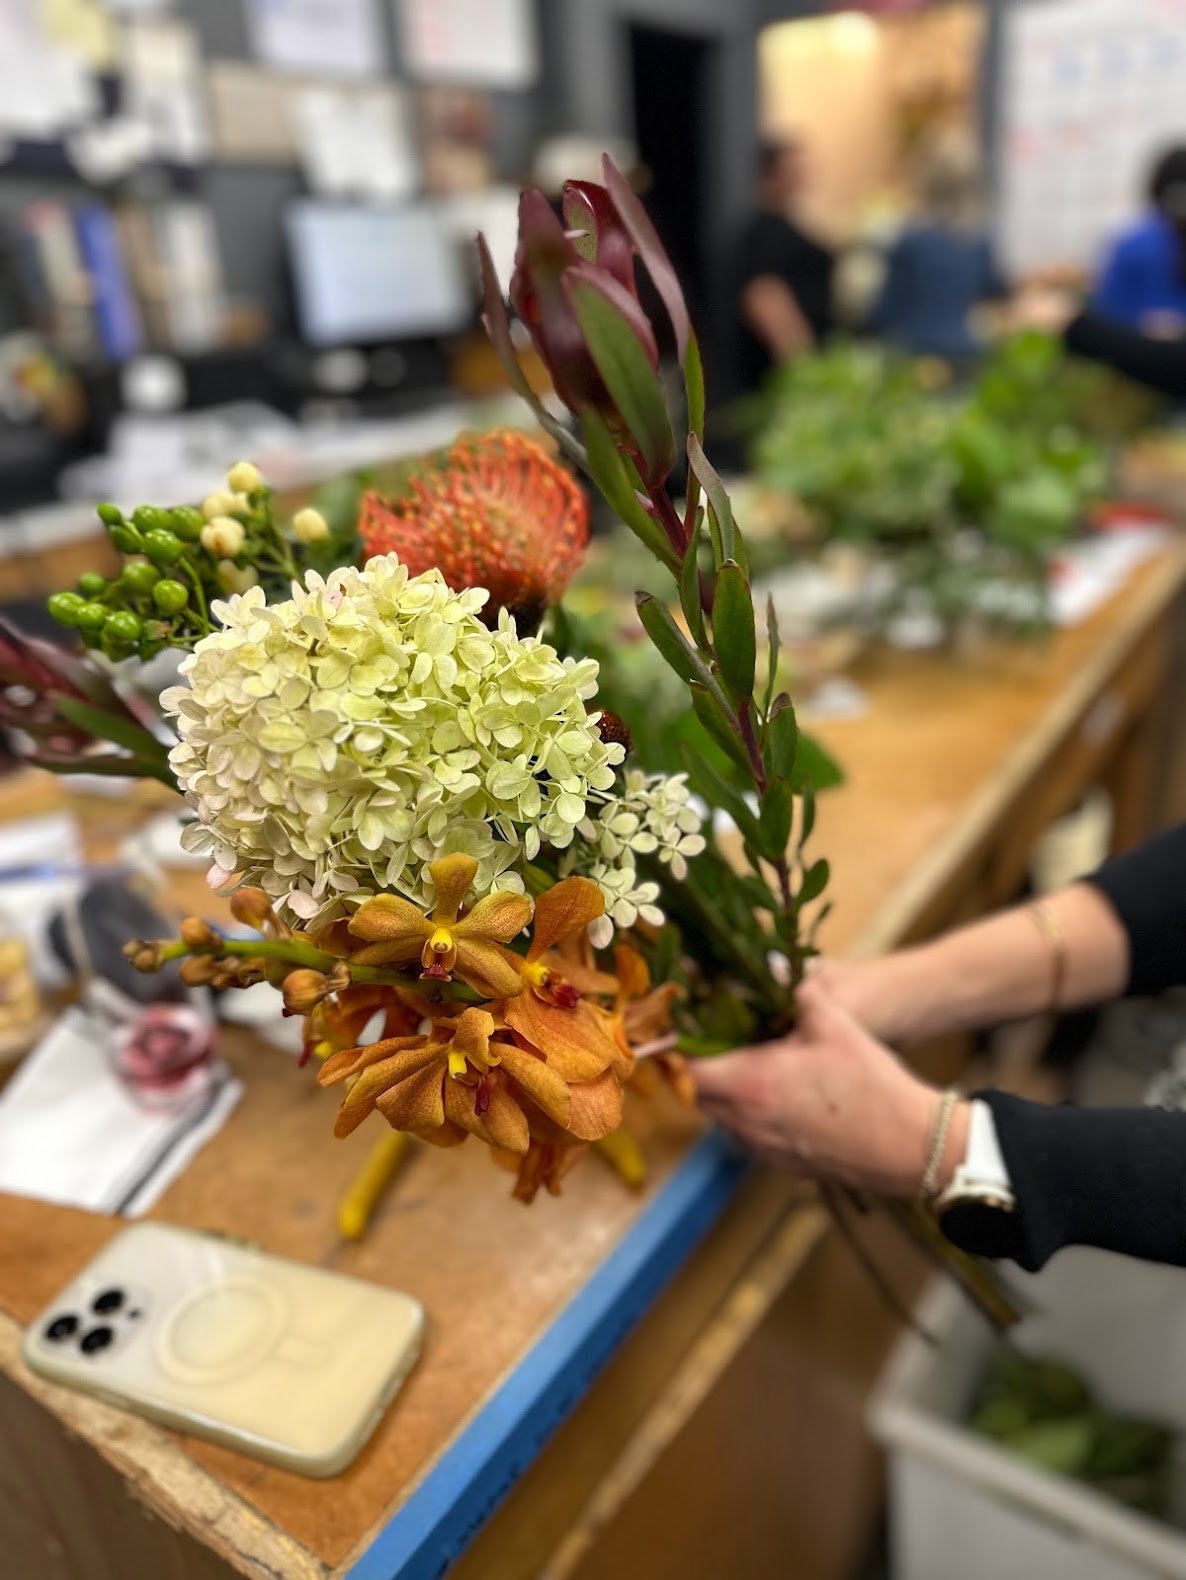
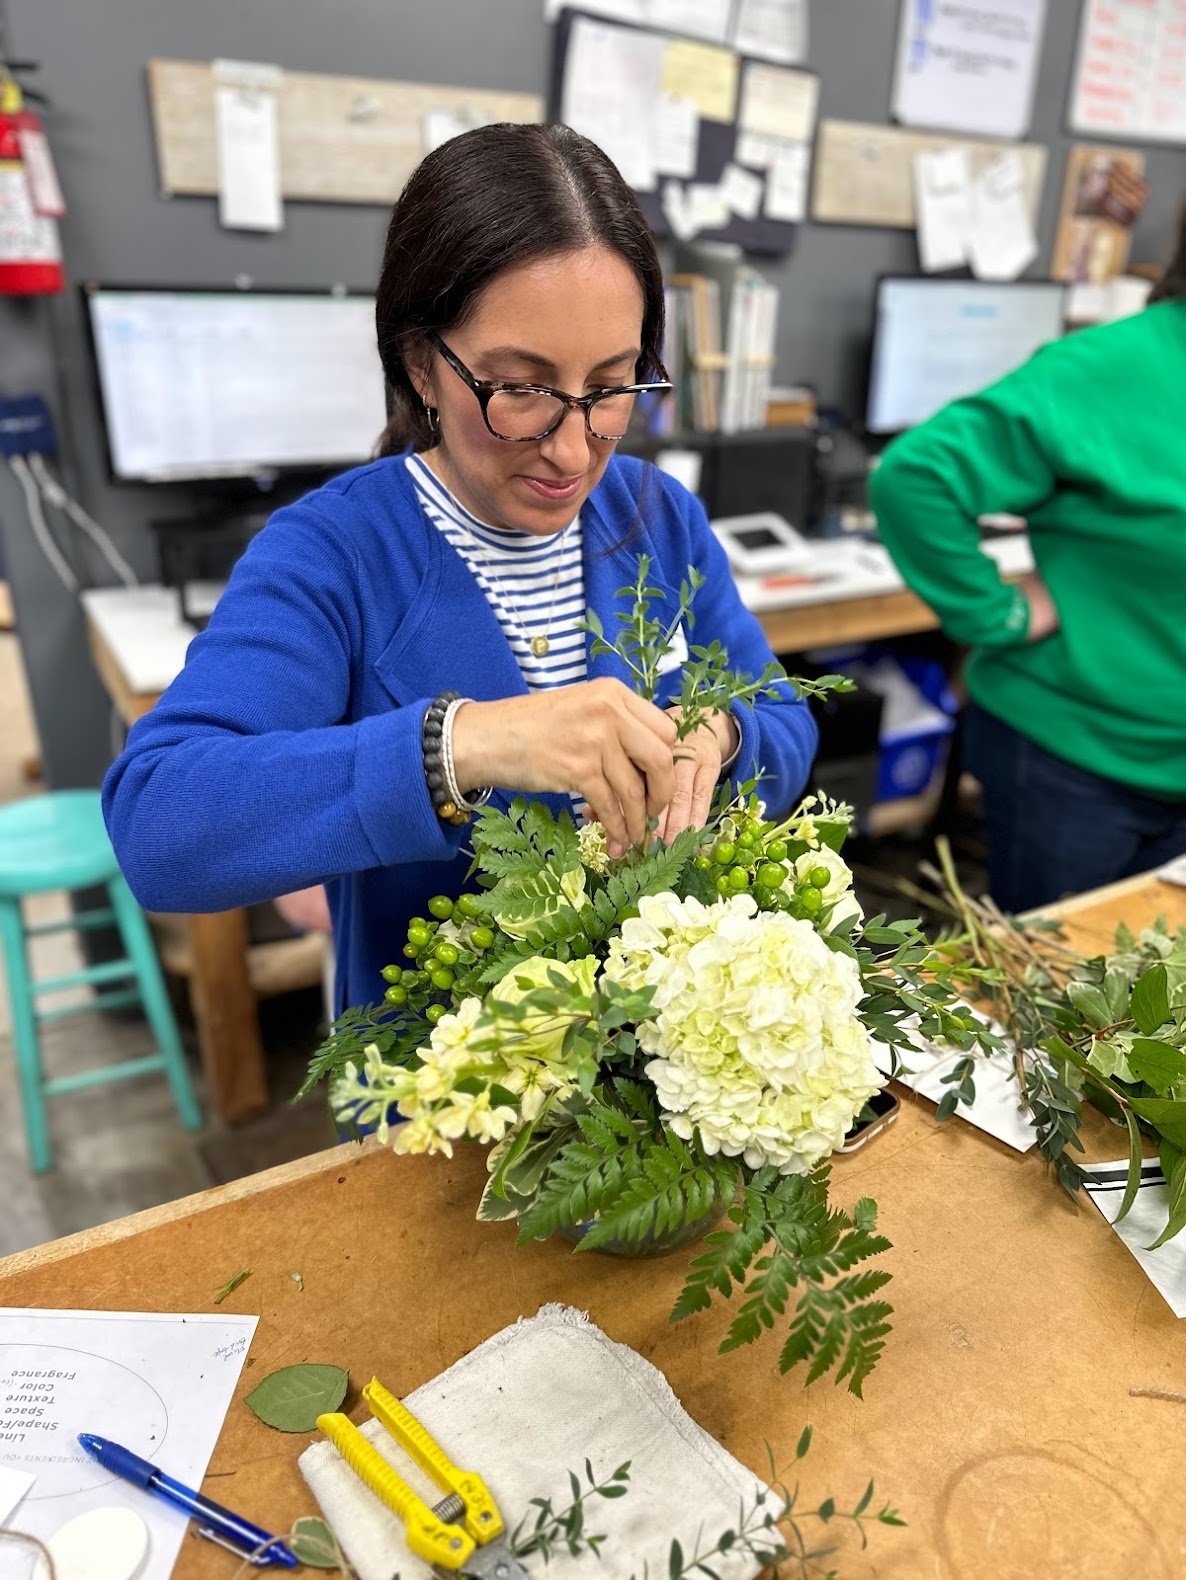
After we used our vase tape to create a grid we chose our greenery that would be the base for our arrangements. We used a mixture of leather fern, pittosporum leaves and salal. We began by mirroring our greenery (ex. if we placed a fern leaf on one side we added another on the opposite side to create balance). We used fern leaves to fill in all four corners and then a few more placed vertically to help us map the height for the arrangement. Jenna recommended that the height of the arrangement be no taller than the width.
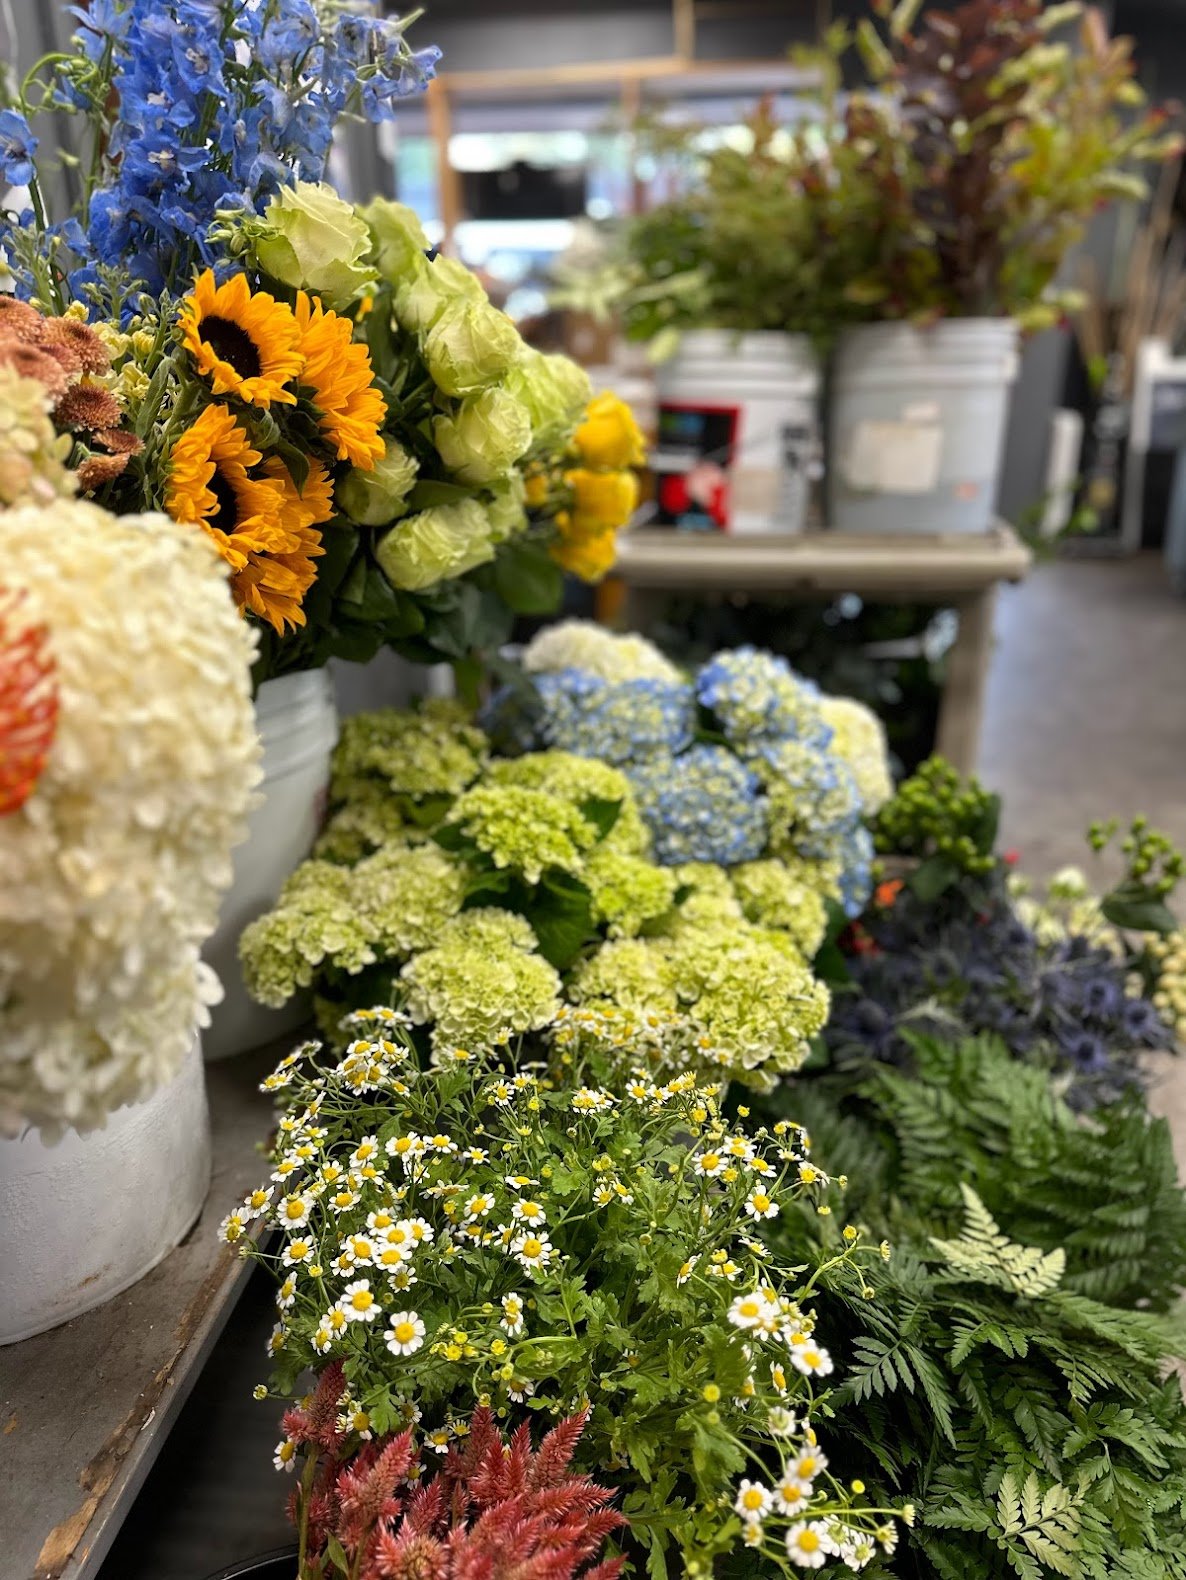
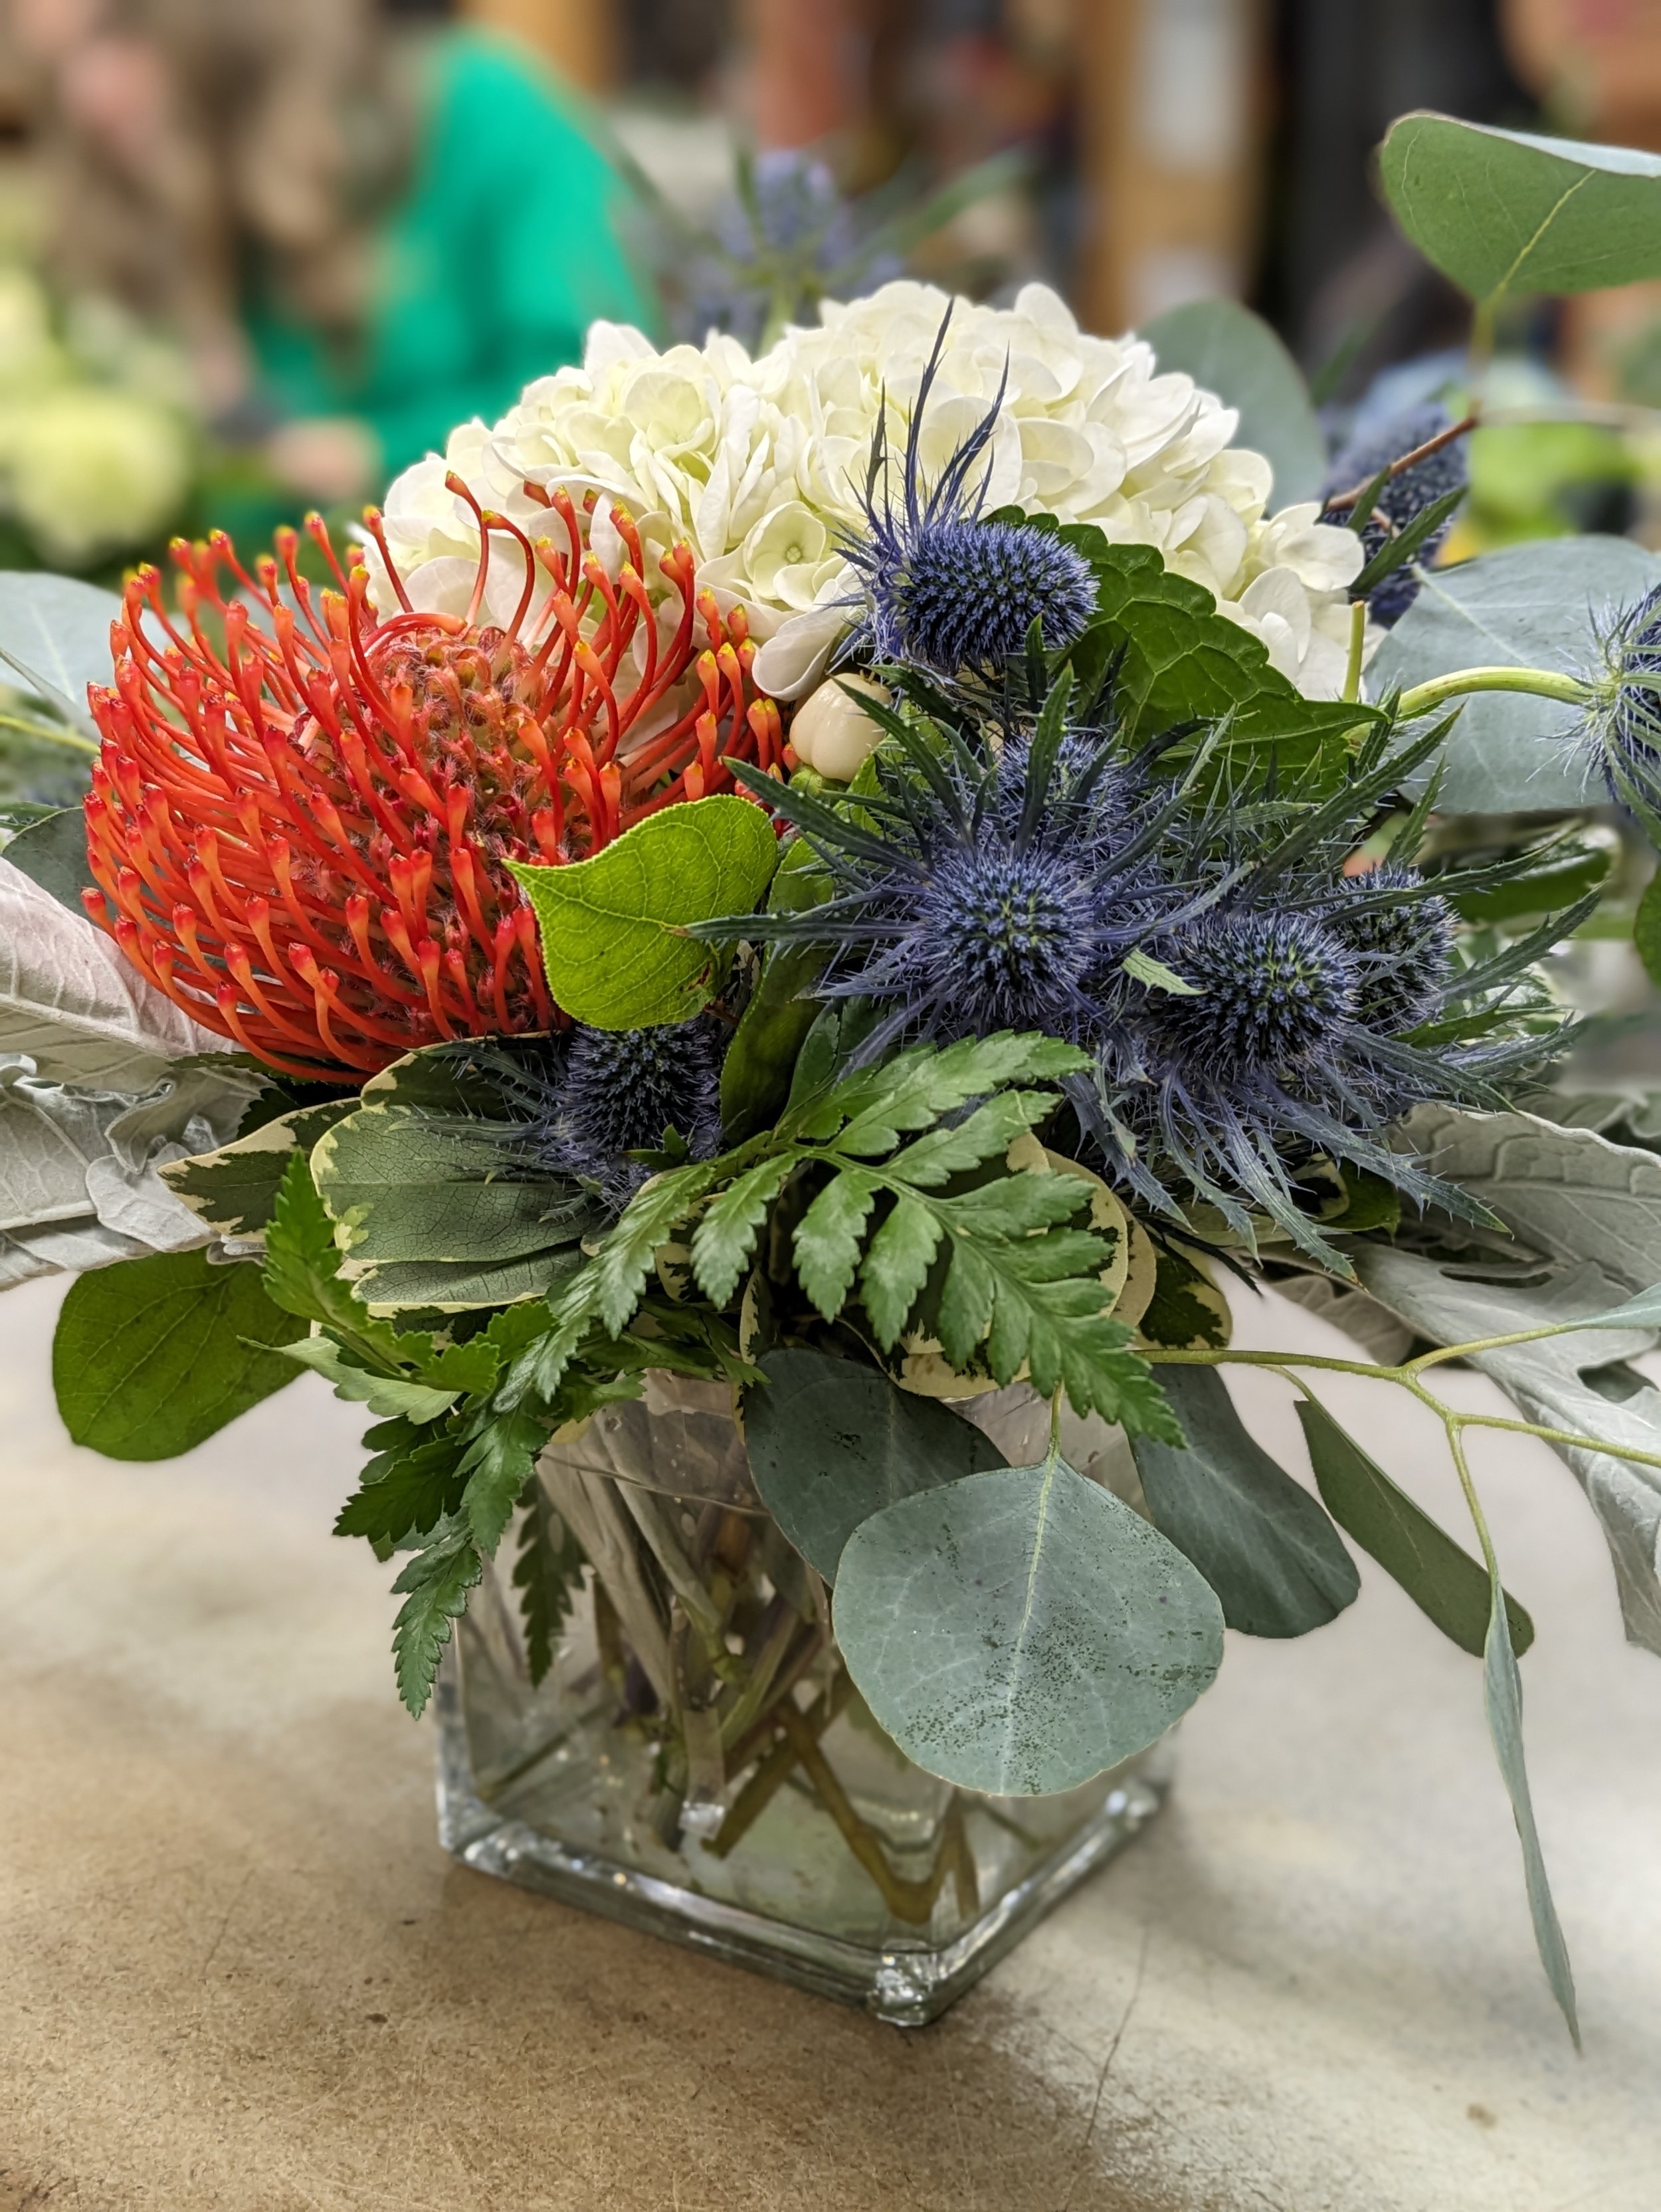
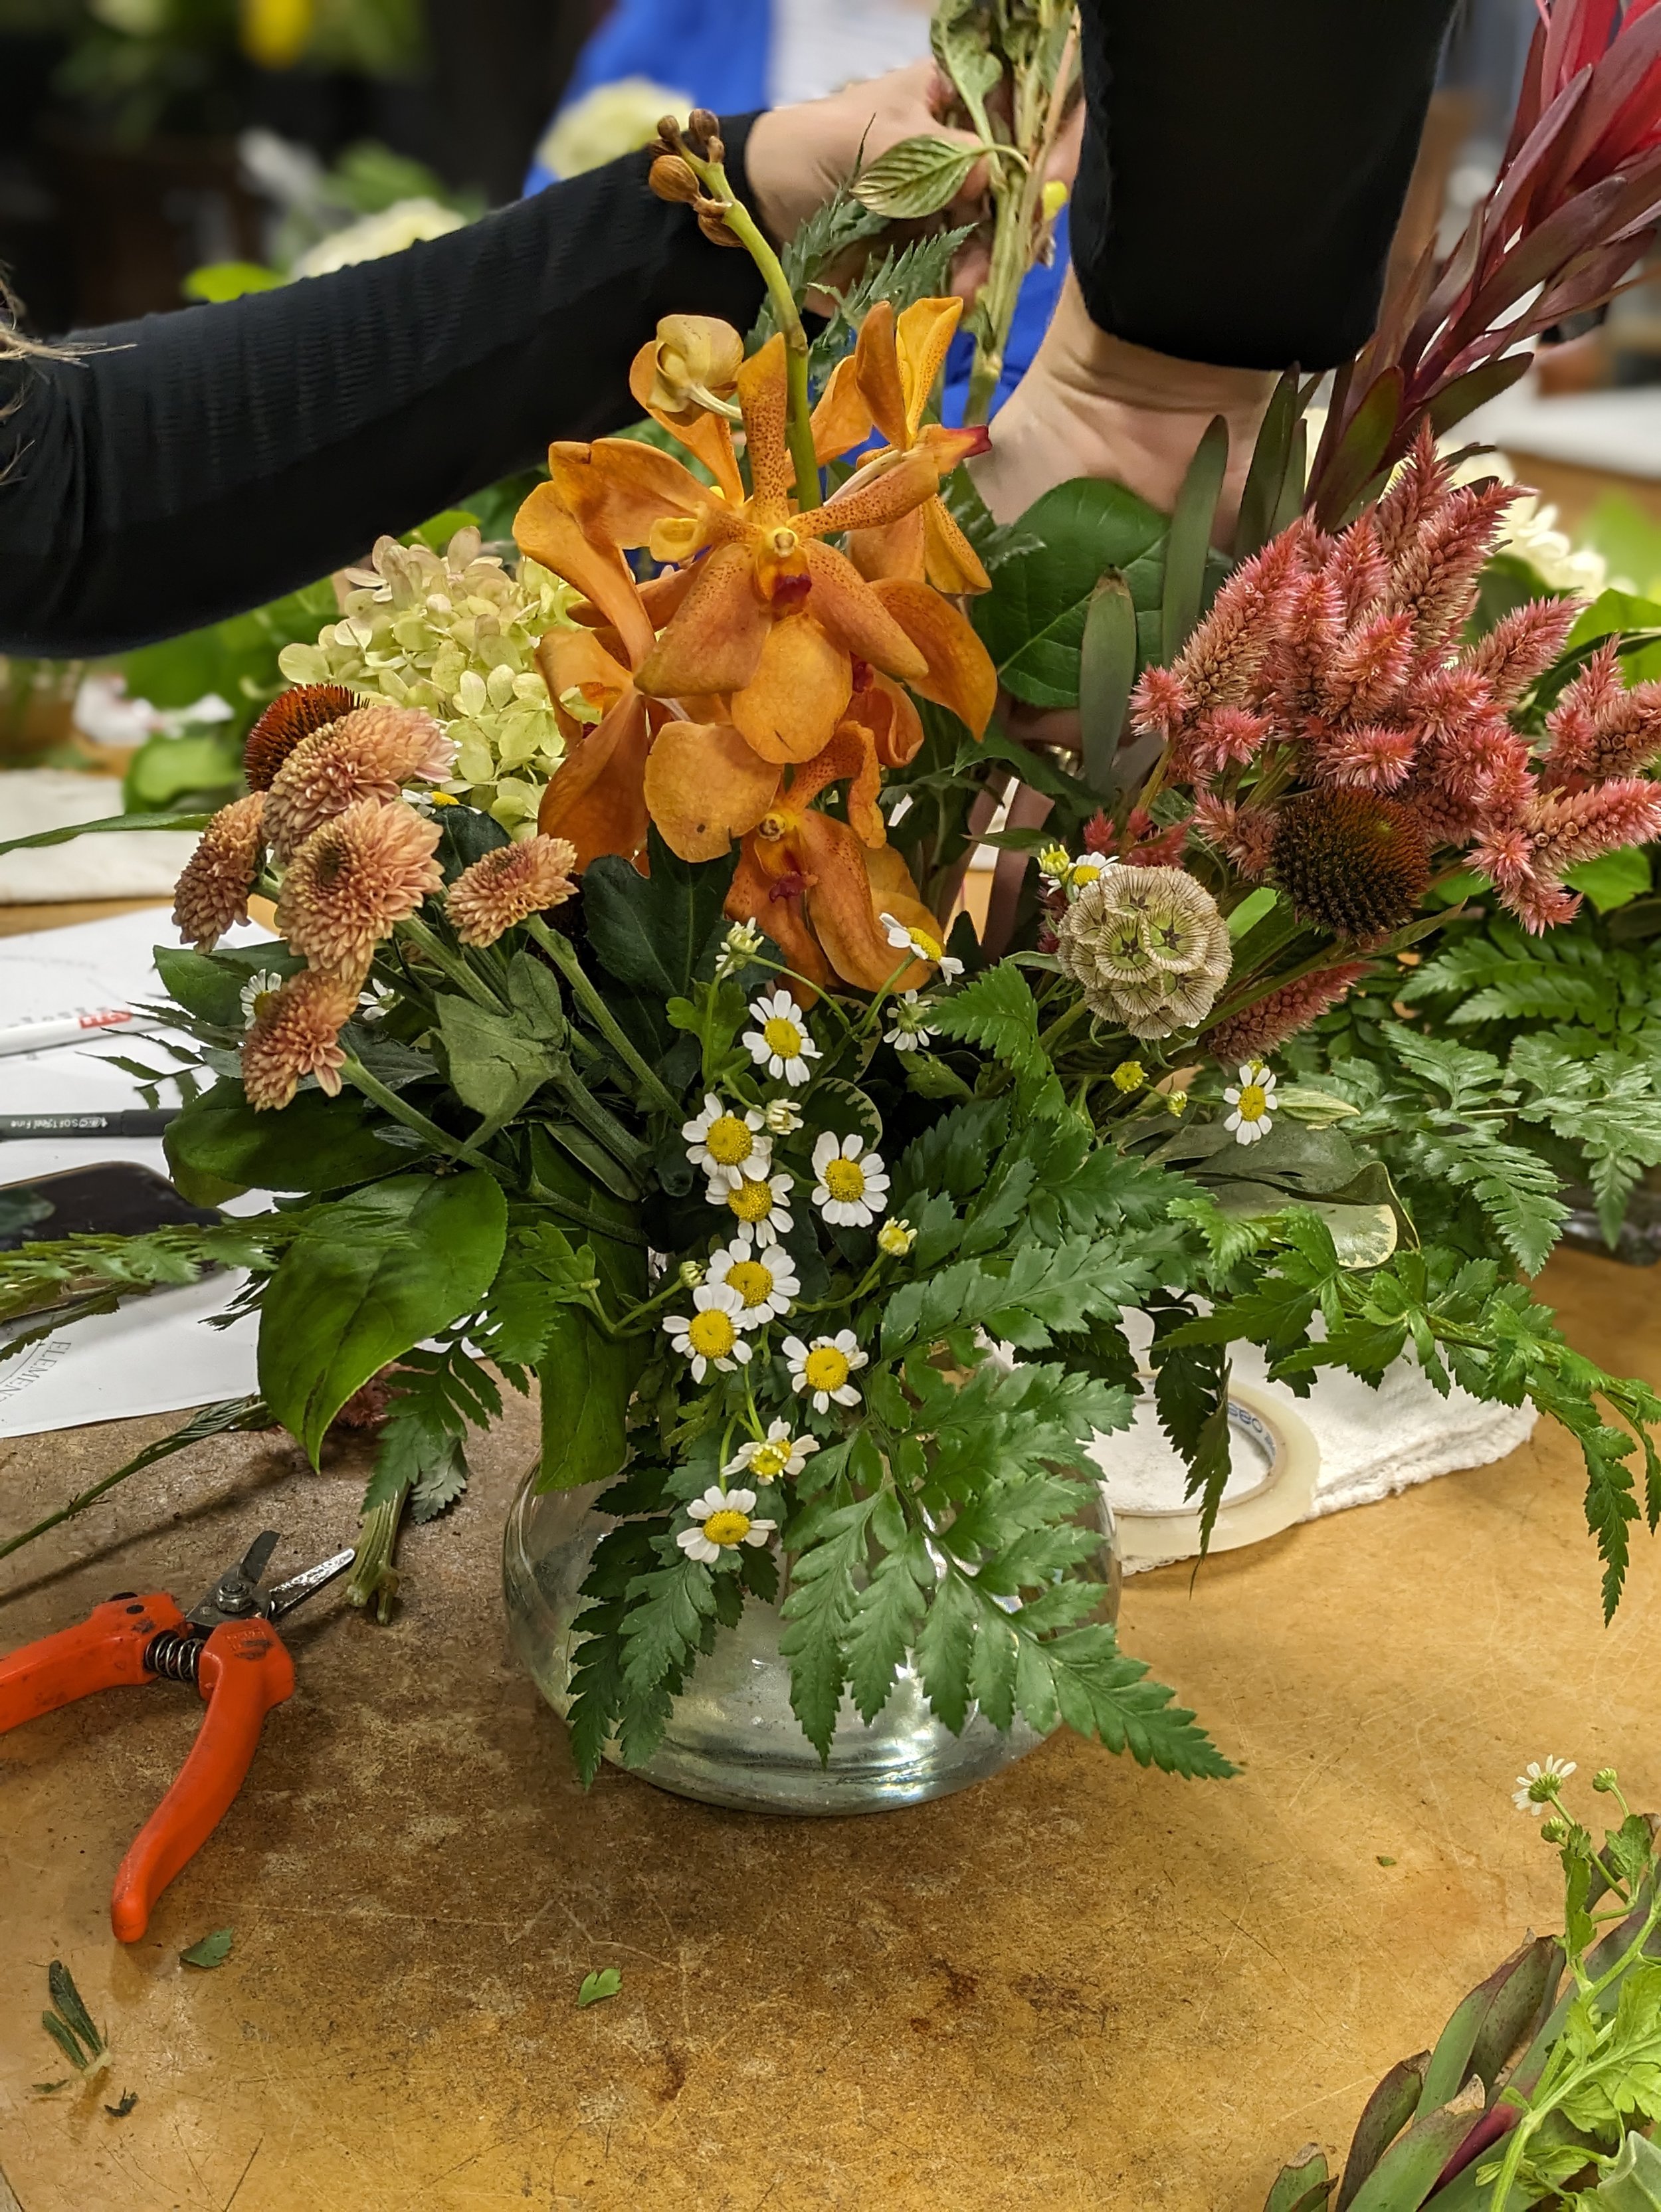
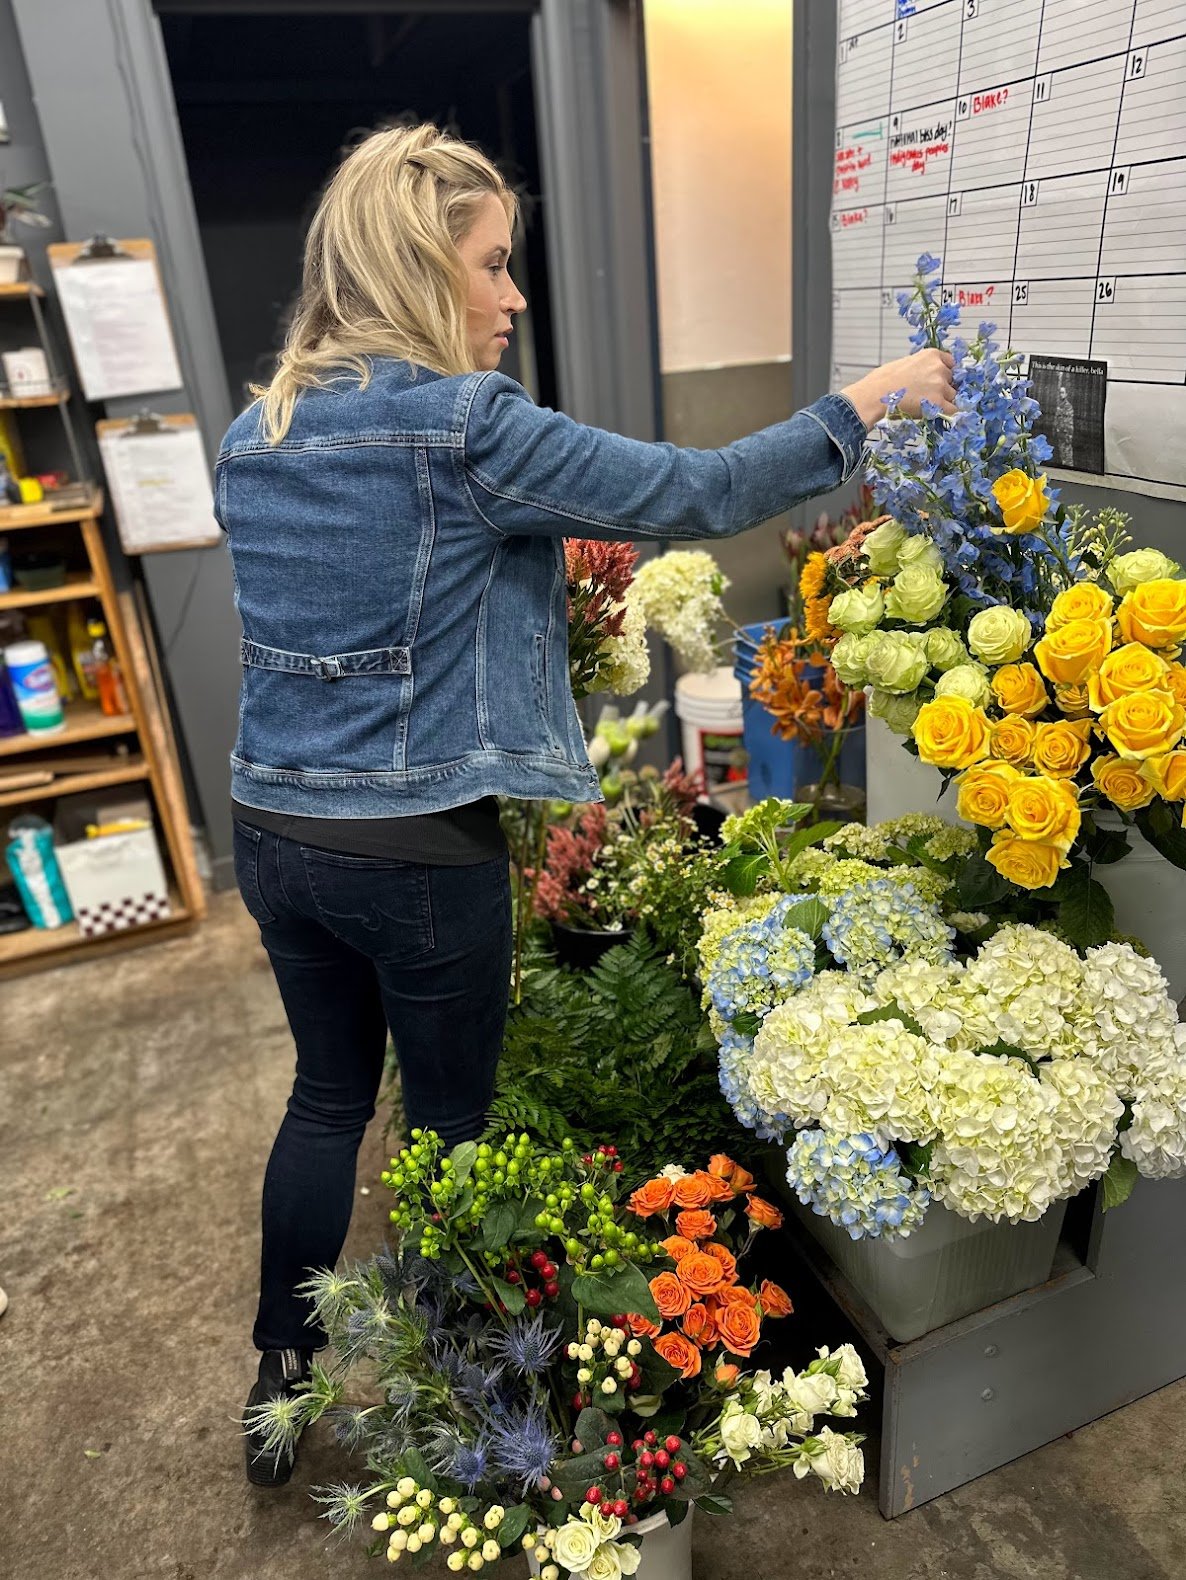
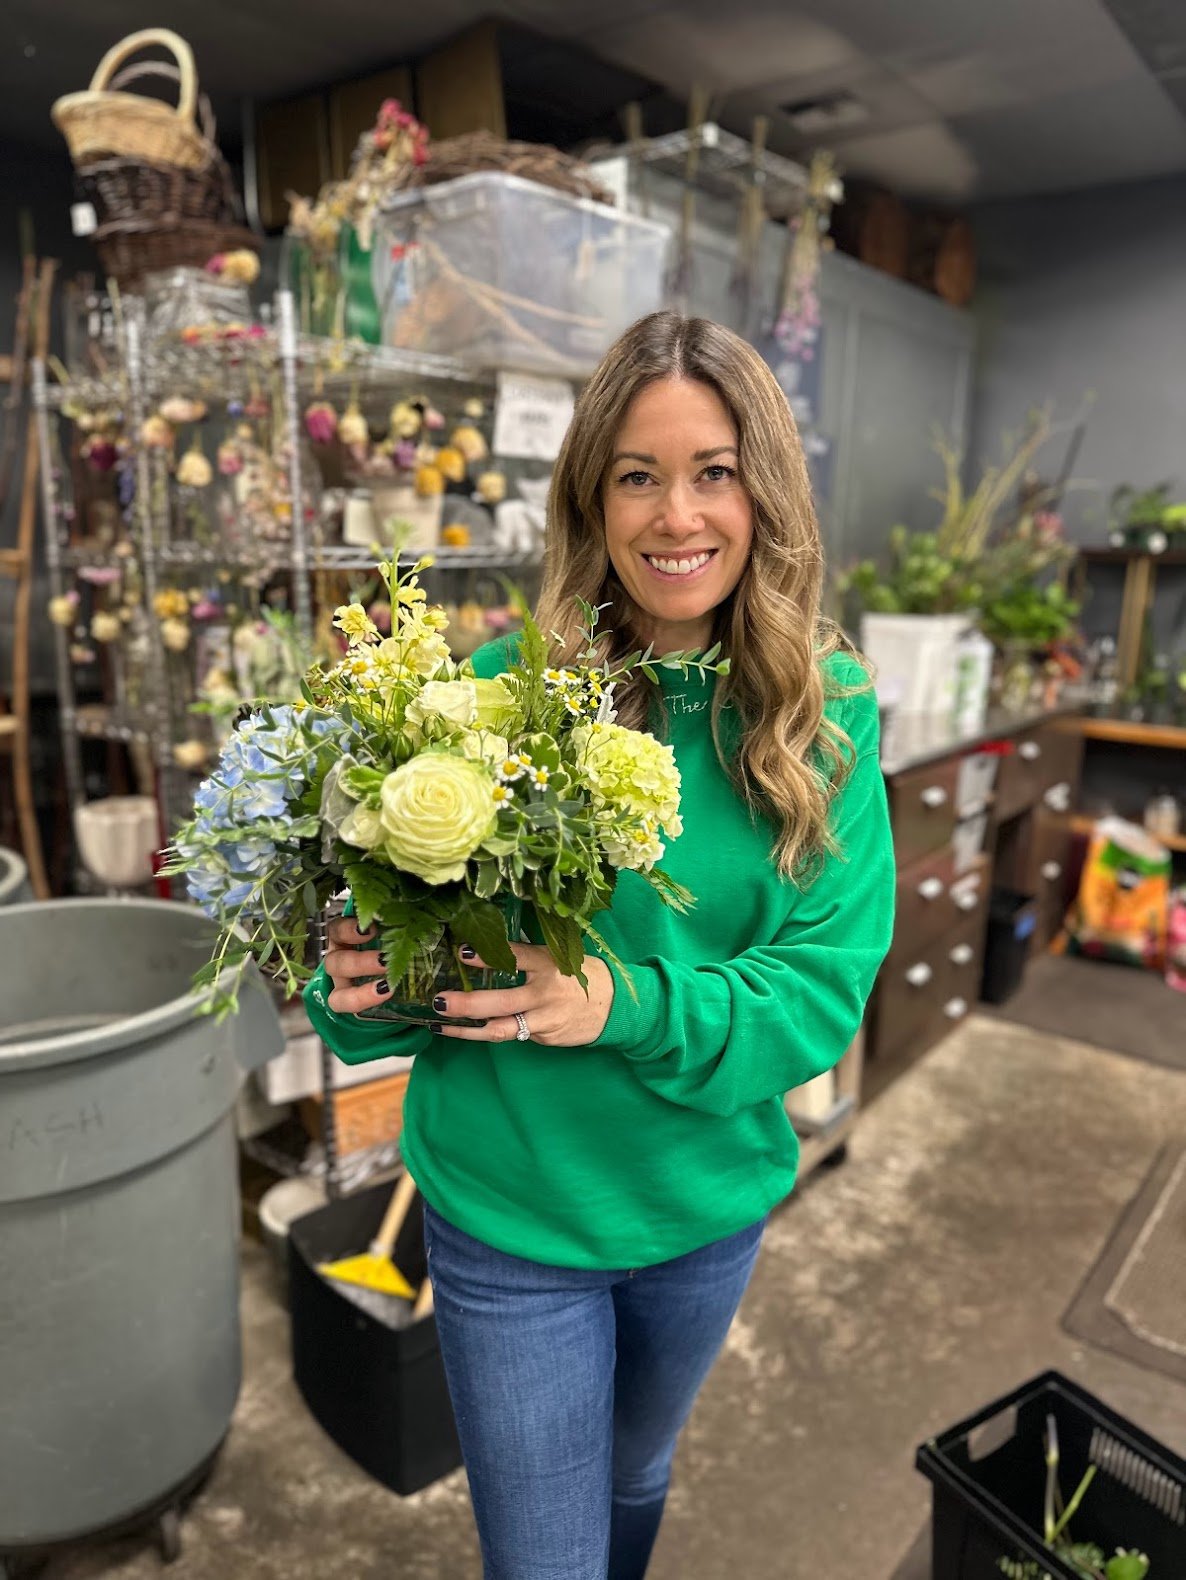
We then began to fill in the blank spaces in our grid with the larger stems of pittosporum and salal. We worked to cover any tape that was visible before we began adding flowers. You want enough greenery in your vase so that it will feel lush and full before adding any floral stems (who knew?). Once we were happy with the greenery base of our arrangement it was time to choose our blooms and stems. There were so many gorgeous options it was difficult to pick! Some guests opted for a refined Fall color scheme while others chose monochromatic color schemes like white, green or blue. Read “Jenna’s Recipe” below if you’d like to know exactly how many blooms it took to create the beautiful arrangements.

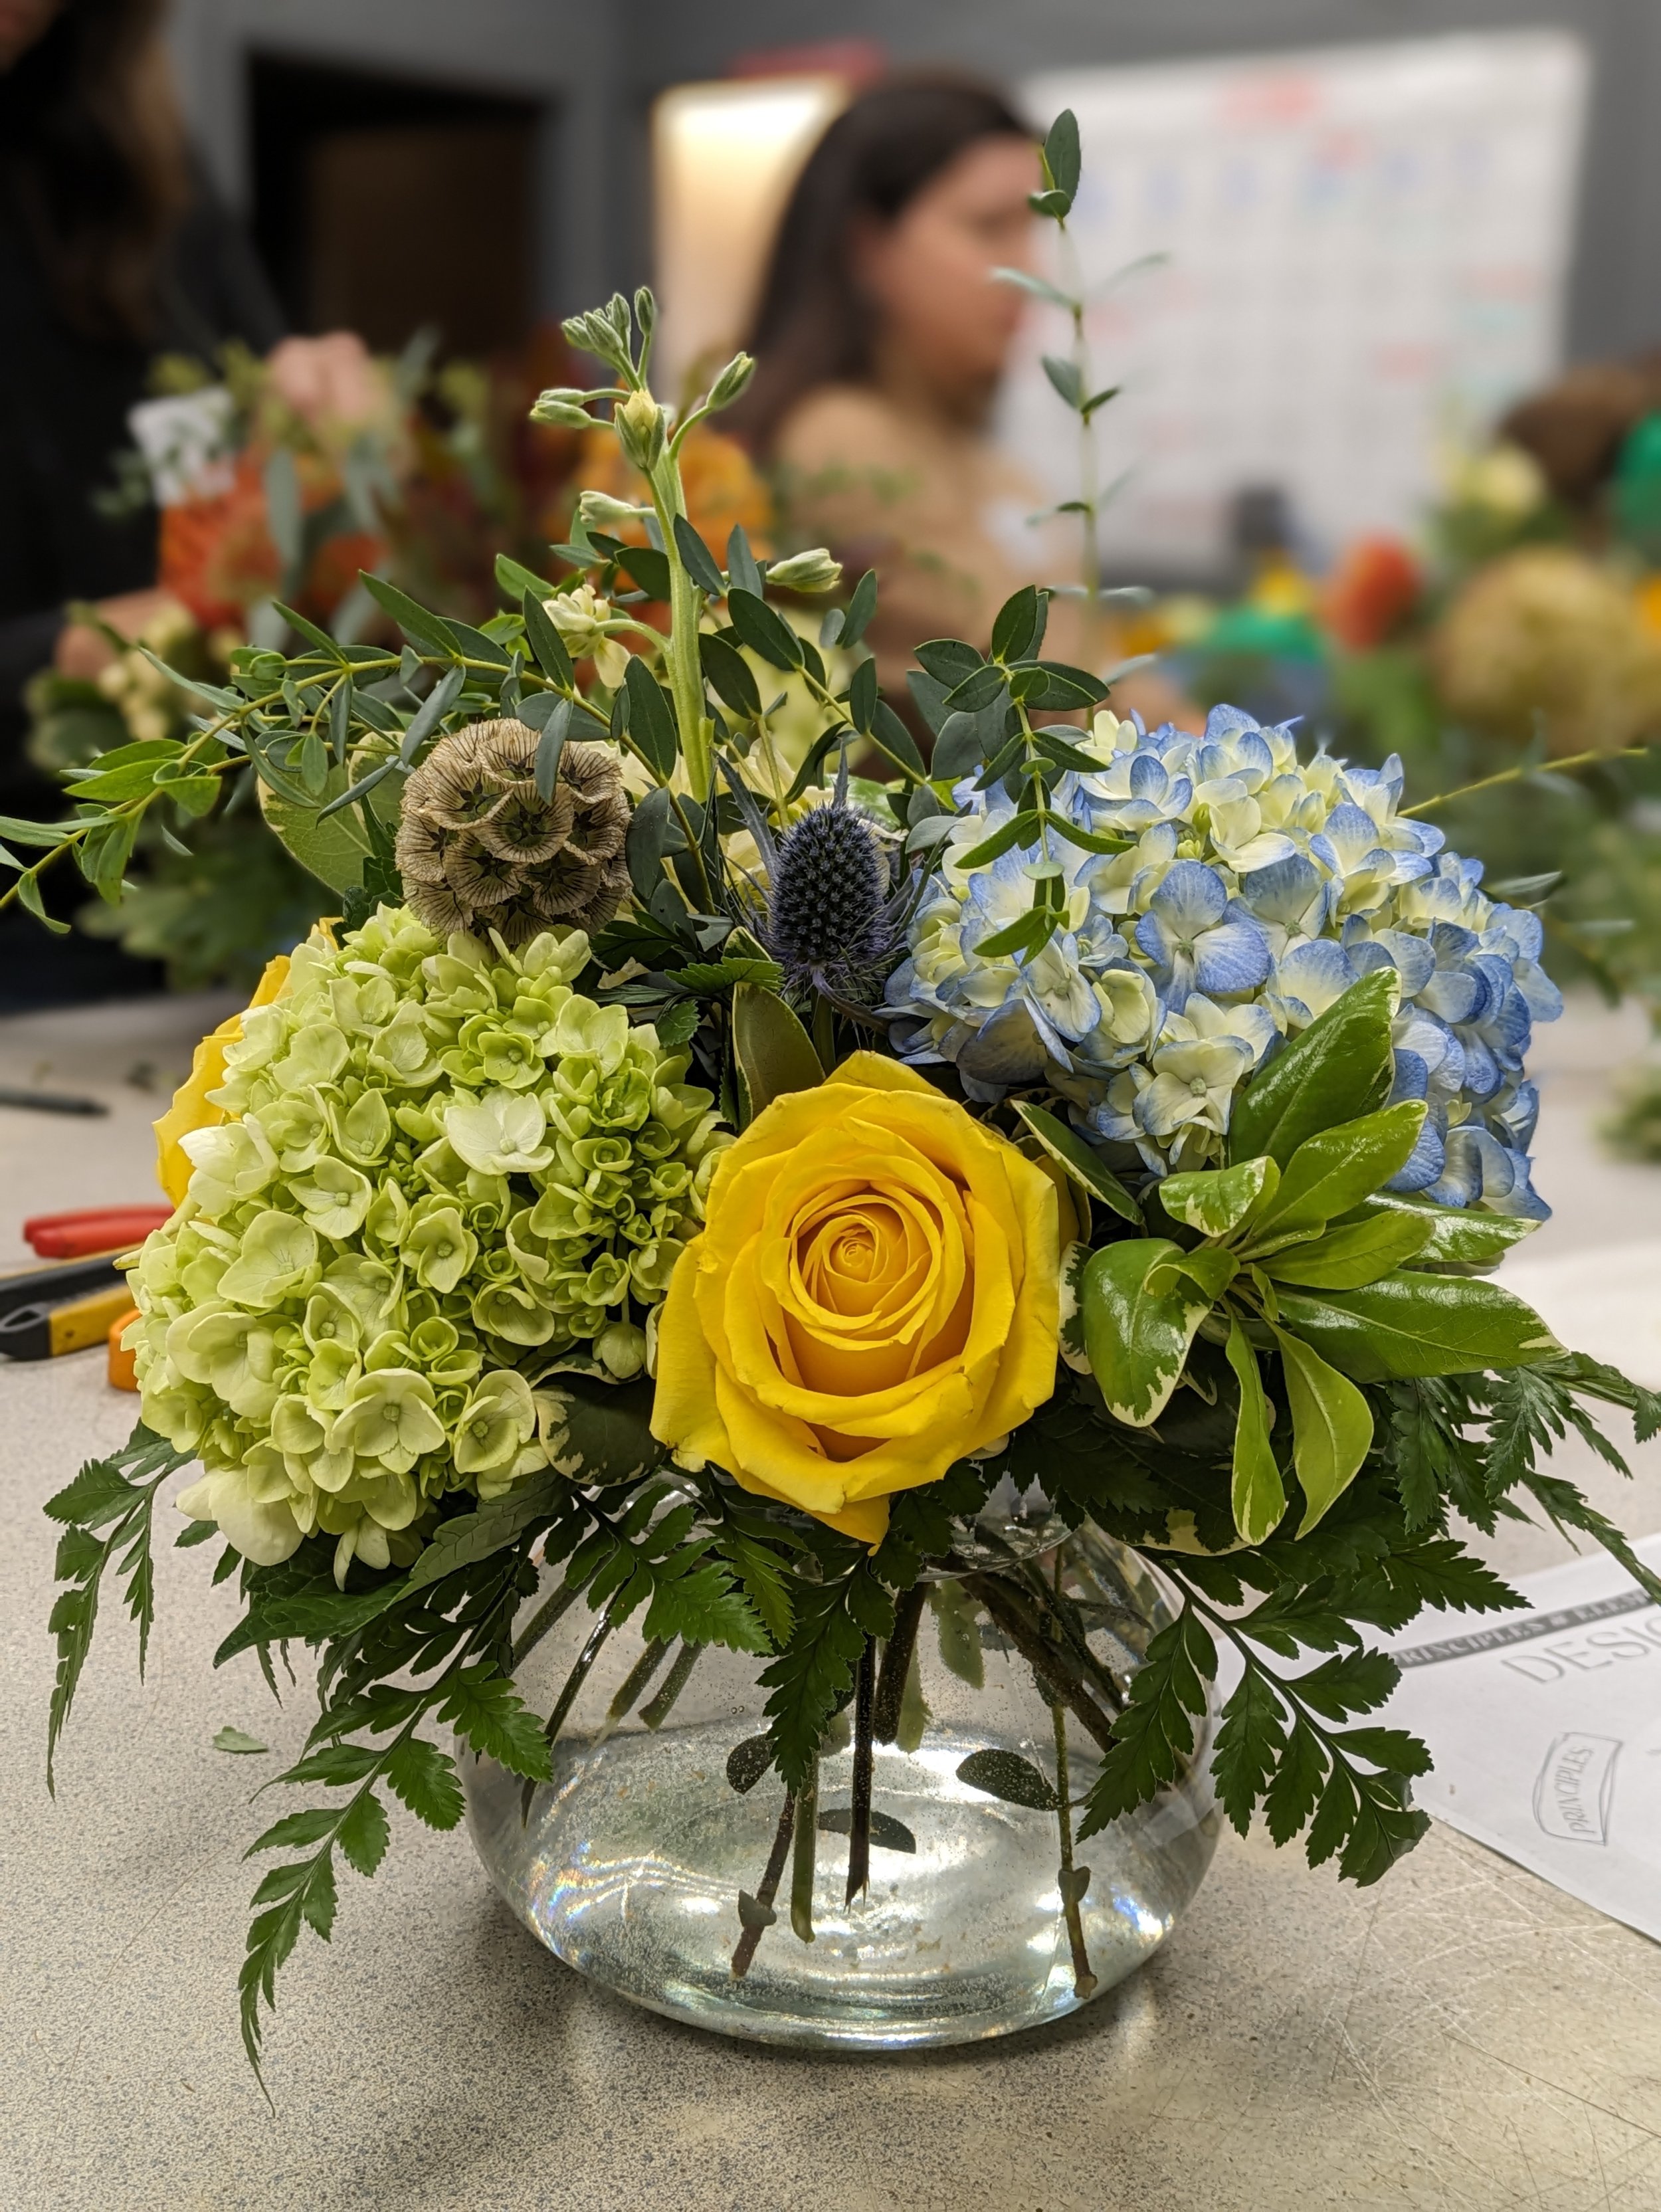
Some guests chose to work with a refined Fall color palette, while other worked in a monochromatic scheme of whites, greens and or blues. We had so many gorgeous flowers to choose from including proteas, hydrangeas, spray roses, sunflowers, sea holly, delphinium and more.
-
Florists use these principles and elements of design to create beautiful and unique floral arrangements. By understanding these principles and elements, anyone can create a stunning floral arrangement.
Think of your principles and elements of design as if you were setting out to bake some cookies. Your principles are the instructions for how to bake the cookies. The elements of design are the ingredients you use to make the cookies.
-
Balance: Balance is the distribution of weight and visual interest throughout an arrangement. A well-balanced arrangement will be pleasing to the eye and will not appear top-heavy or lopsided.
Repetition: How the shape, texture, color and line work together.
Emphasis: Emphasis is used to draw attention to a particular element of an arrangement. This can be done by using a larger flower, a brighter color, or a more unusual shape. Break things up in your arrangement to give your eyes areas of focus.
Contrast: Play with color and line to make your arrangement more interesting.
Proportion: Proportion refers to the size and scale of the different elements of an arrangement. The flowers, foliage, and fillers should be arranged in a way that is visually appealing and balanced.
Rhythm: Rhythm is the repetition of elements in an arrangement. This can be achieved by using the same type of flower or foliage throughout the arrangement, or by using different elements in a repeating pattern.
Harmony/ Unity: Unity is the feeling of wholeness and completeness that an arrangement should have. This is achieved by using similar colors, textures, and shapes throughout the arrangement.
-
Line: Line is the use of straight or curved lines to create movement and interest in an arrangement. There are a variety of lines to keep in mind when creating your arrangement. A vertical line will draw your eyes up the arrangement. These arrangements tend be solid and masculine feeling. Arrangements that lay flat can feel comforting, while an S line feels soft and feminine. A diagonal line in your arrangement will feel interesting and exciting as it’s unexpected.
Shape/ Form: Shape is the two-dimensional or three-dimensional form of an arrangement. Common shapes include round, oval, and cascade. Plan out the idea of your shape before you begin.
Space: Space is the negative space around the different elements of an arrangement. This can be used to create a sense of balance and harmony. Be aware of positive and negative space between flowers. If your arrangement is too cramped you’ll loose focus when you look at it.
Texture: Texture is the feel of the different elements of an arrangement. This can be achieved by using different types of flowers, foliage, and fillers. Smooth leaves and flowers will give your design a modern and sleek feel. Texture can also create an upscale, elegant design, a country, whimsical design or a lush and full look.
Color: Color is the use of different hues, shades, and tints to create a visually appealing arrangement.
Fragrance: Think about the scents of the flowers you are mixing and the location that your arrangement will be living in (ex. don’t overpower a small room by adding overly fragrant flowers such as lilies).

Jenna’s Floral Design Tips and Tricks:
Use COLD water in your vases to keep your flowers fresh for longer. Cold water helps to neutralize and prevent the growth of bacteria. Bacteria and fungus growth are what cause your flowers to rot more quickly.
Check your water level daily to be sure all stems are still submerged. Change water every 4-5 days.
Always fill your vase at least 3/4 of the way full. You want plenty of water so that those shorter stems can reach it.
Give your stems a fresh cut before placing them in your vase. You can continue to trim them when you notice them turning brown at the bottom.
You should actually follow those instructions you see on those flower food packets that come with your flowers from the grocery store. Too much (aka dumping in the whole packet) will burn your flowers! Yikes! A general rule of thumb is one scoop of flower food for one gallon of water.
Leave the leaves on your flower stems until you’re ready to create your arrangement. Removing leaves releases ethylene gas which shortens the life span of your flowers. Yep- that’s the same gas that comes off of fresh fruit like bananas and apples. Keep your flower arrangements away from your fruit too!
Pull off any dead flowers or leaves from your arrangement as they die over time to prevent other nearby flowers from wilting sooner.
When working with vase tape fold your end to the side so that you don’t lose your starting point.

We also used some beautiful less common greens and fillers that included dusty miller, smoke tree, eucalyptus, baby blue eucalyptus, bay leaves, maple leaves and more. These fillers add fun textural and color element to our arrangements.
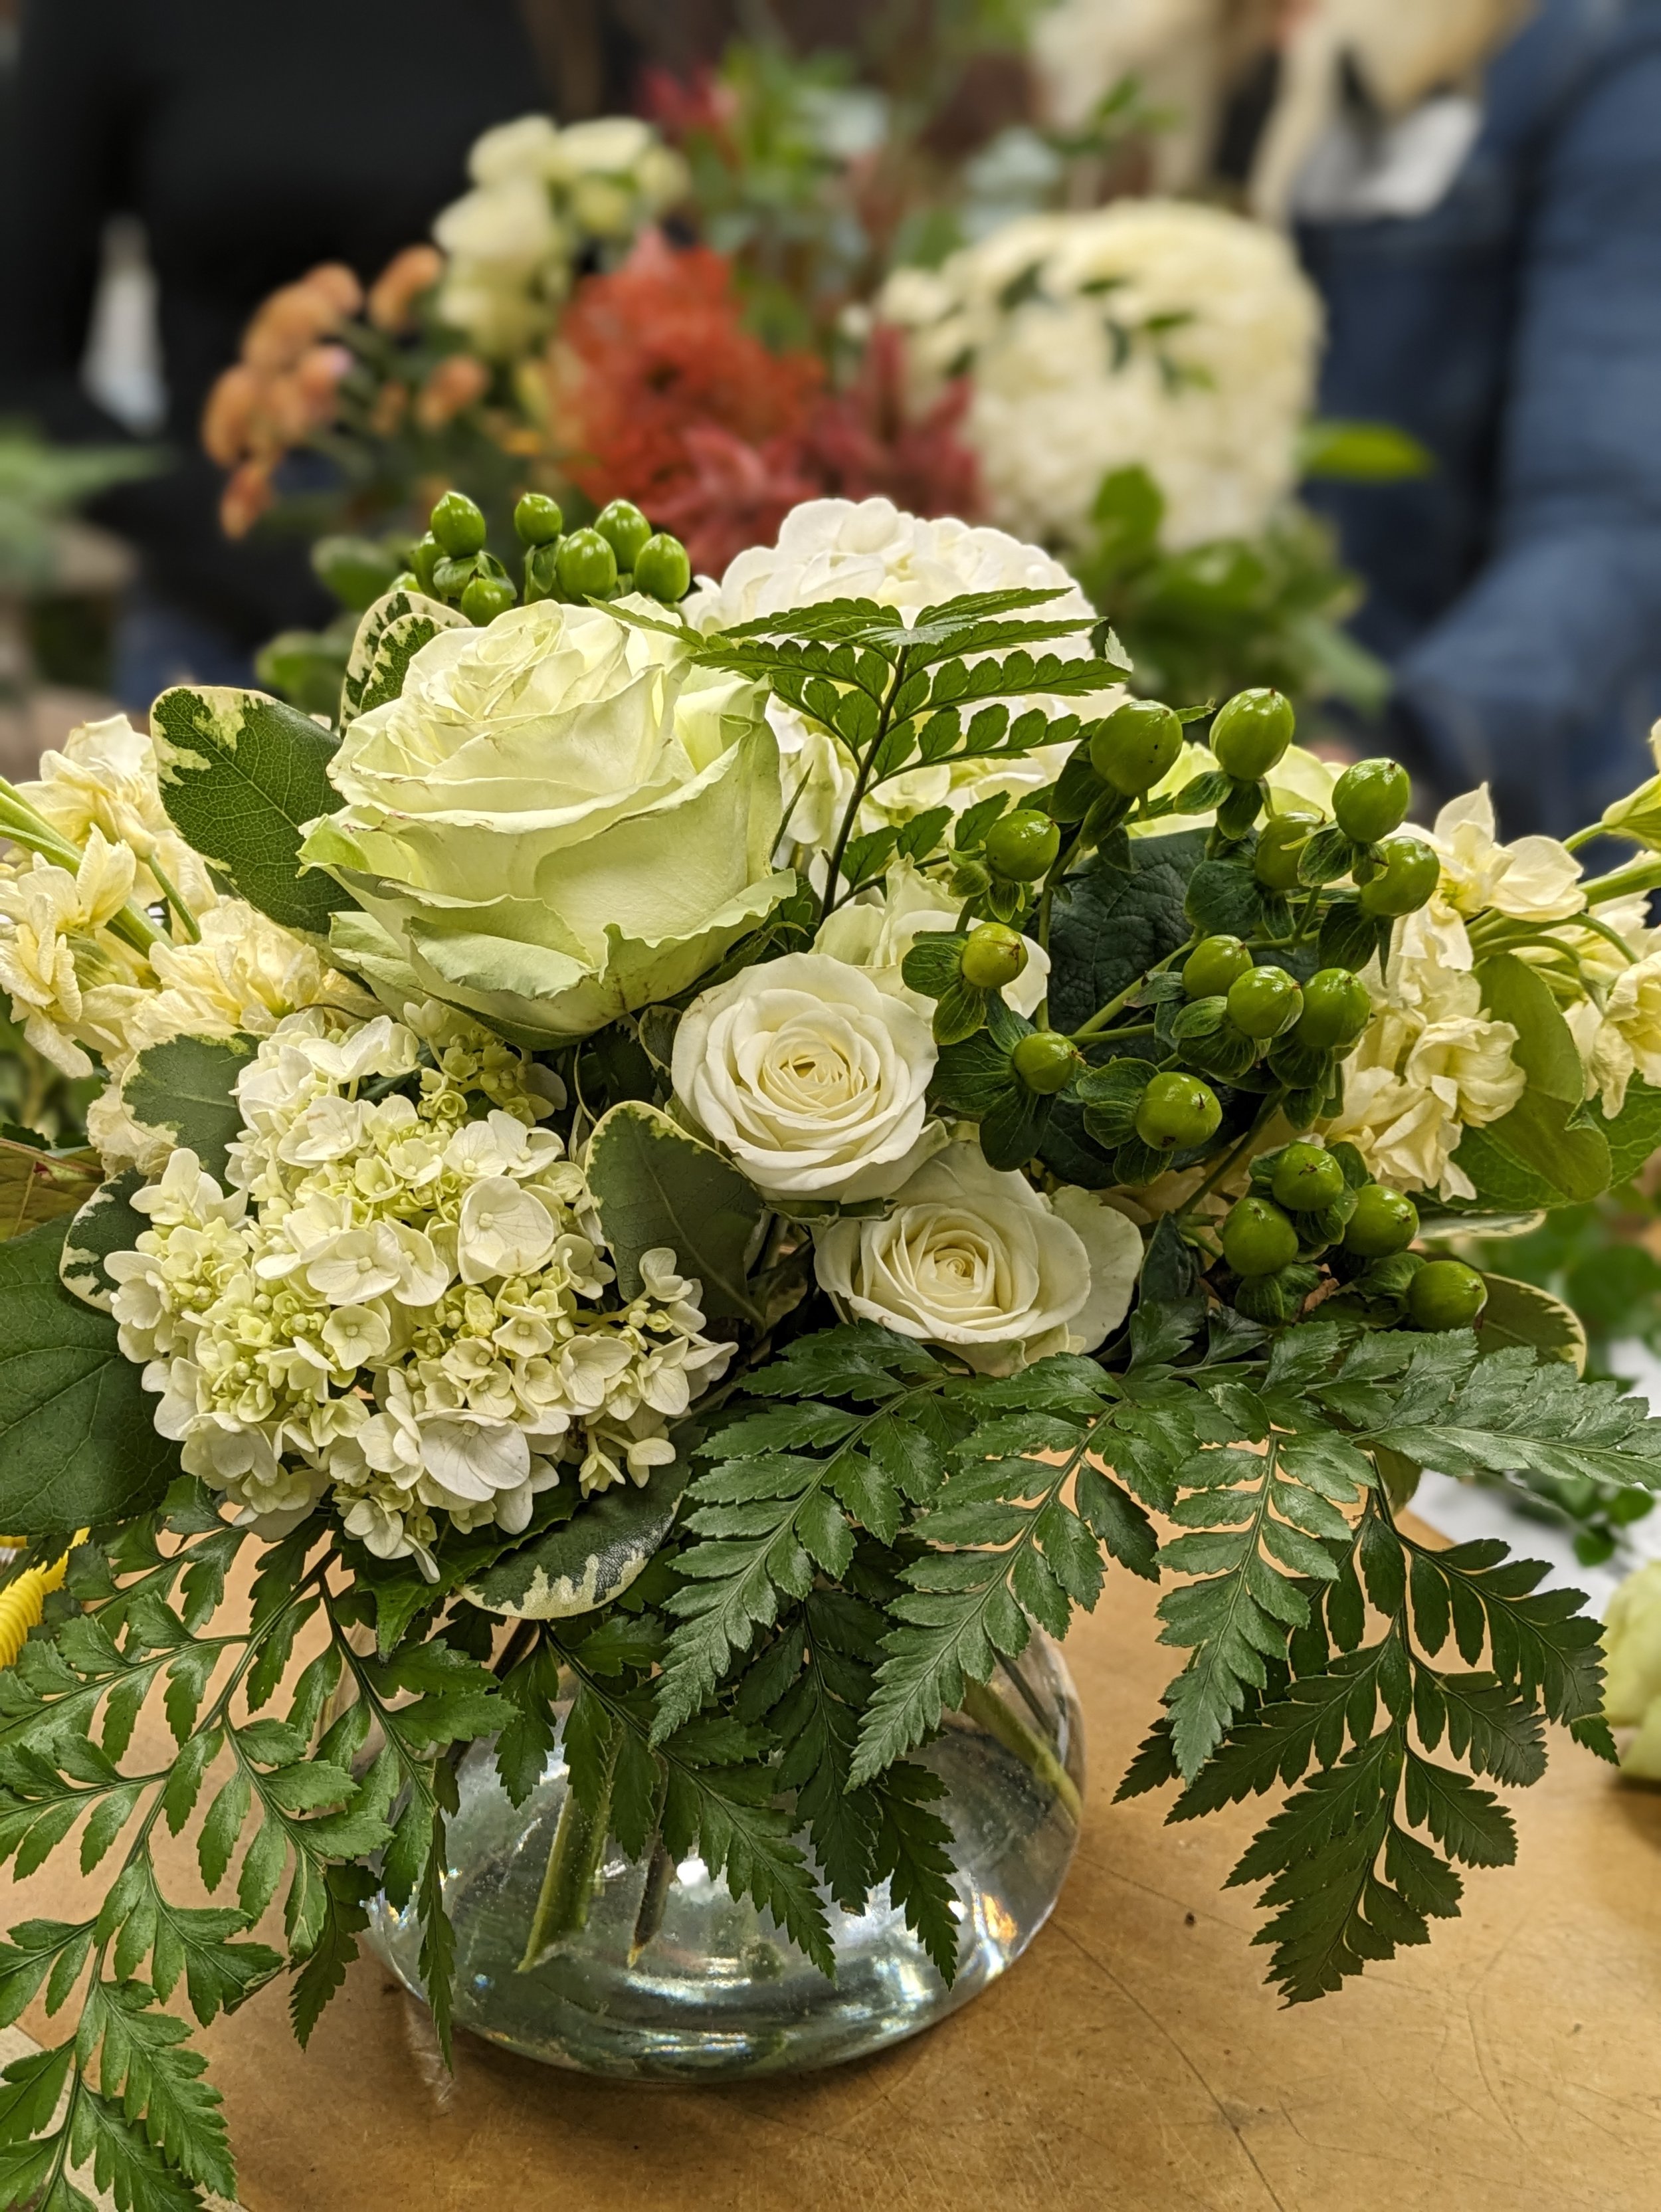
We followed the same principles of design when adding our flowers. We used the mirroring technique to create balance within the arrangement. If we placed a rose on one side of the arrangement we placed another on the opposite side. Jenna recommended keeping large blooms like hydrangeas low and to the middle/ side of your arrangement. Use odd numbers of flowers to mimic nature and use no more than seven blooms of the same type (your eyes can’t see individual numbers beyond that). When trimming your flowers to fit in the vase cut a little at a time. You can always cut more stem off, but your stems need to be long enough to reach the water.
Floral arranging is also dependent on your own personal style and aesthetic. If you want a lush and full feeling arrangement you might keep more leaves on your blooms to minimize negative space. If you want a more modern and sleek feeling arrangement you might remove those leaves to create a little more negative space to catch your eye. We loved seeing how unique each floral arrangement turned out.


Jenna’s Recipe for creating a show stopping centerpiece at home:
Ingredients: 4x4 square or oval glass vase
Greenery: 7 stems of leather fern, 2 stems of Pitosporum and 3 stems of salal. We used approximately 11 stems of greenery to form the base of our arrangement (so much more than anyone expected!).
Florals and Fillers: 1 large hydrangea, 1 smaller hydrangea, 3 roses, one stem of spray roses, 4 filler flowers (these could include florals like alpine sea holly, feverfew, gilli-flower, or starflower pincushions)
We finished off the arrangement with a few stems of dusty miller, and baby blue eucalyptus for some added height and texture.
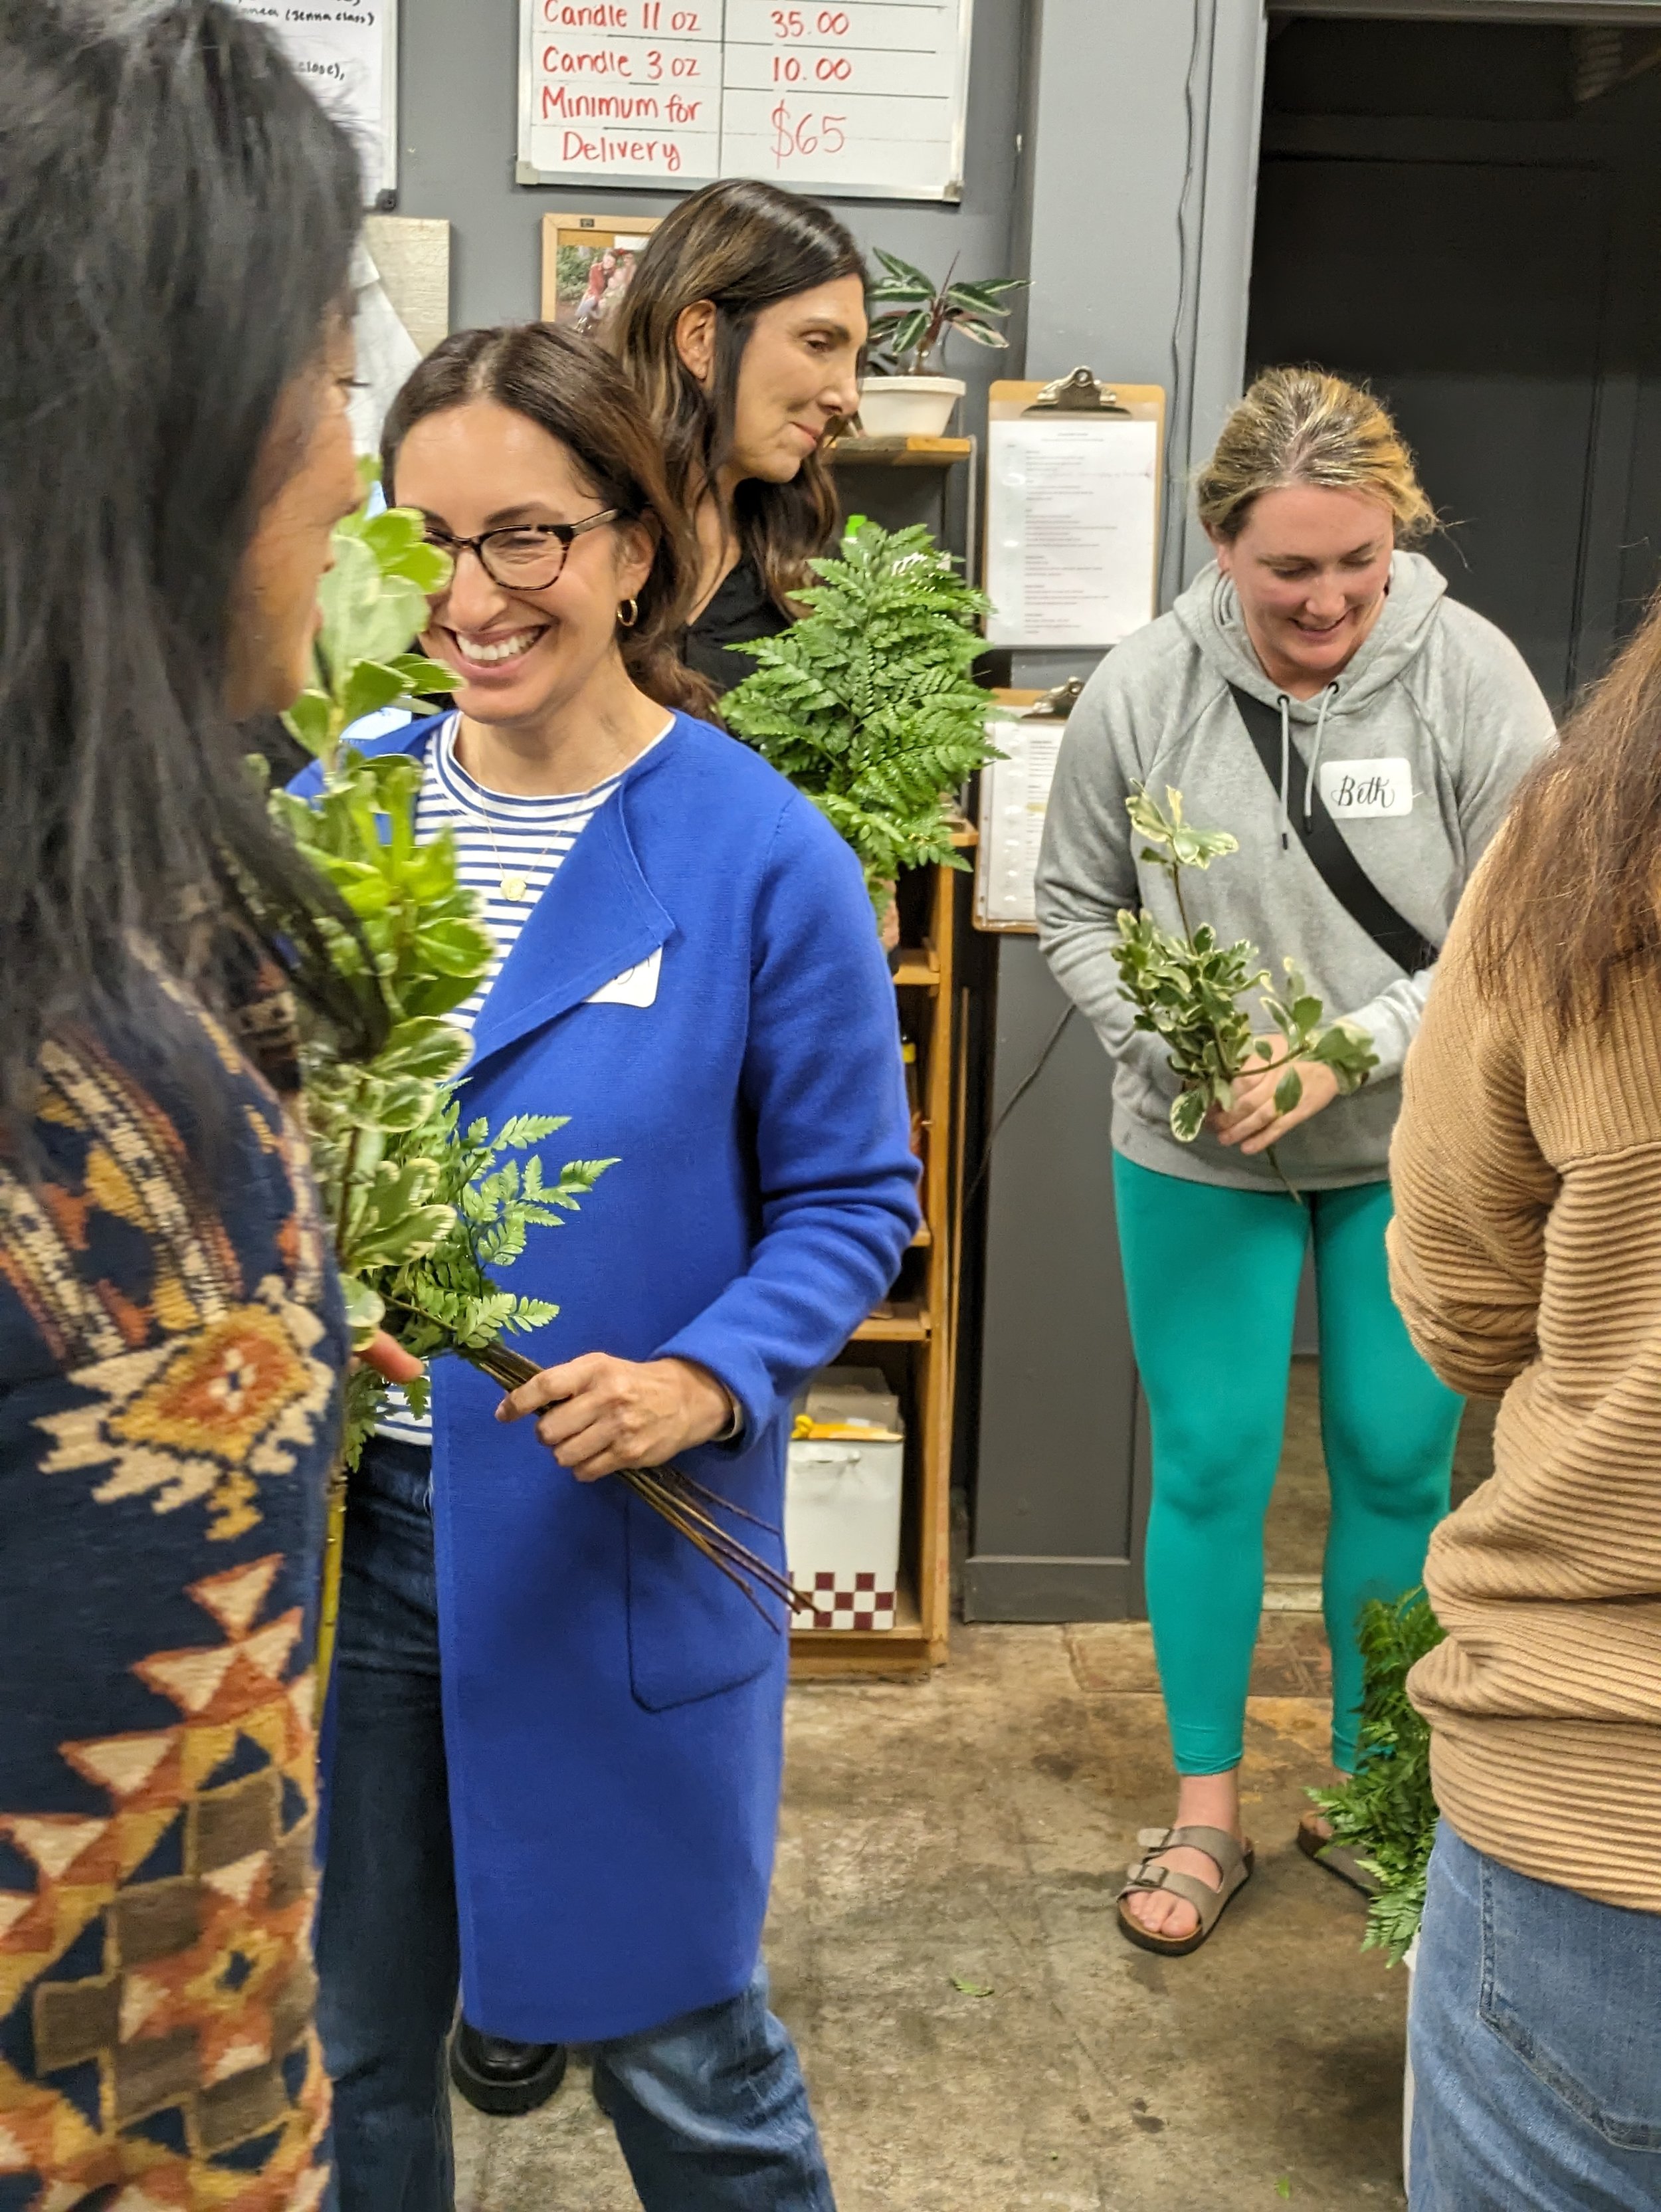
Each workshop attendee went home with their own custom arrangement in a 5” square glass vase, floral vase tape for creating arrangements at home, and an outline covering the principles and elements of design. If you missed this class keep an eye on our upcoming events for our next partnership with Mercer Island Florist!
Our top picks that will get you styling florals like a pro.
Now for the fun stuff! We’ve got you covered with some of our favorite products. Now go buy that bouquet from QFC and style it like a pro at home!

Floral Vase Tape: Want to take your at-home floral arranging to the next level? You need to get yourself some clear, waterproof vase tape. This tape allows you to make a grid on your vase so that stems stay in place no matter what their size. Vase Tape
Flower Snips: Let these snips do the work for you with their carbon steel blade and soft ergonomic handle. The single-hand lock makes closing them up after use a breeze. Flower Snips

Floret Farm’s Cut Flower Garden Puzzle: Flower arranging not your thing? How about puzzling instead! We love slowing down with a great puzzle on a rainy day and couldn’t be more excited about this double-sided puzzle from local Floret Farm. Floret Farm's Puzzle
Square Glass Vase: These square vases are similar to what we used in the workshop and match any aesthetic. They’d make the perfect vessel for the your next floral arrangement. Pick up a few to have on hand as hostess gifts. Square Glass Vase
Until we gather again!
**As Amazon Associates we earn from qualifying purchases.