Embroidery Basics: Floral embroidery for the needle novice

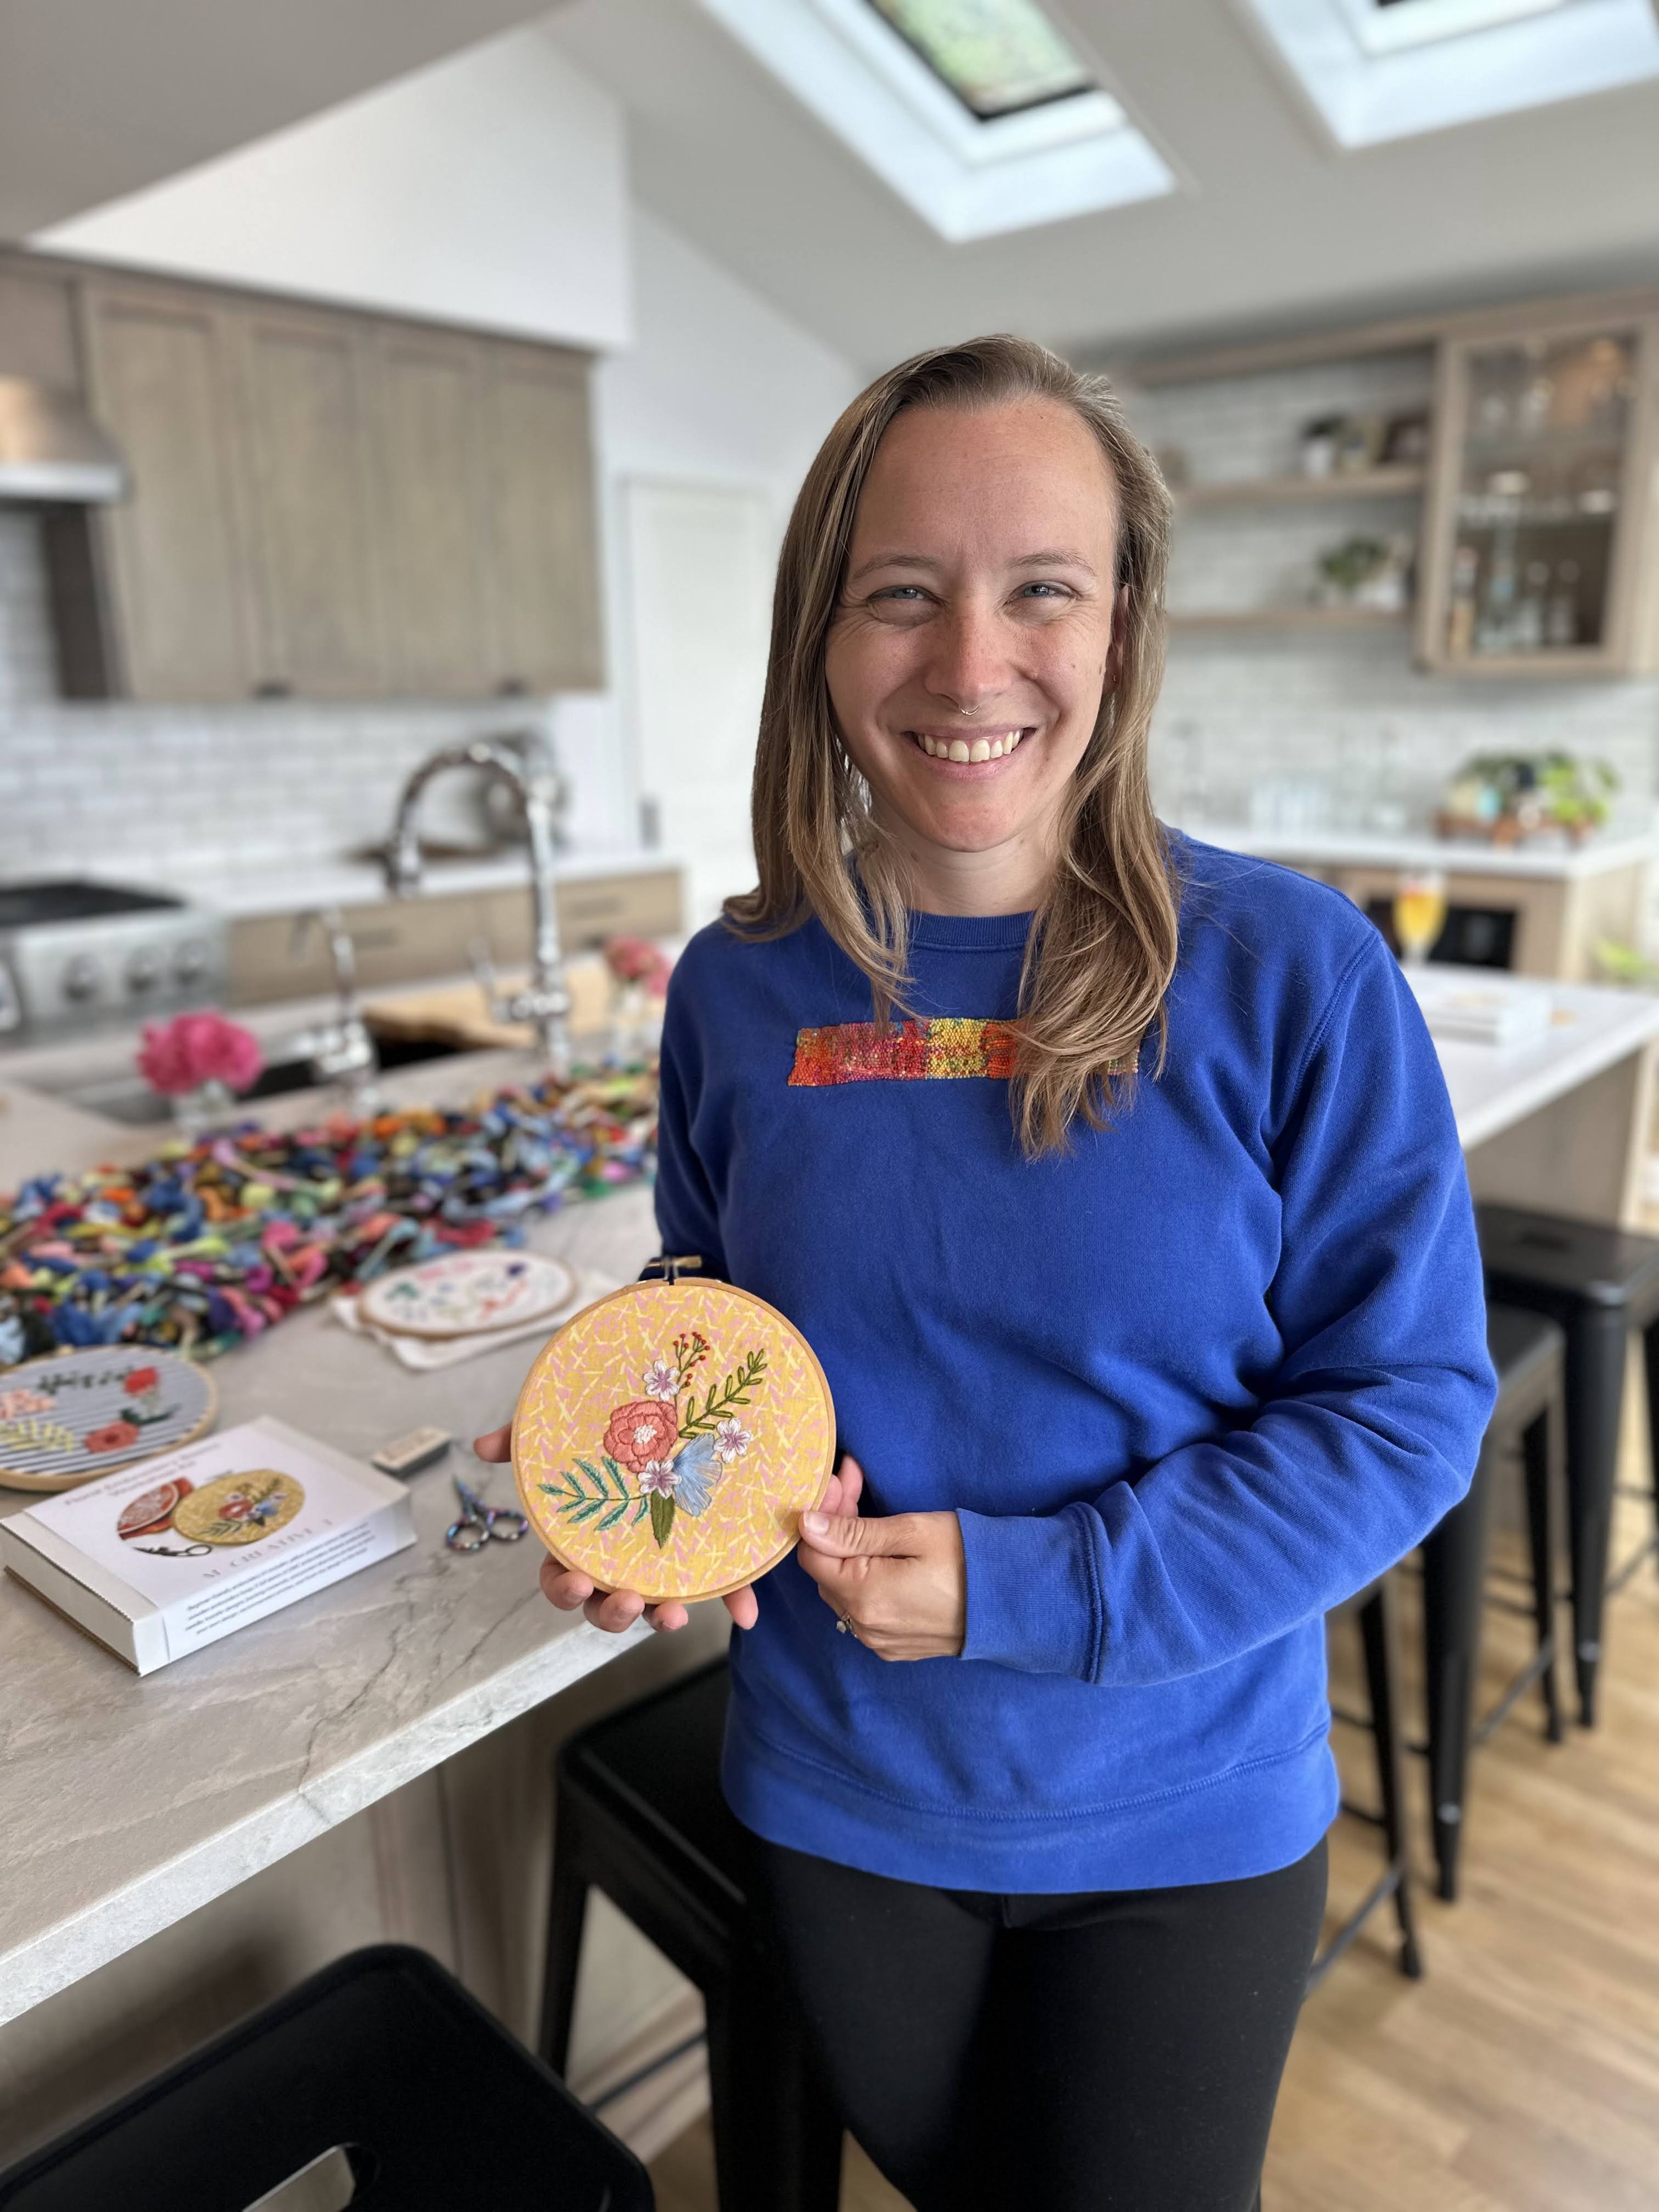
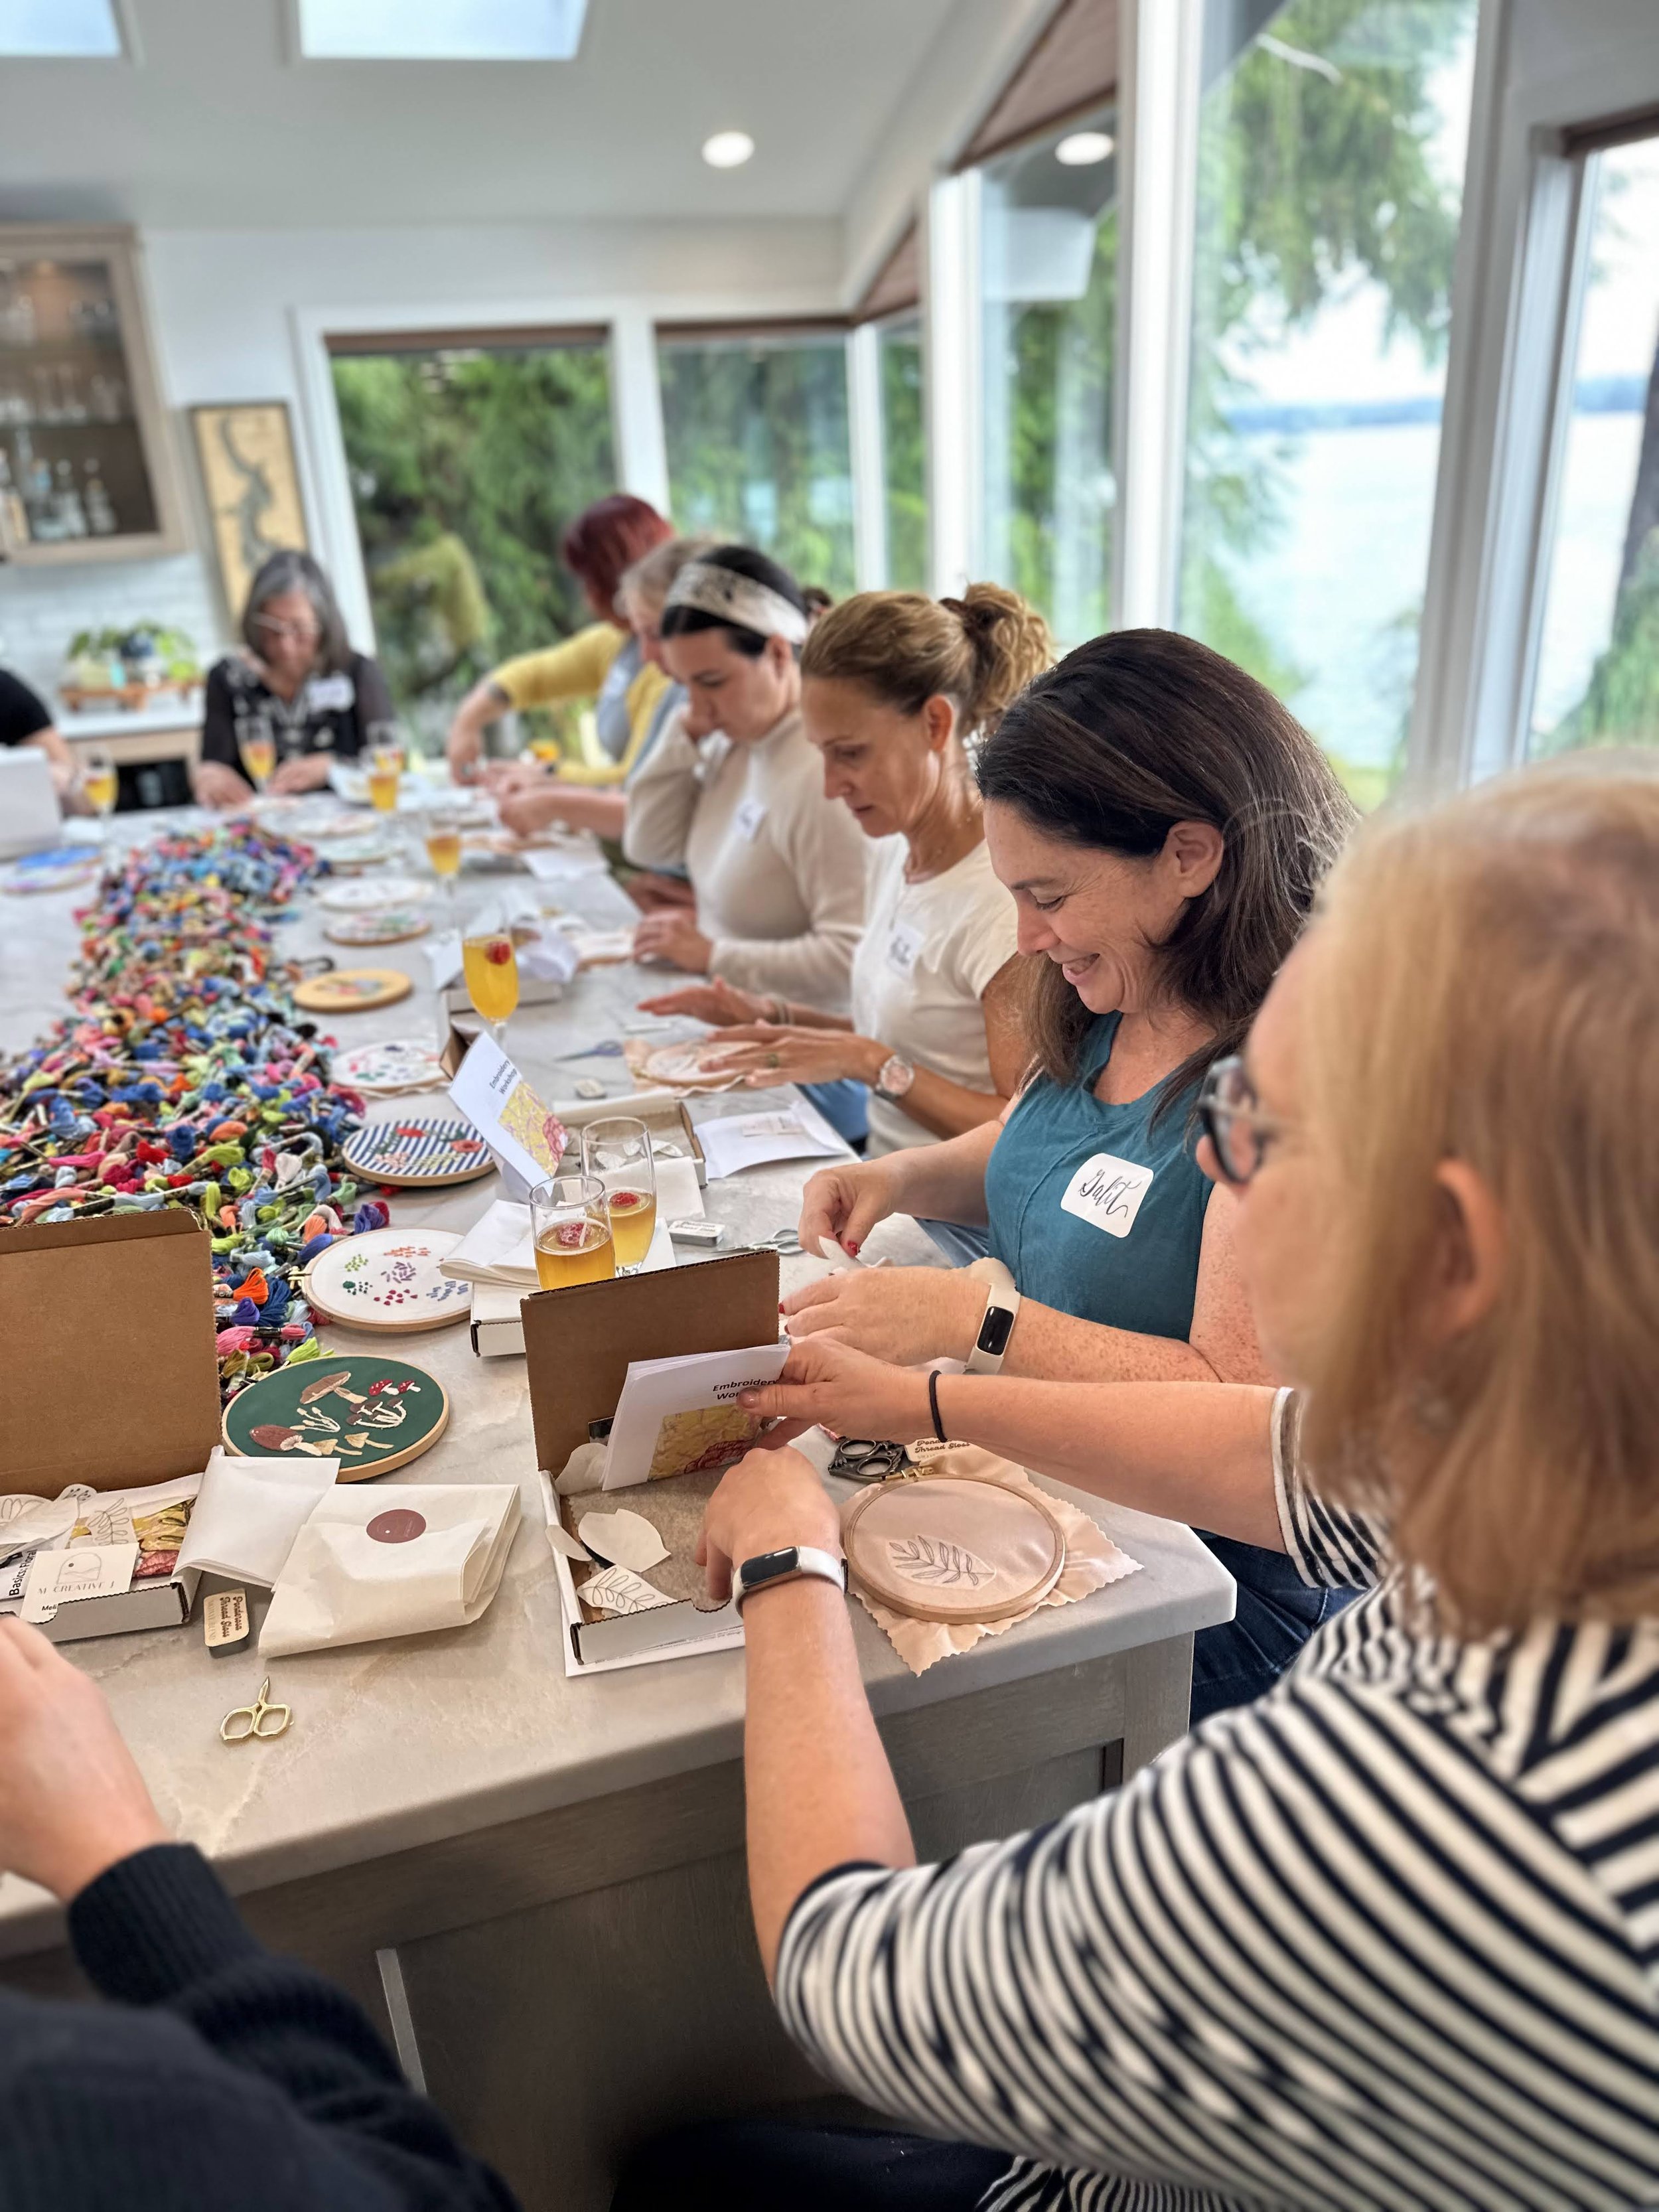
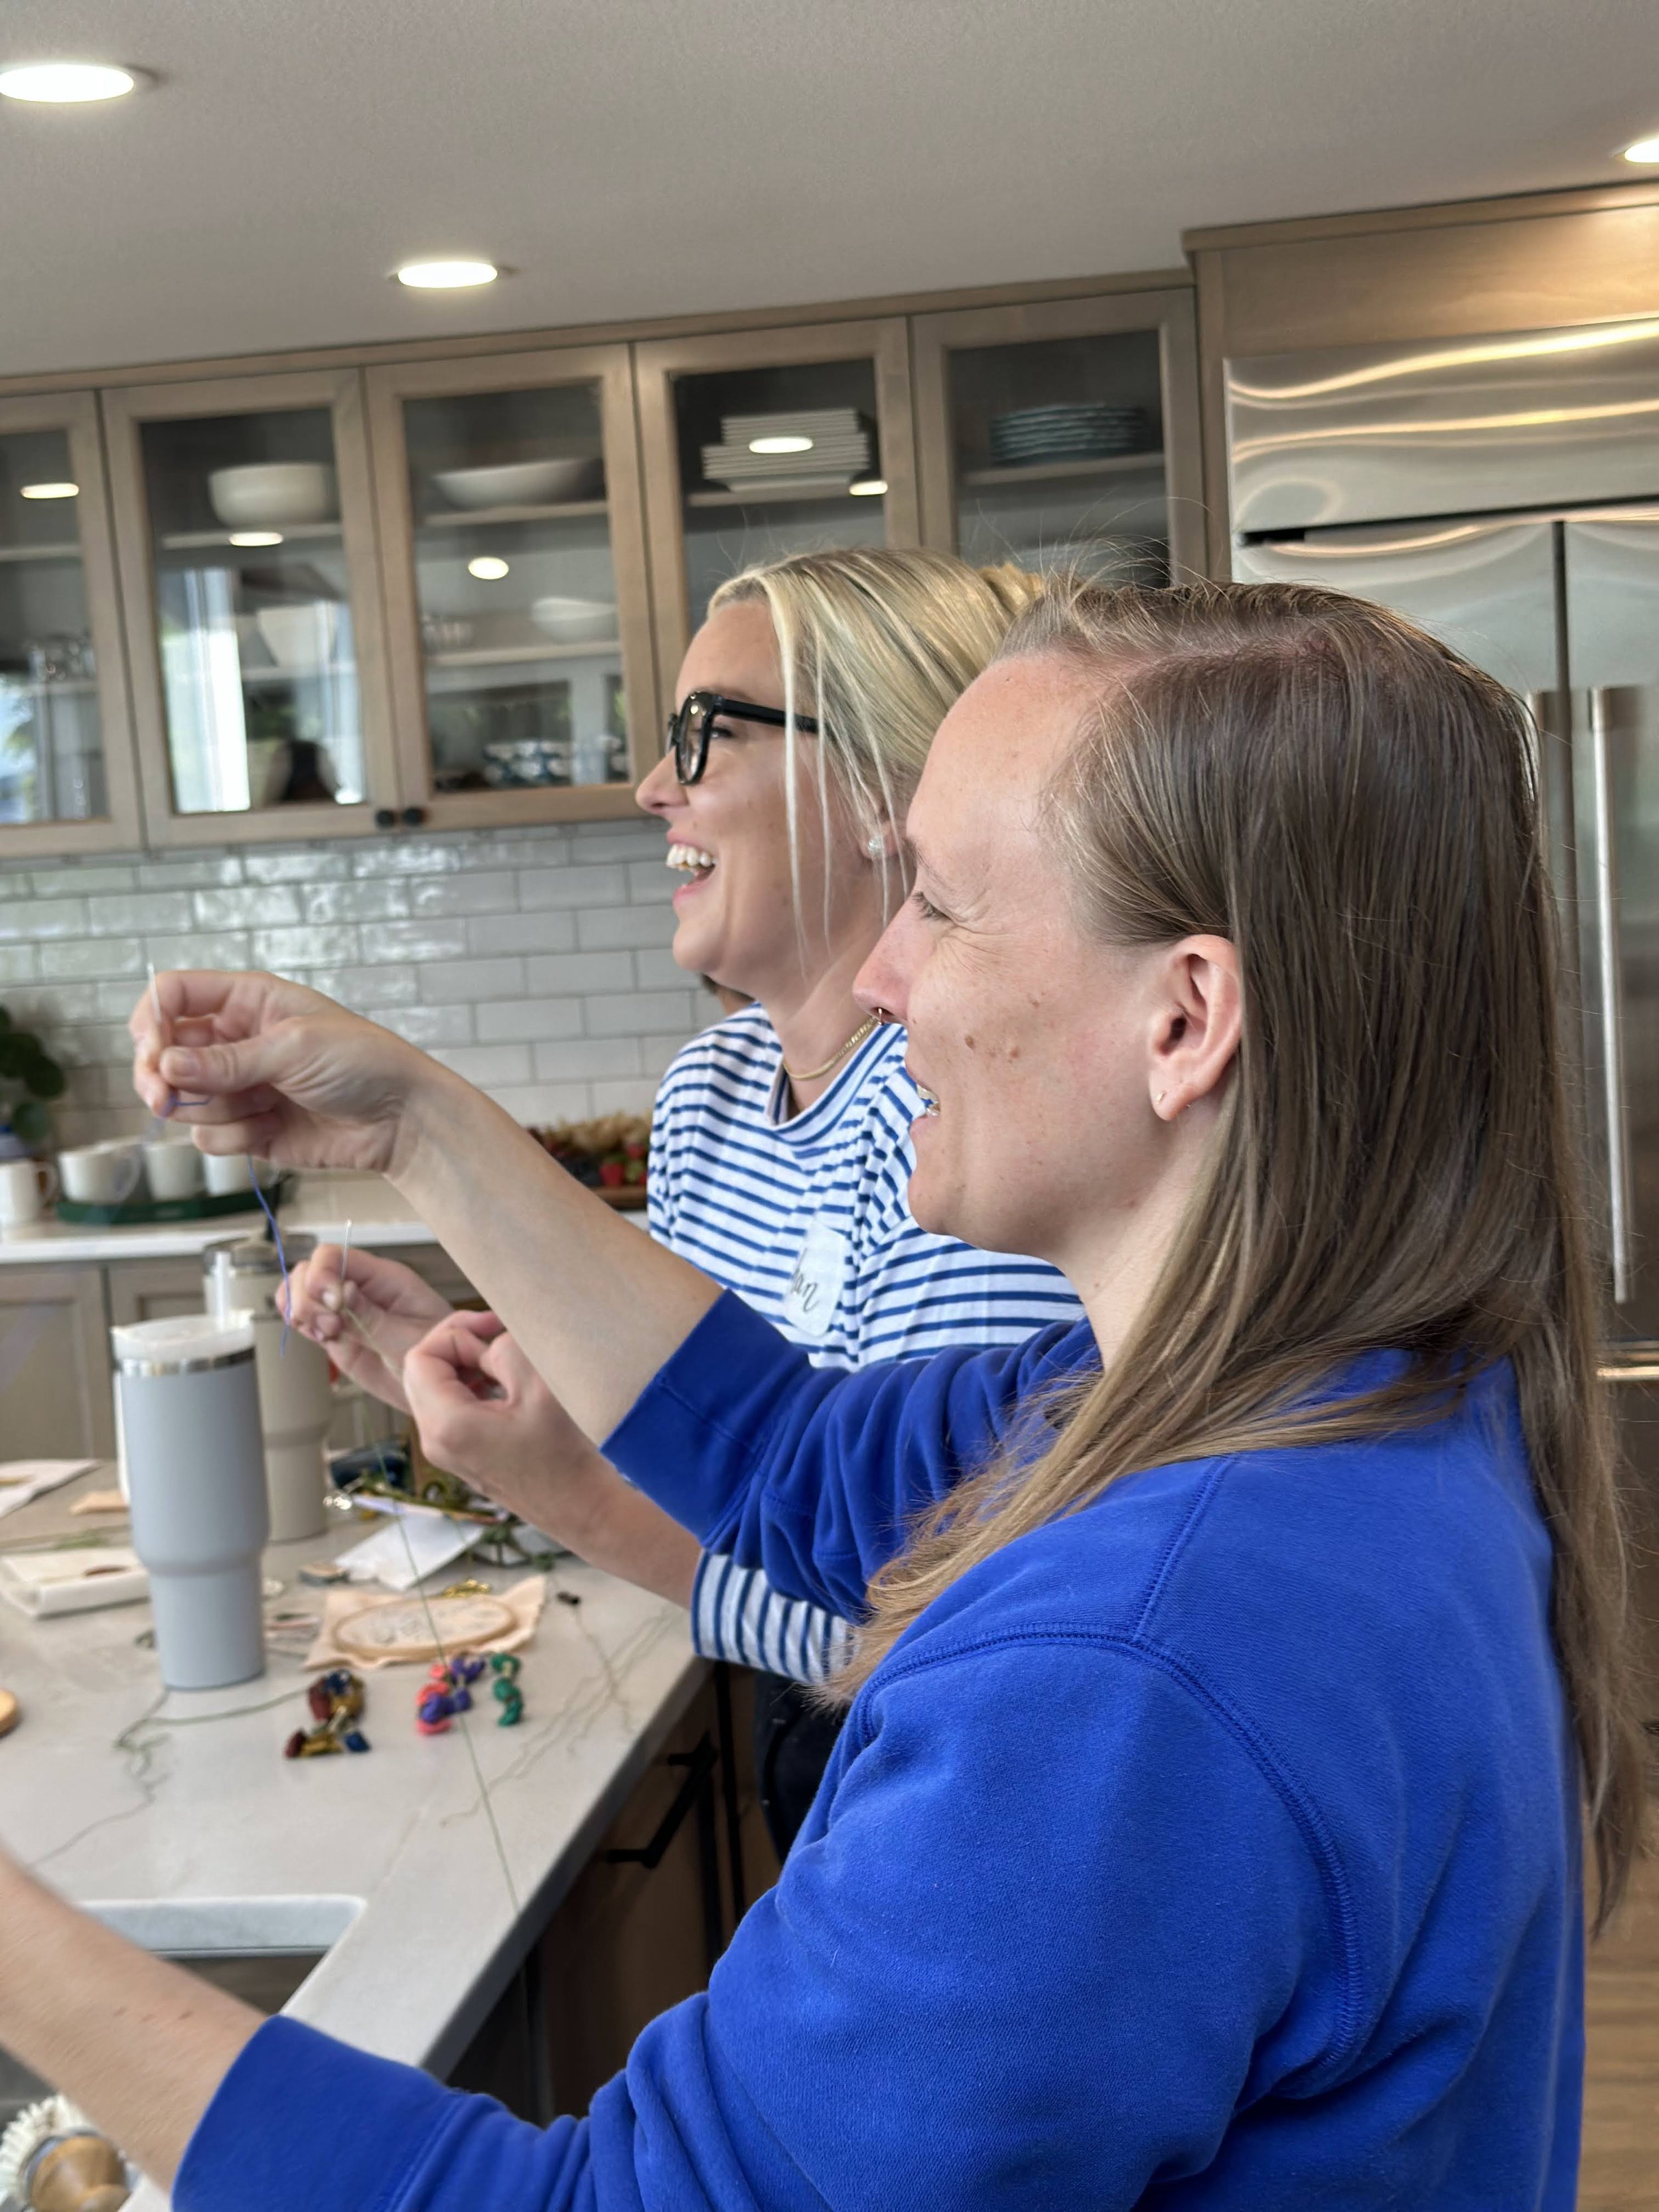
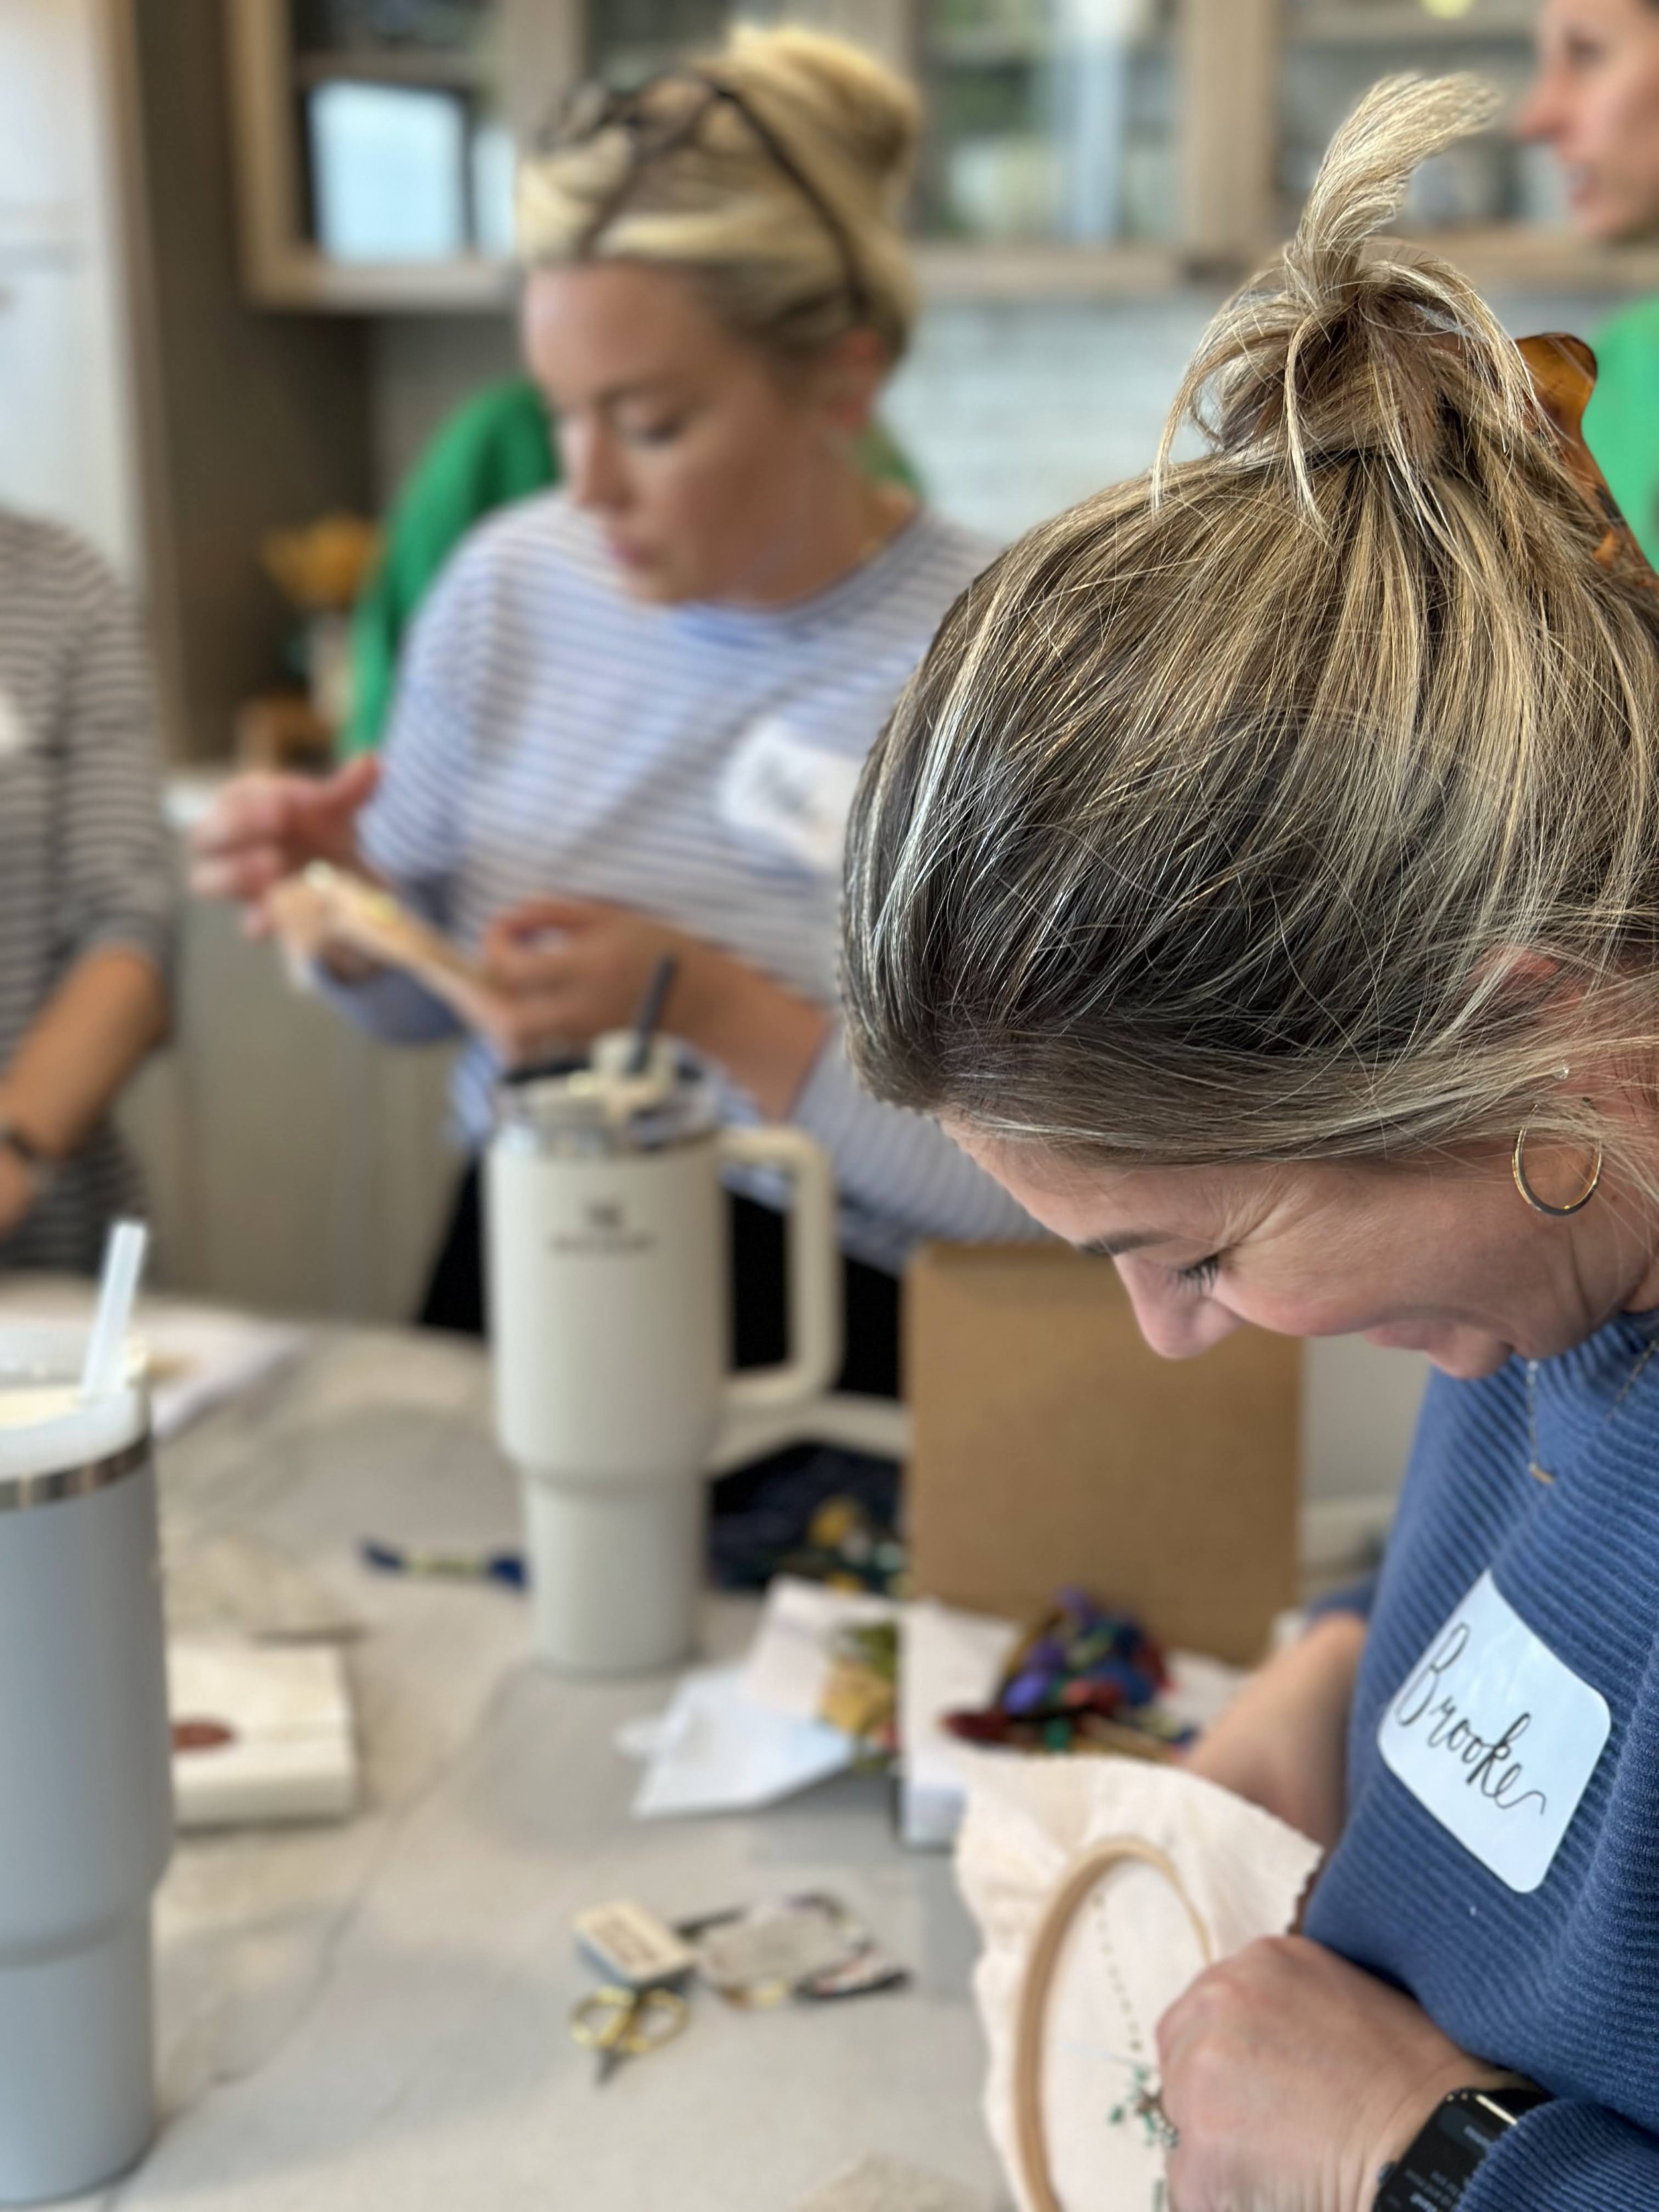
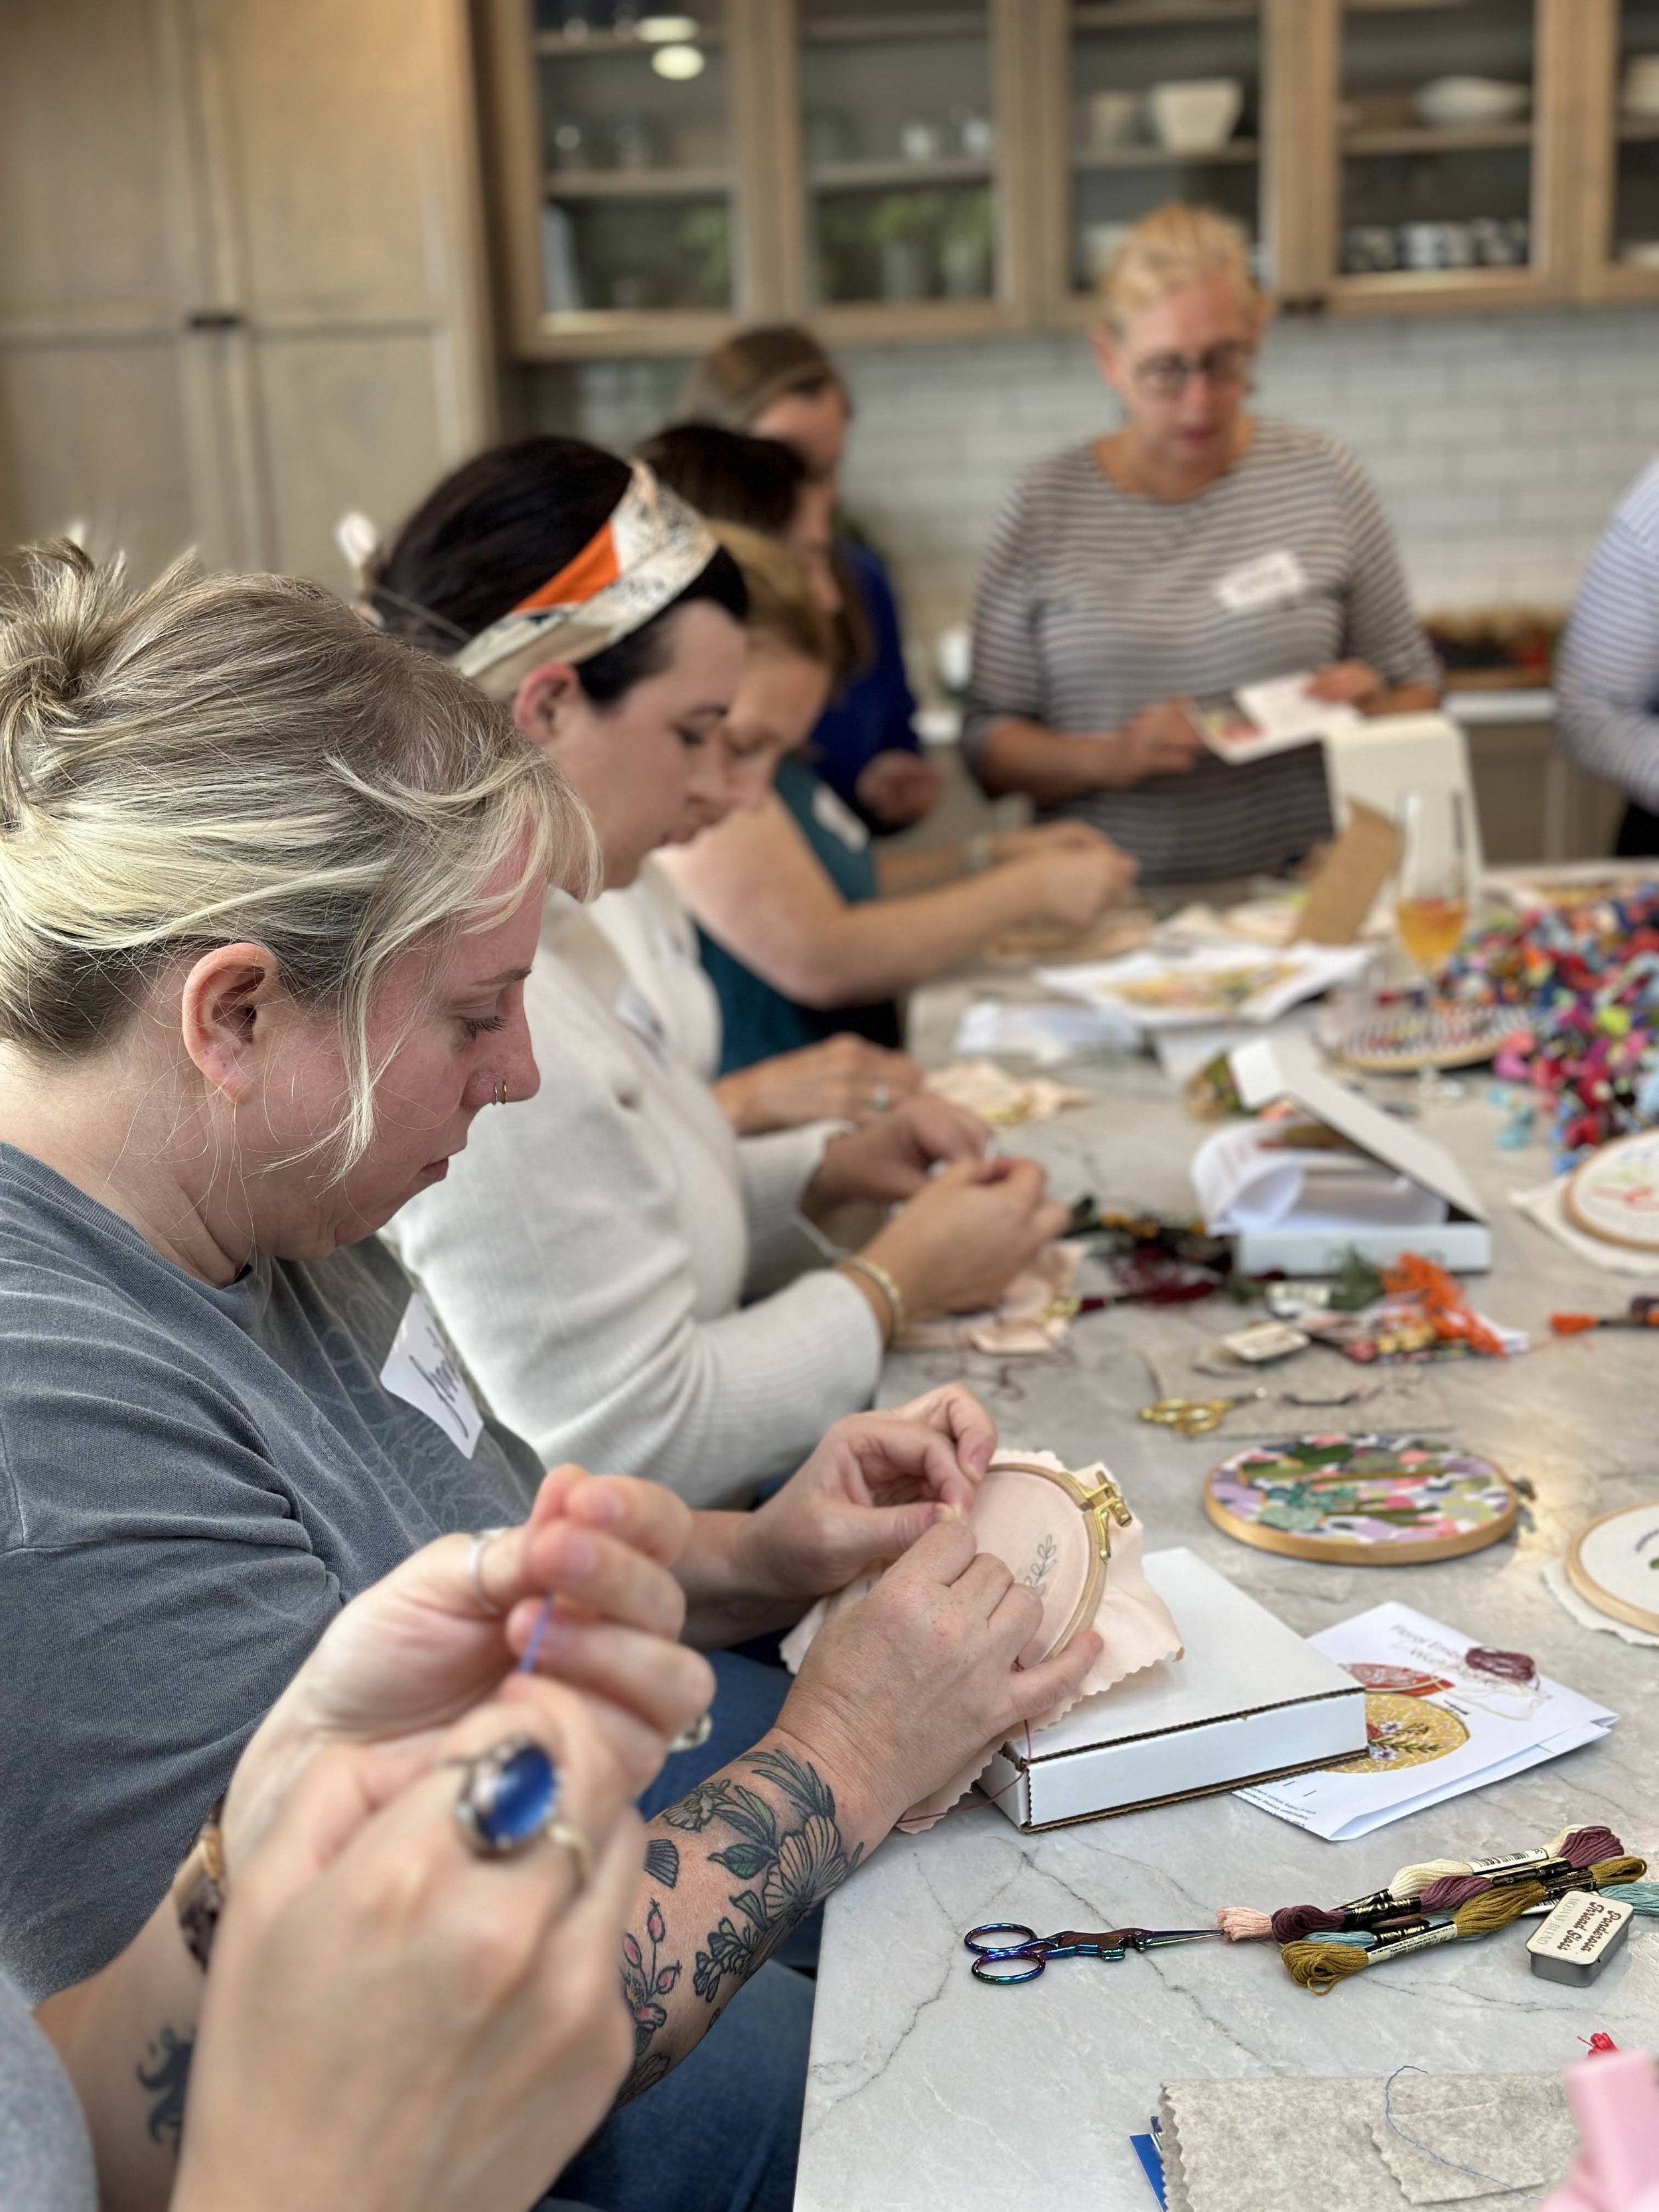
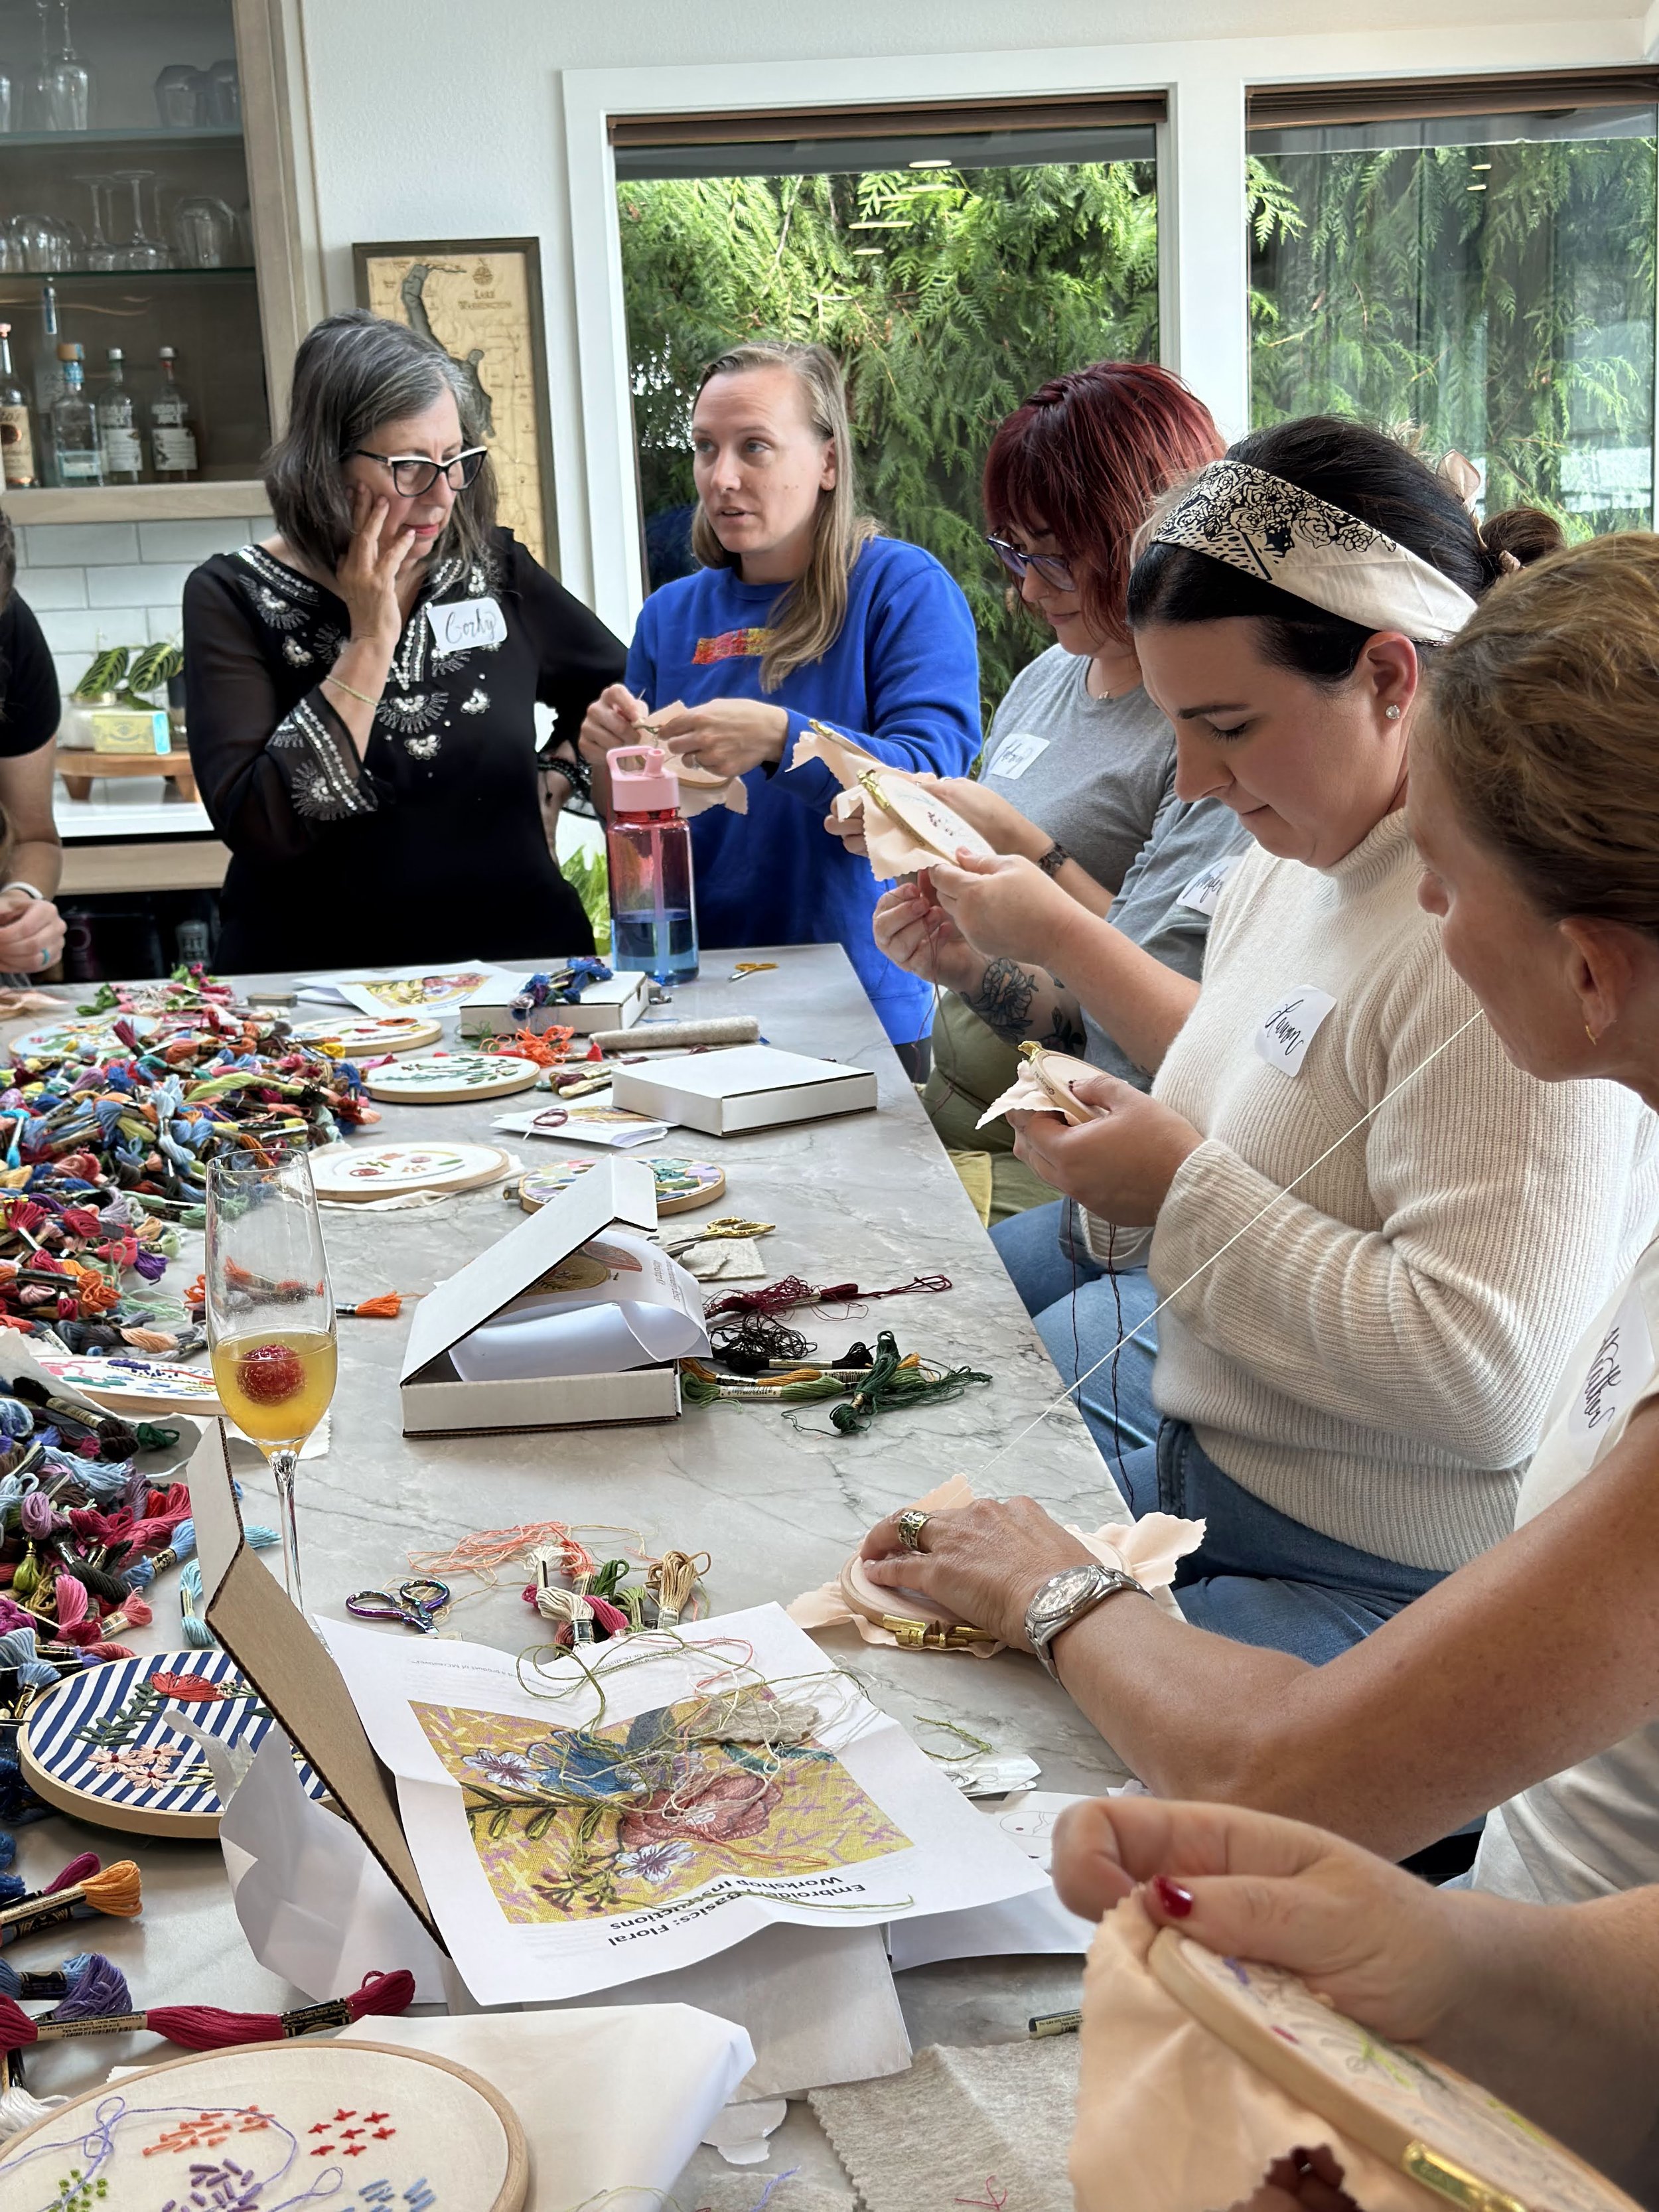
We had a blast learning embroidery basics at our morning gathering with Melissa Galbraith last Monday. Peach Bellinis in hand, attendees learned the stitches they needed to create their own floral masterpieces from Melissa.

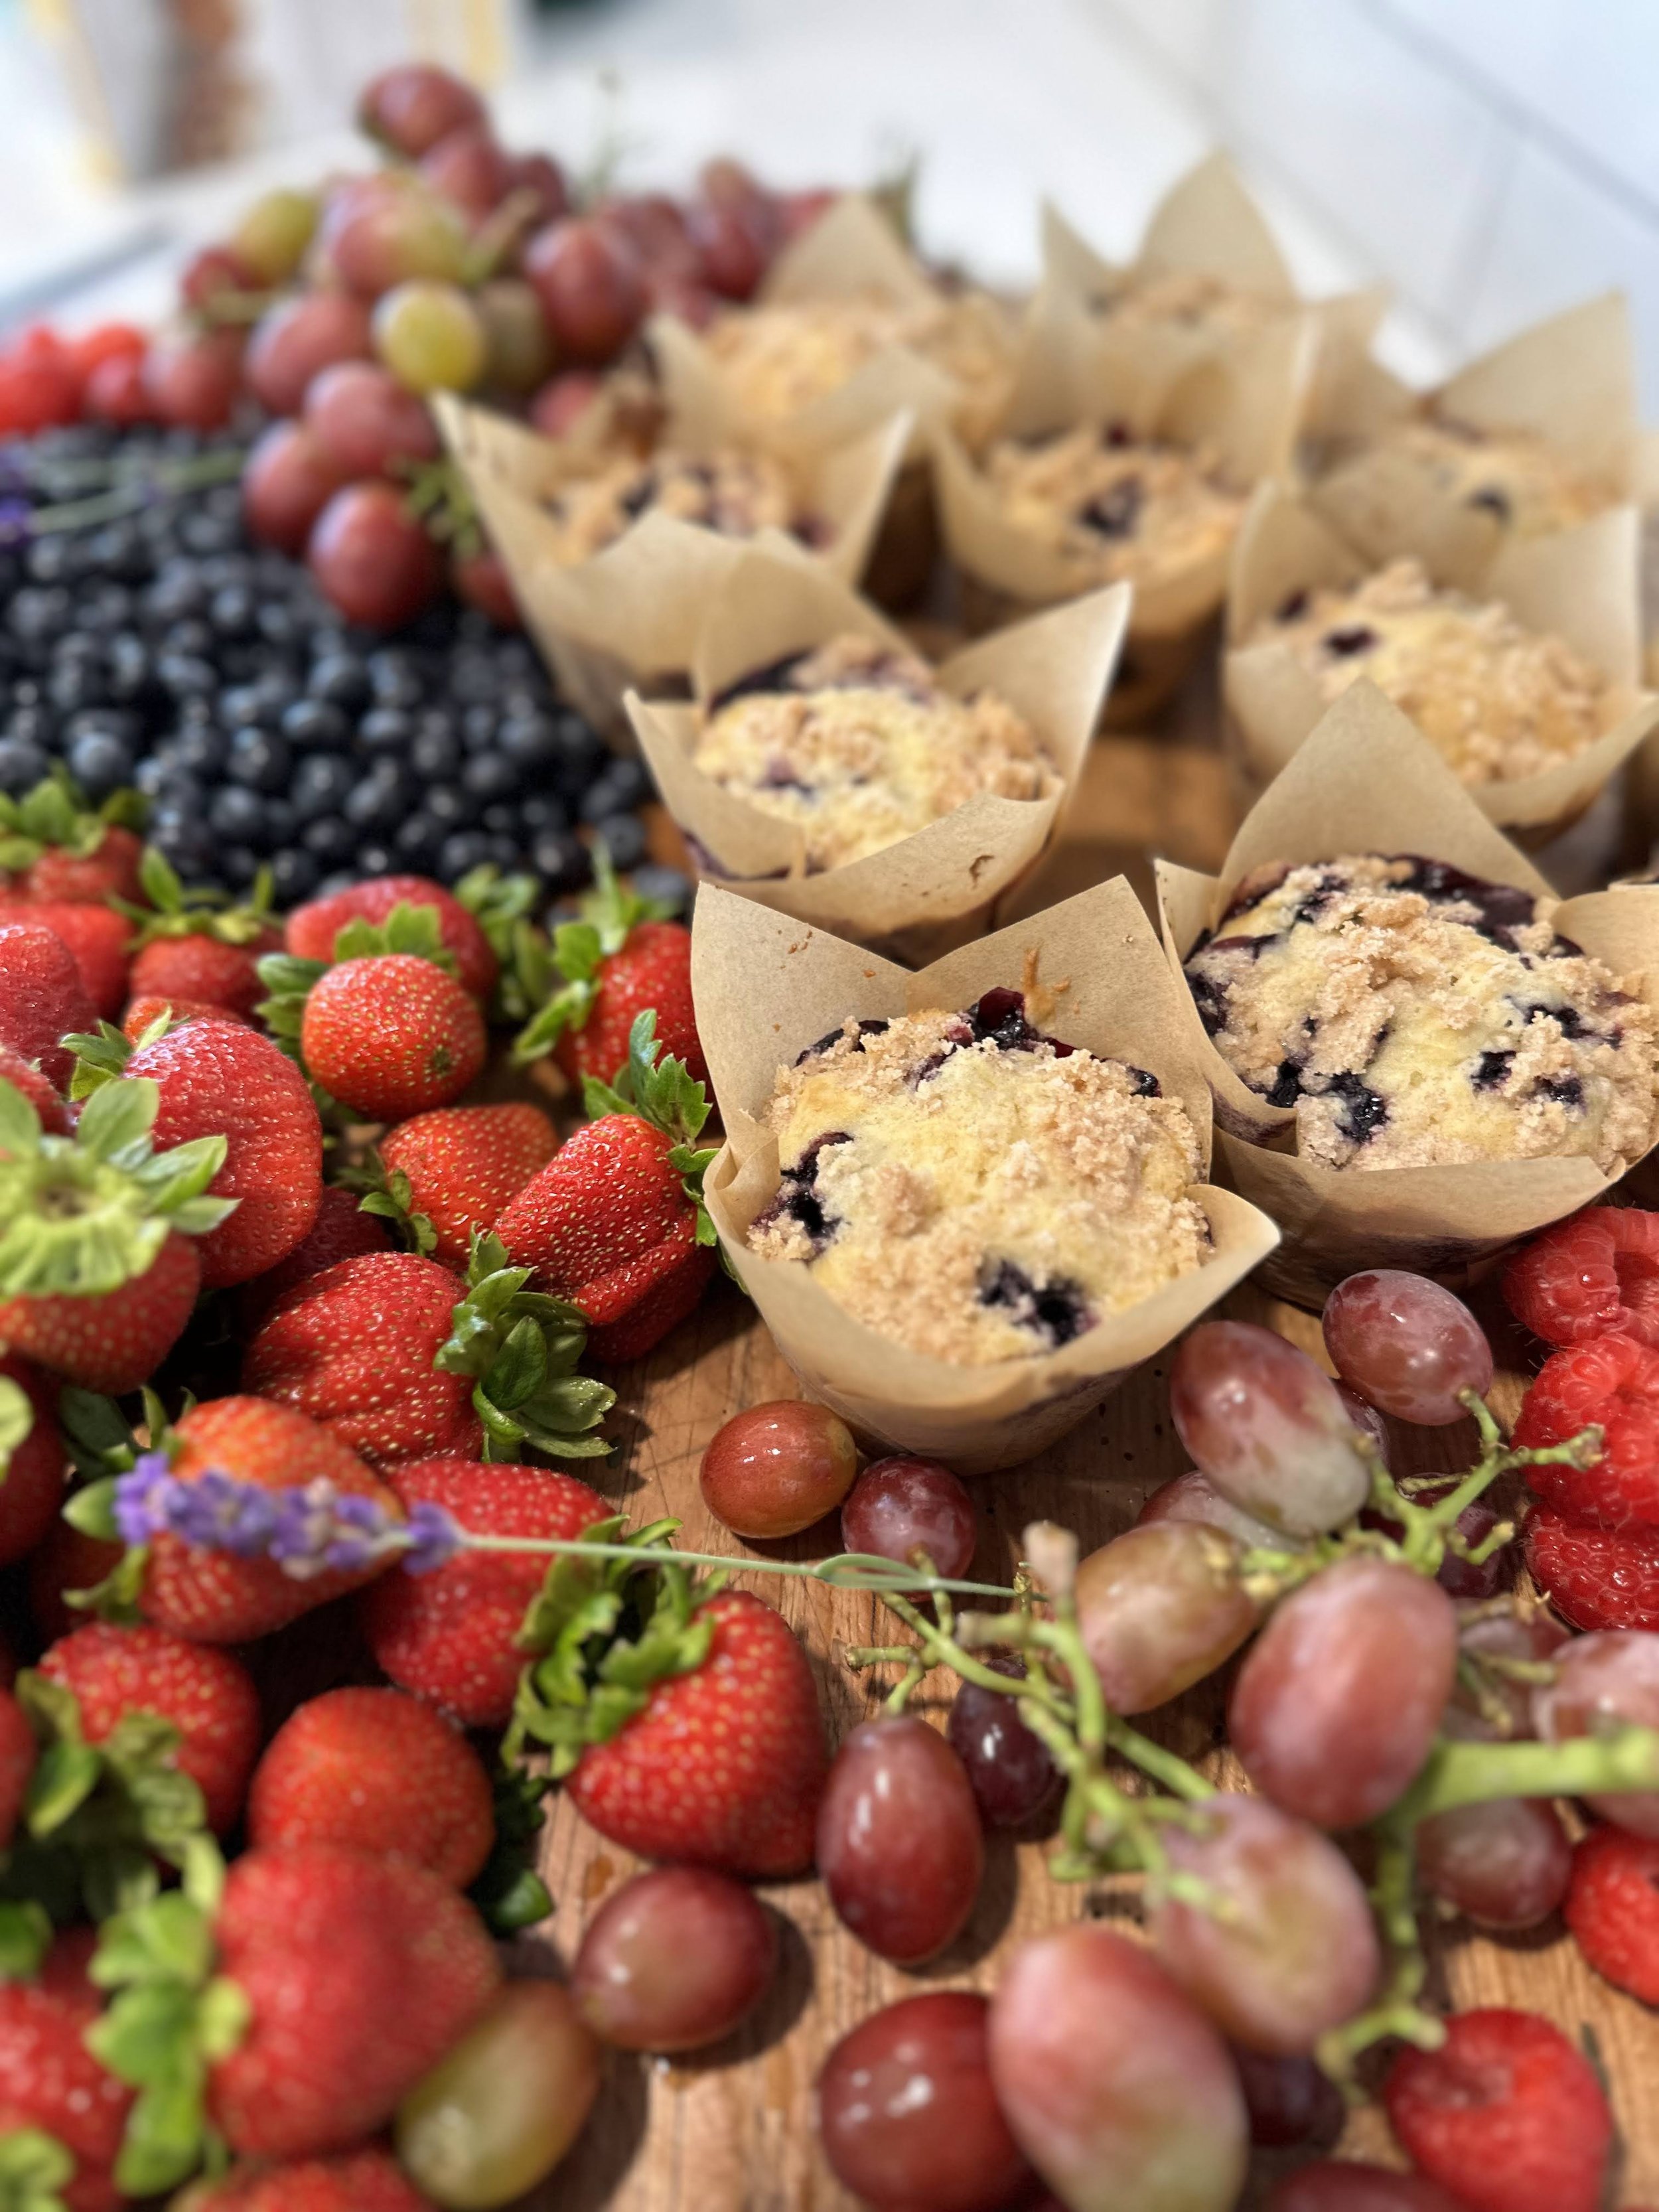
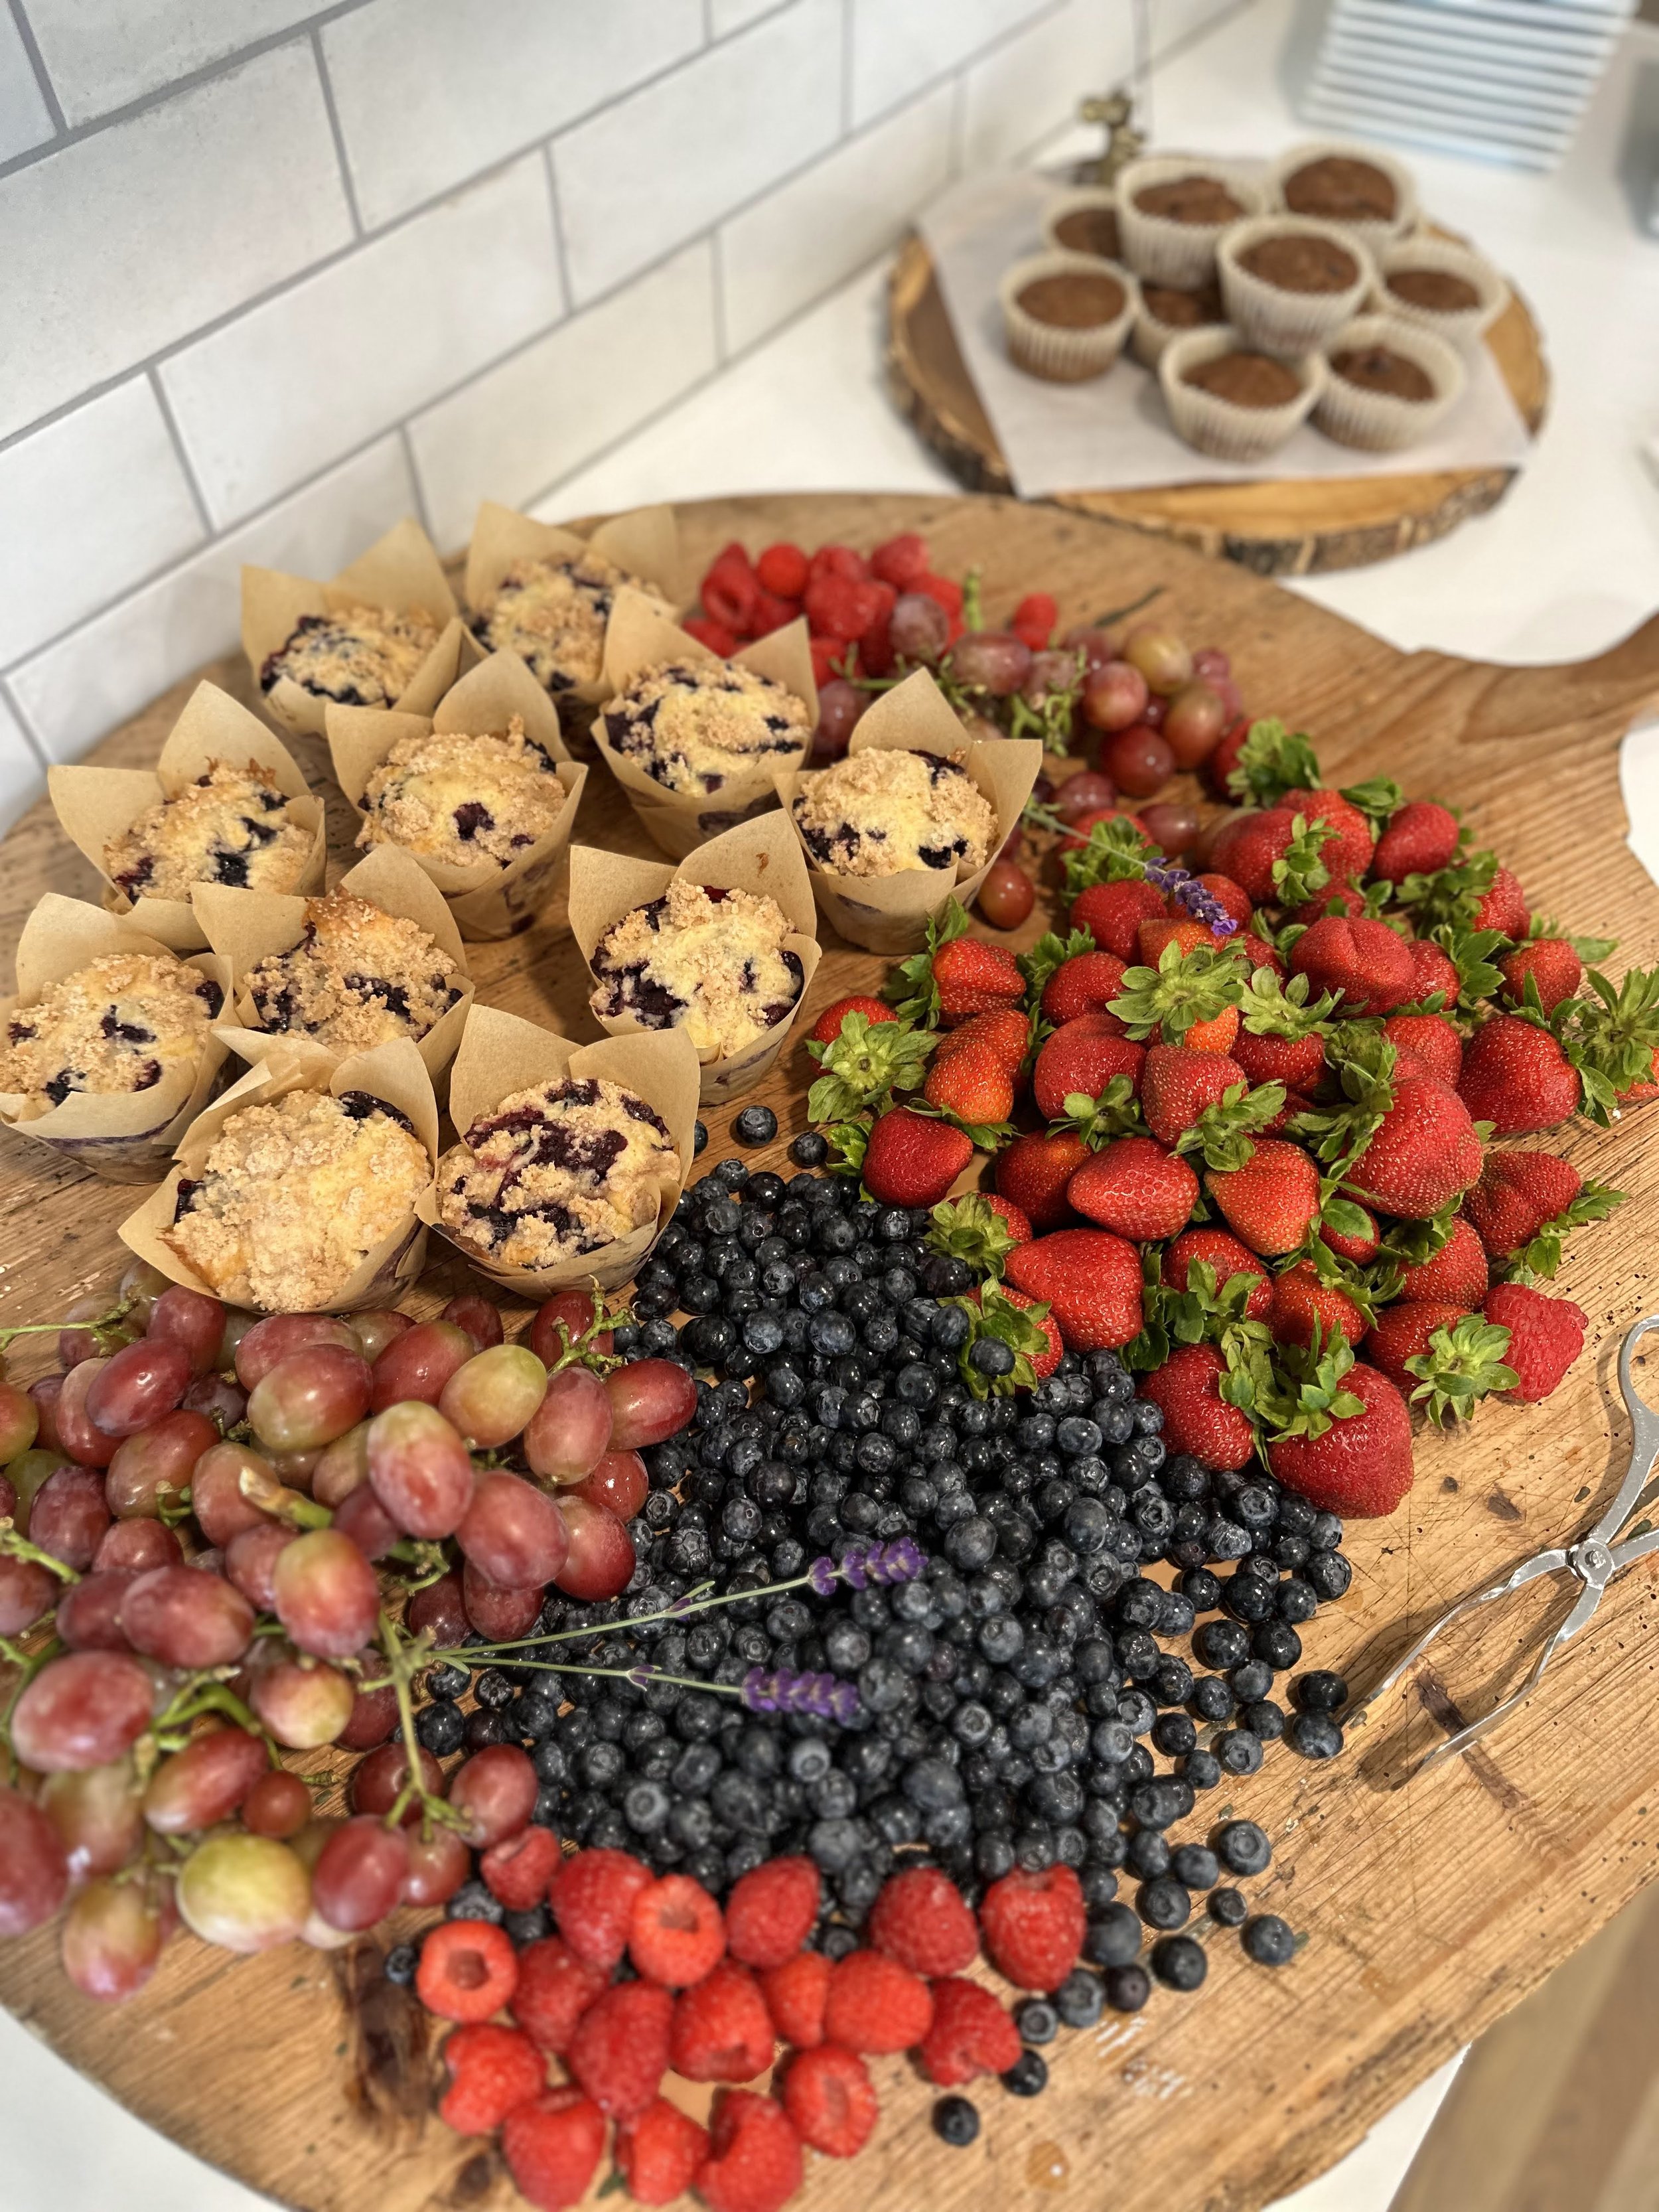
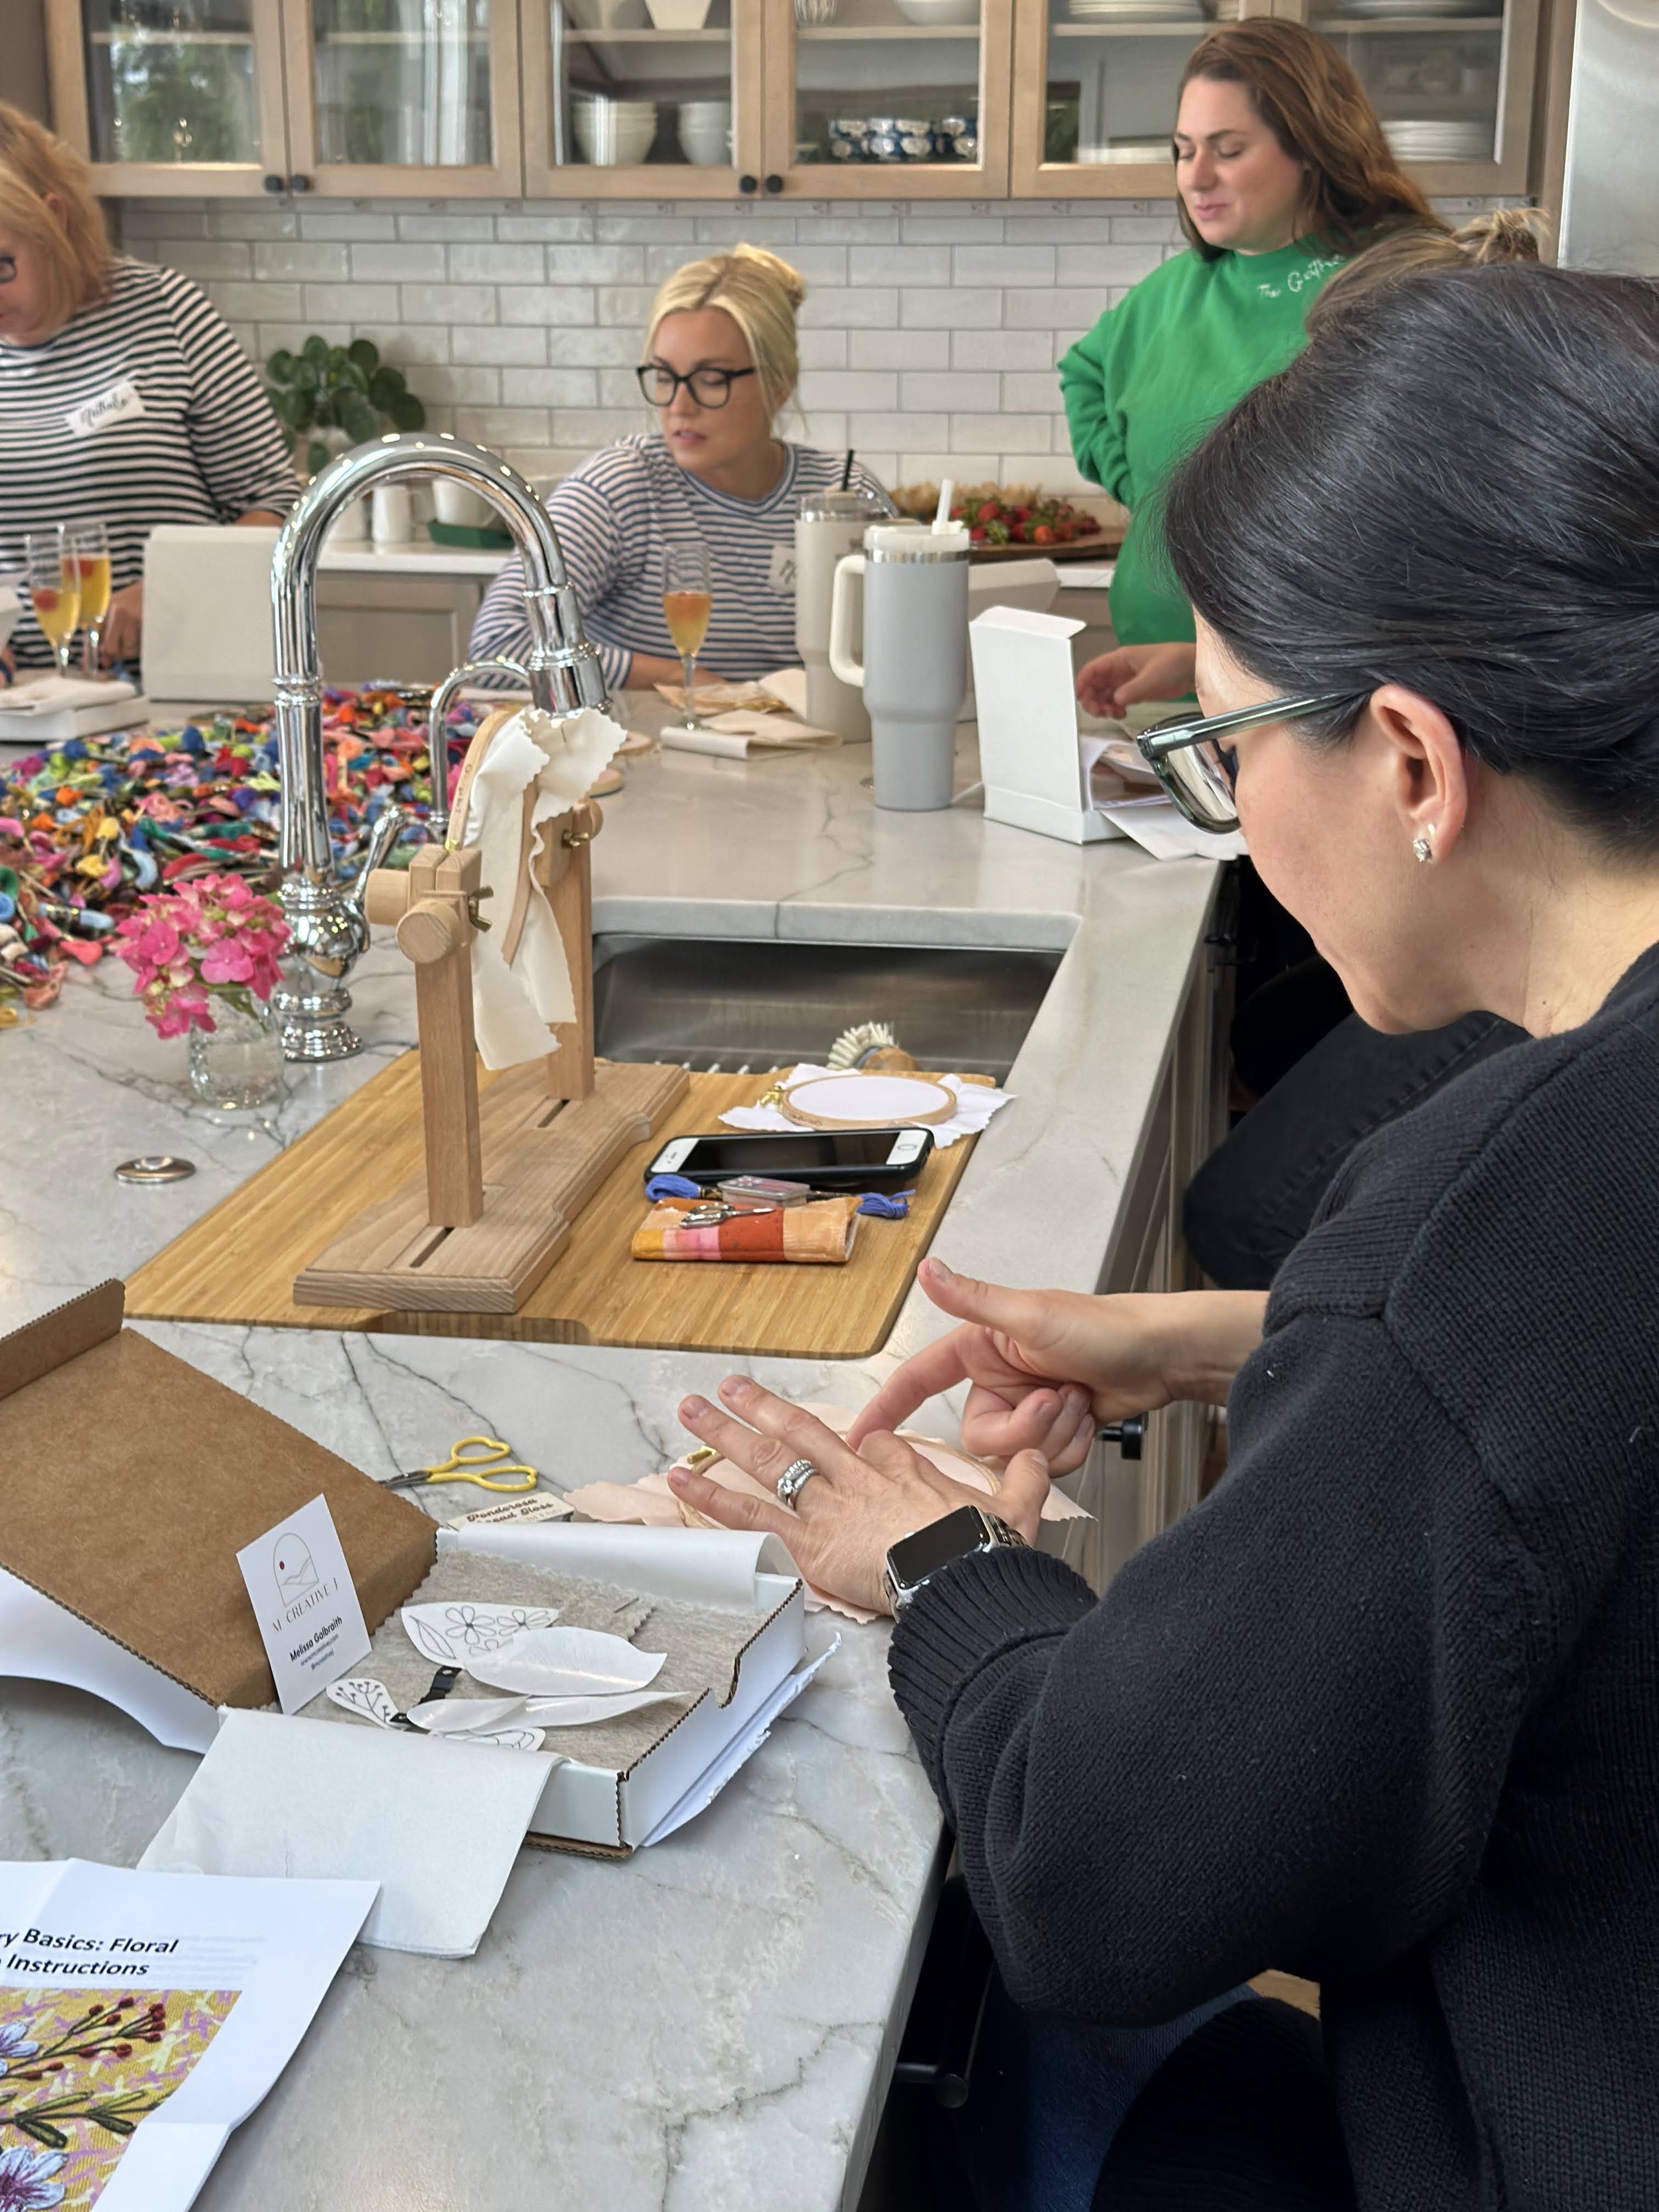
We began our morning with peach bellinis, a delicious spread of fruit, freshly-baked blueberry buckles, and vegan & gluten free banana chocolate chip muffins. Shortly after arrival guests grabbed their stools and embroidery kits to begin our hands-on workshop.
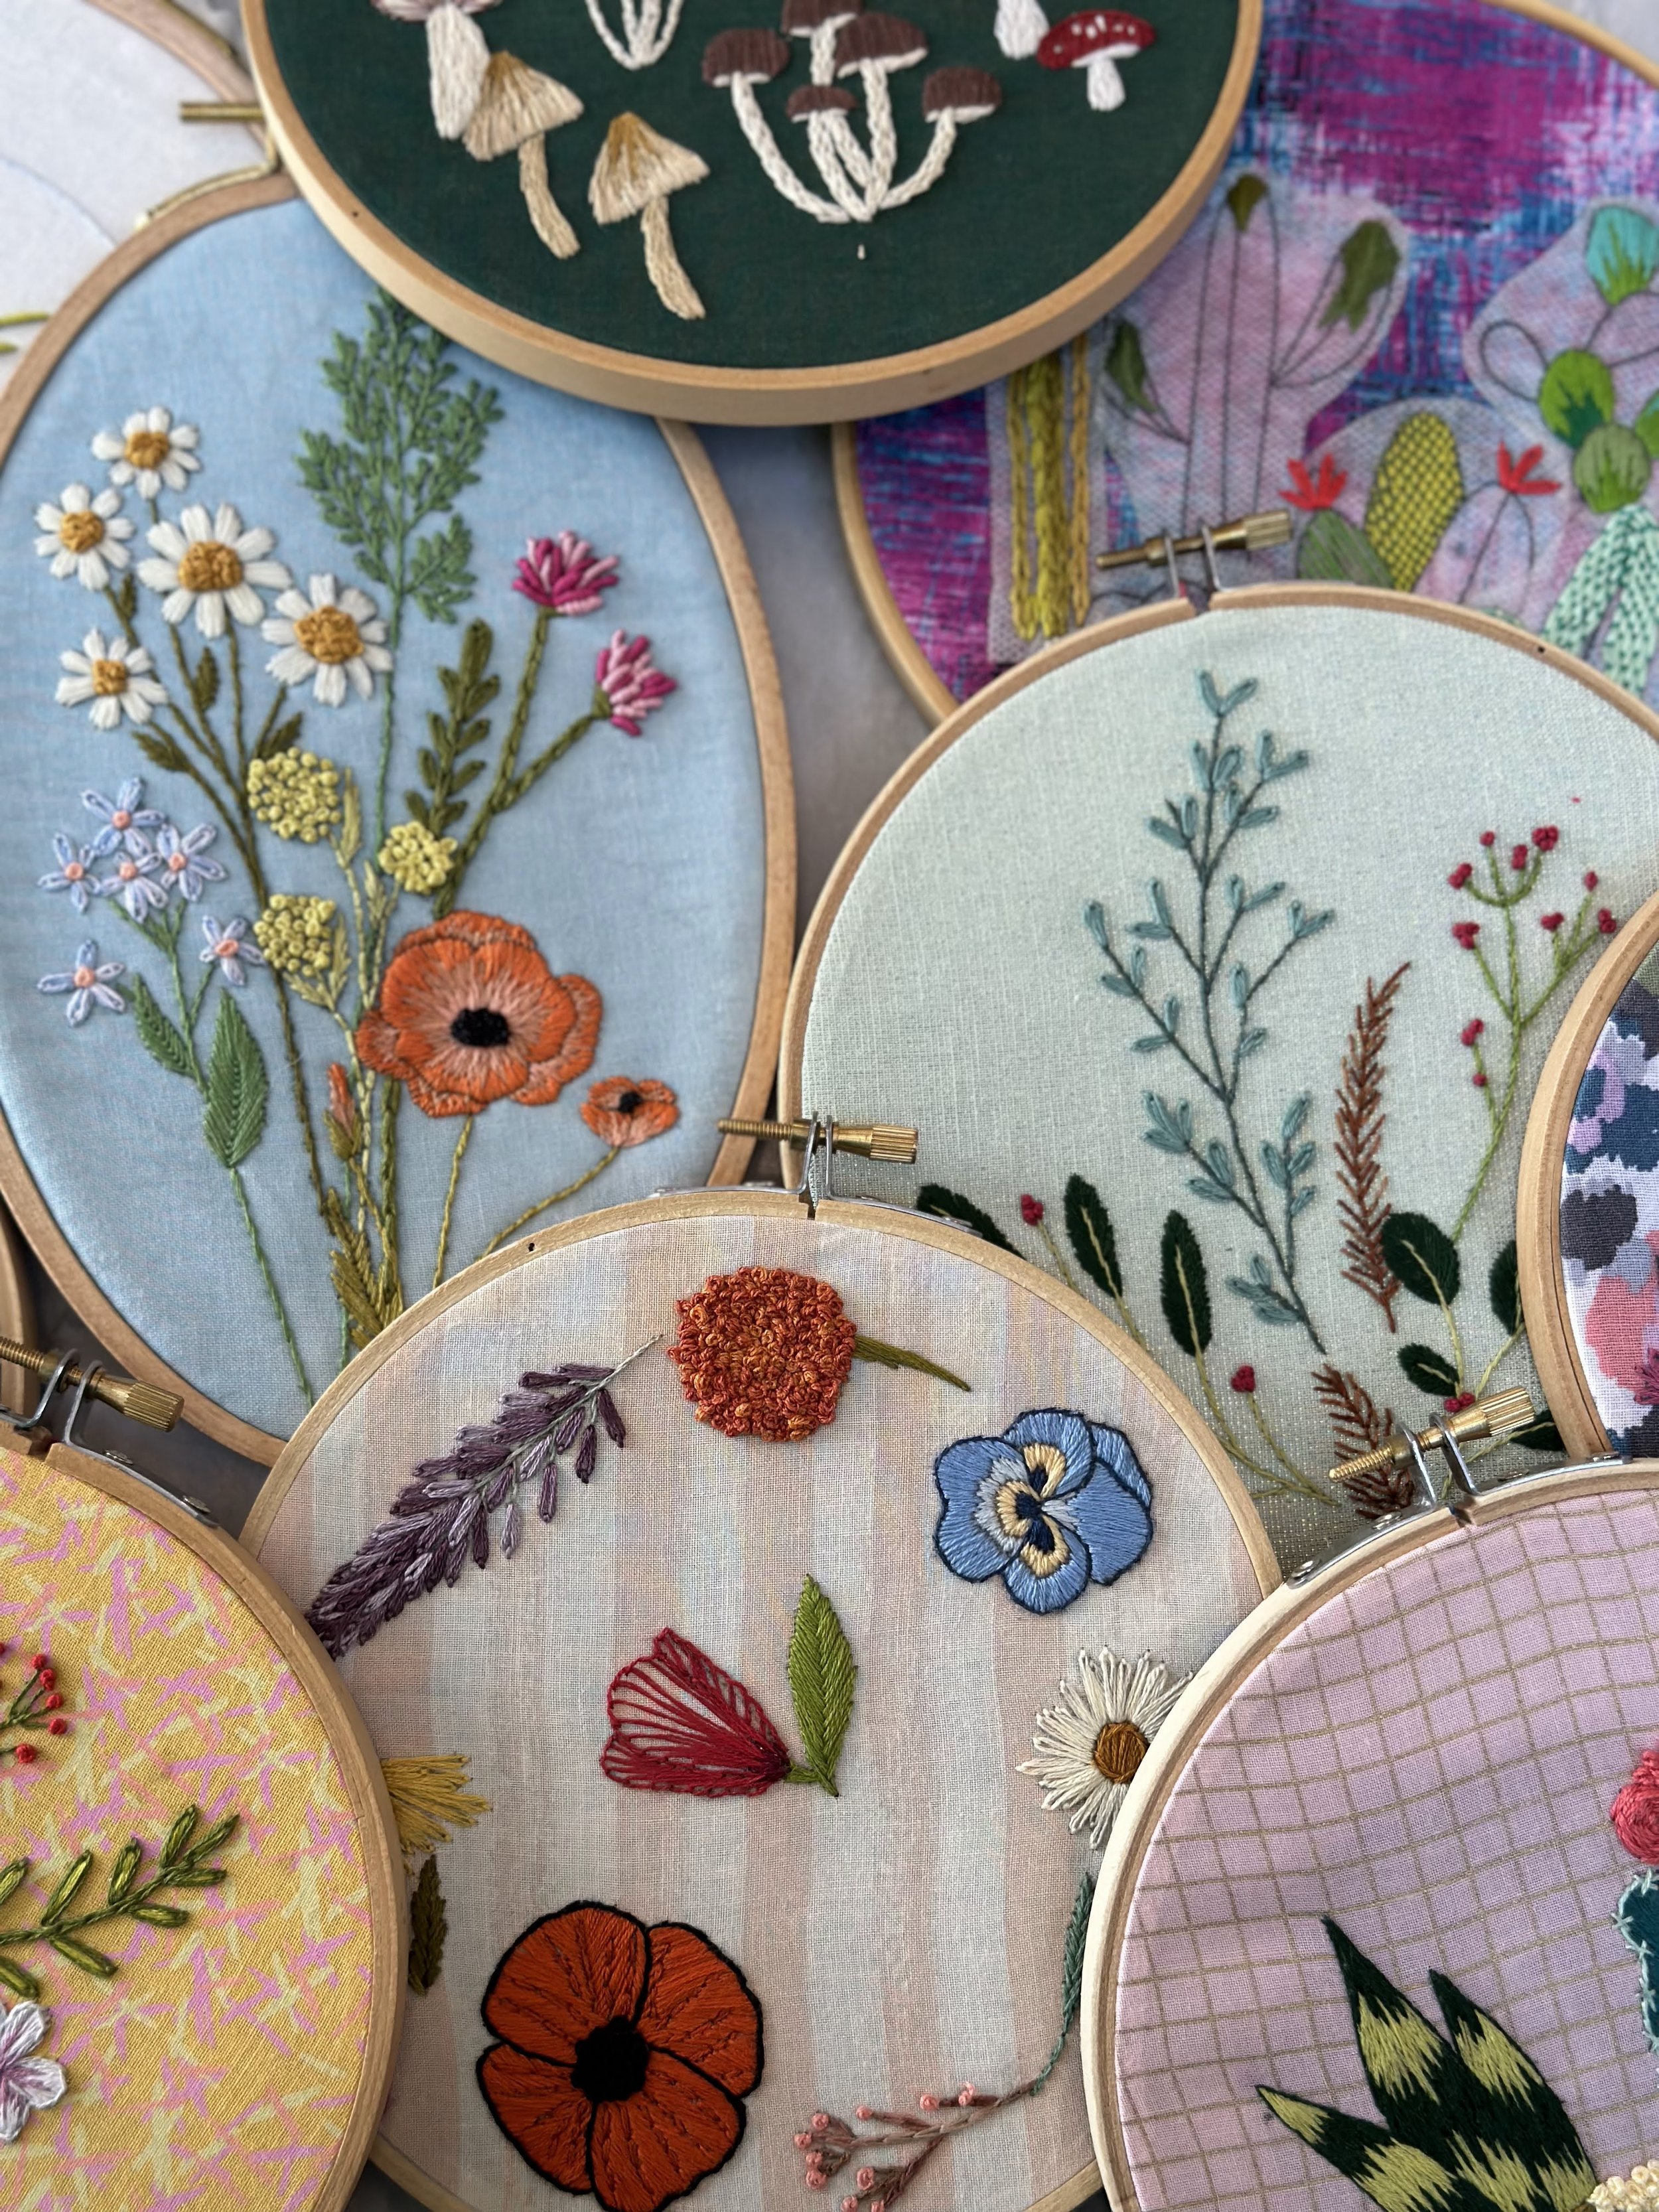
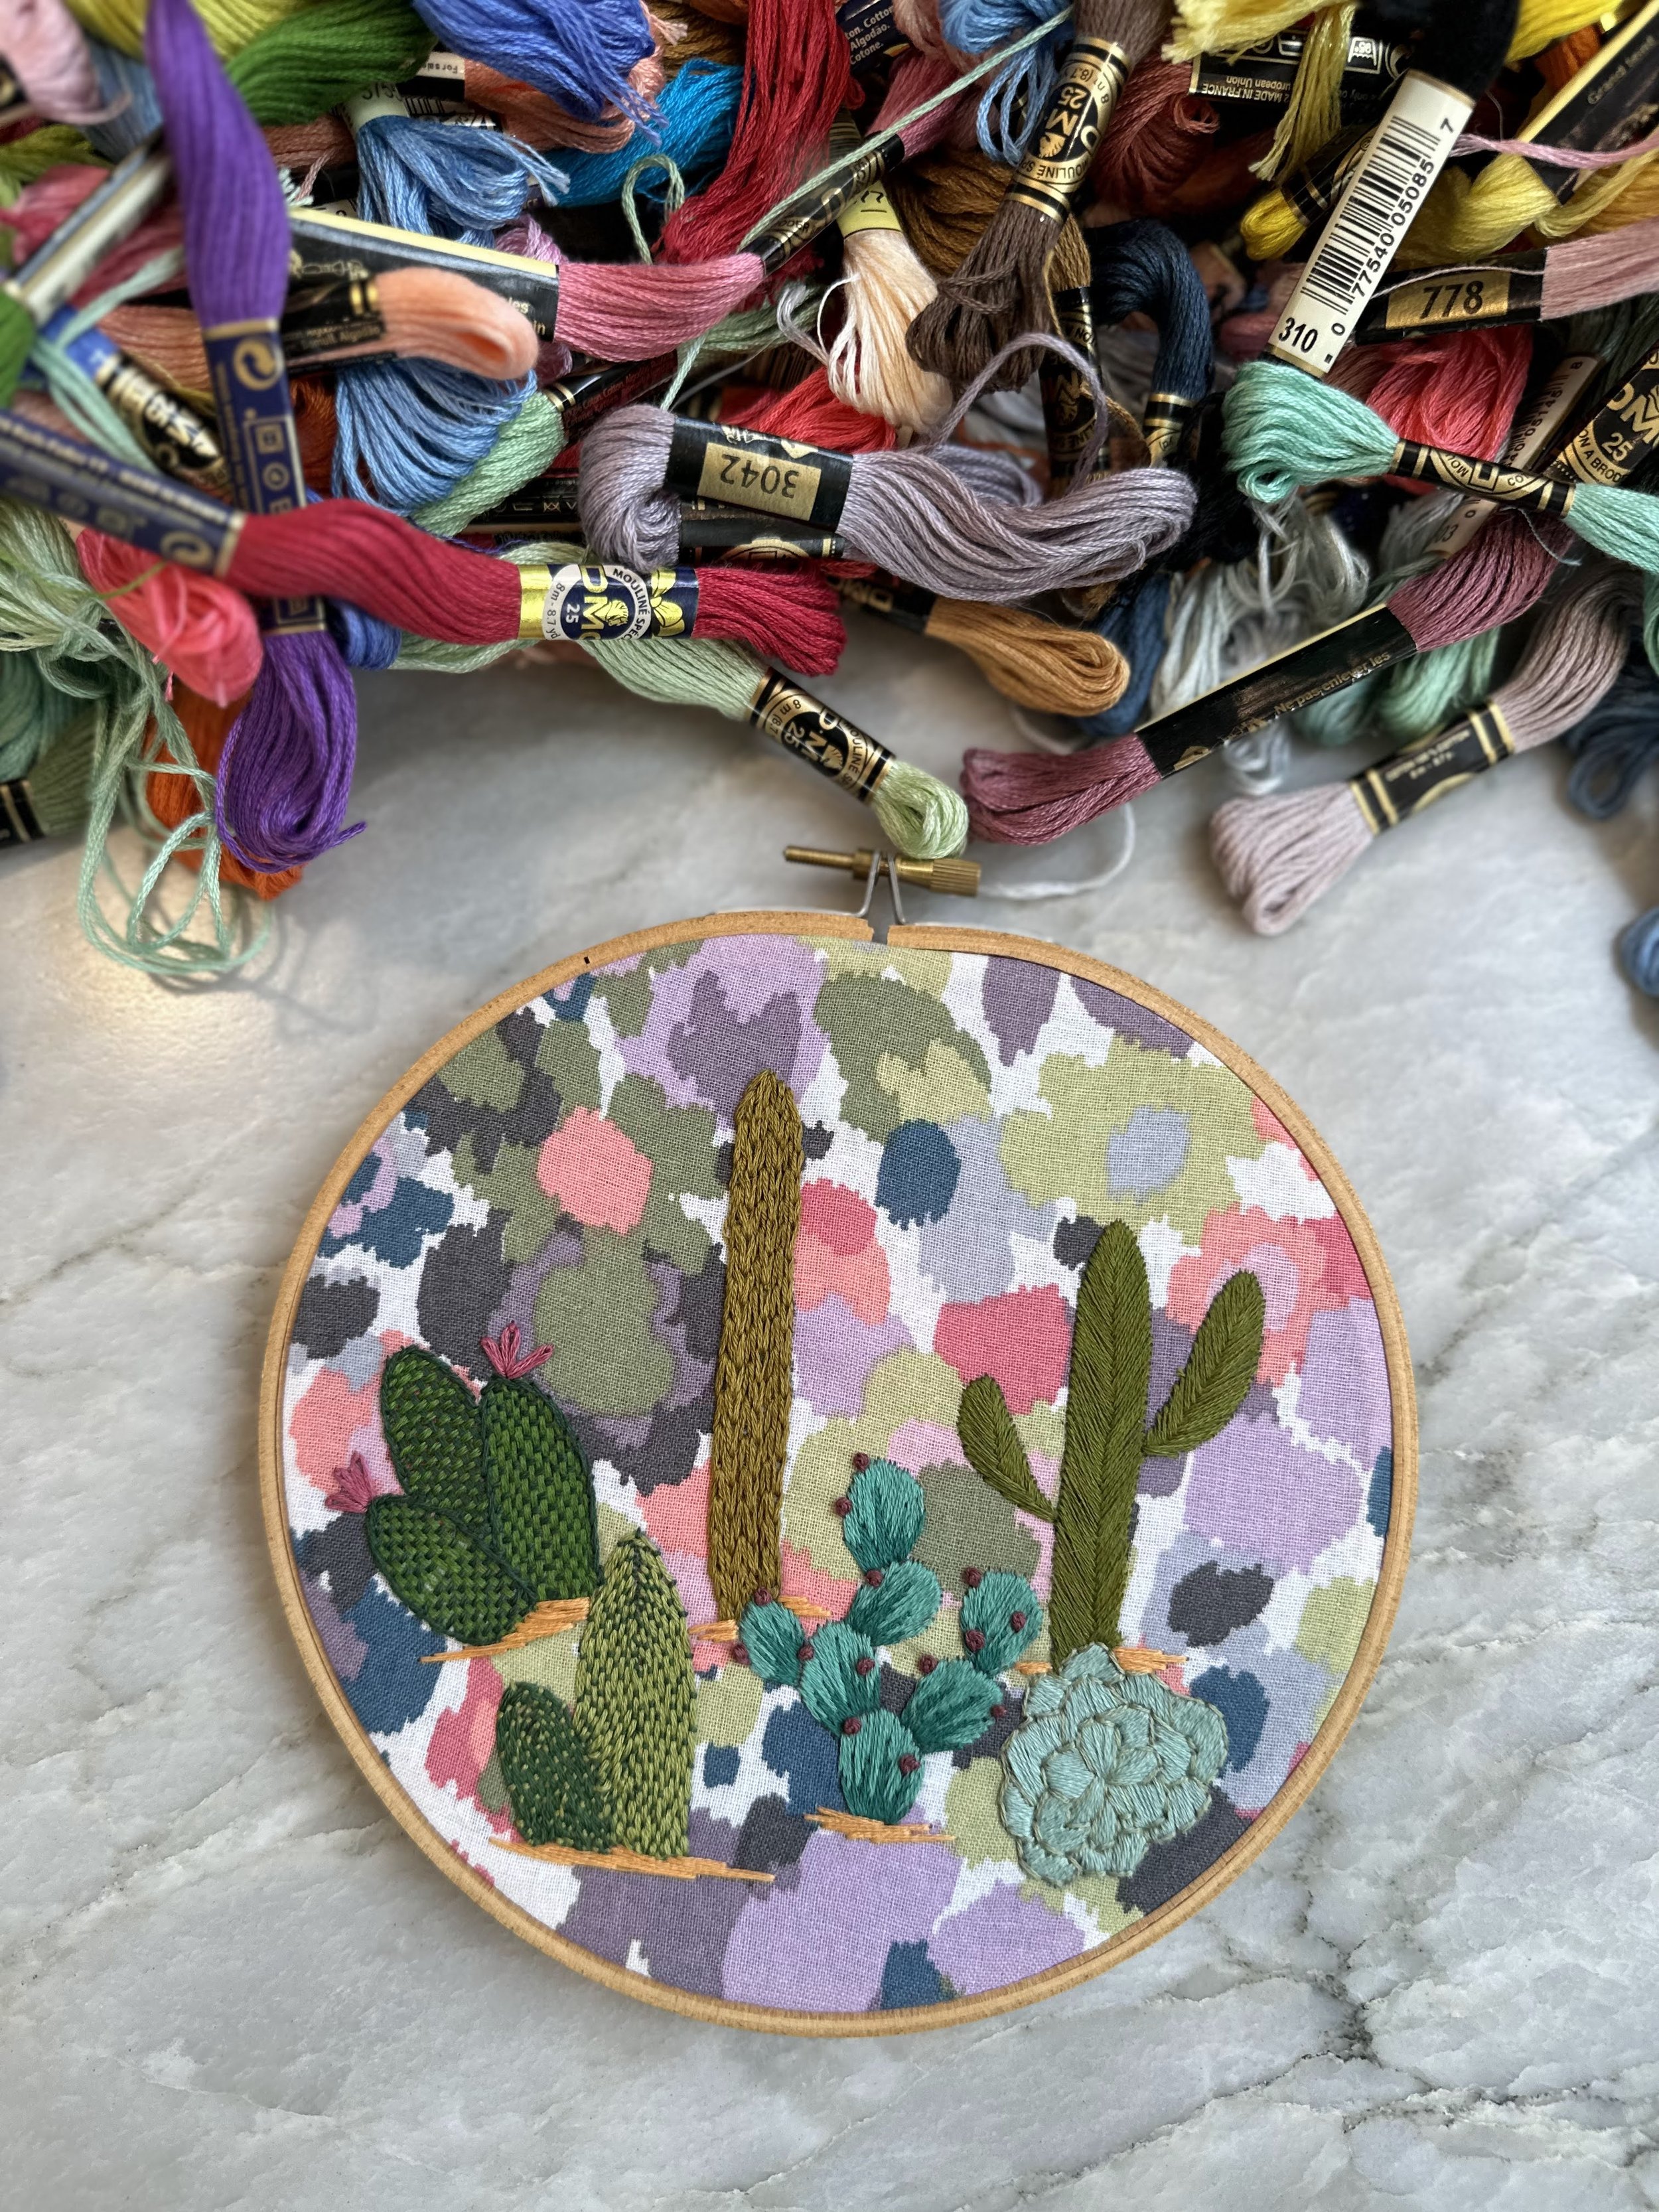
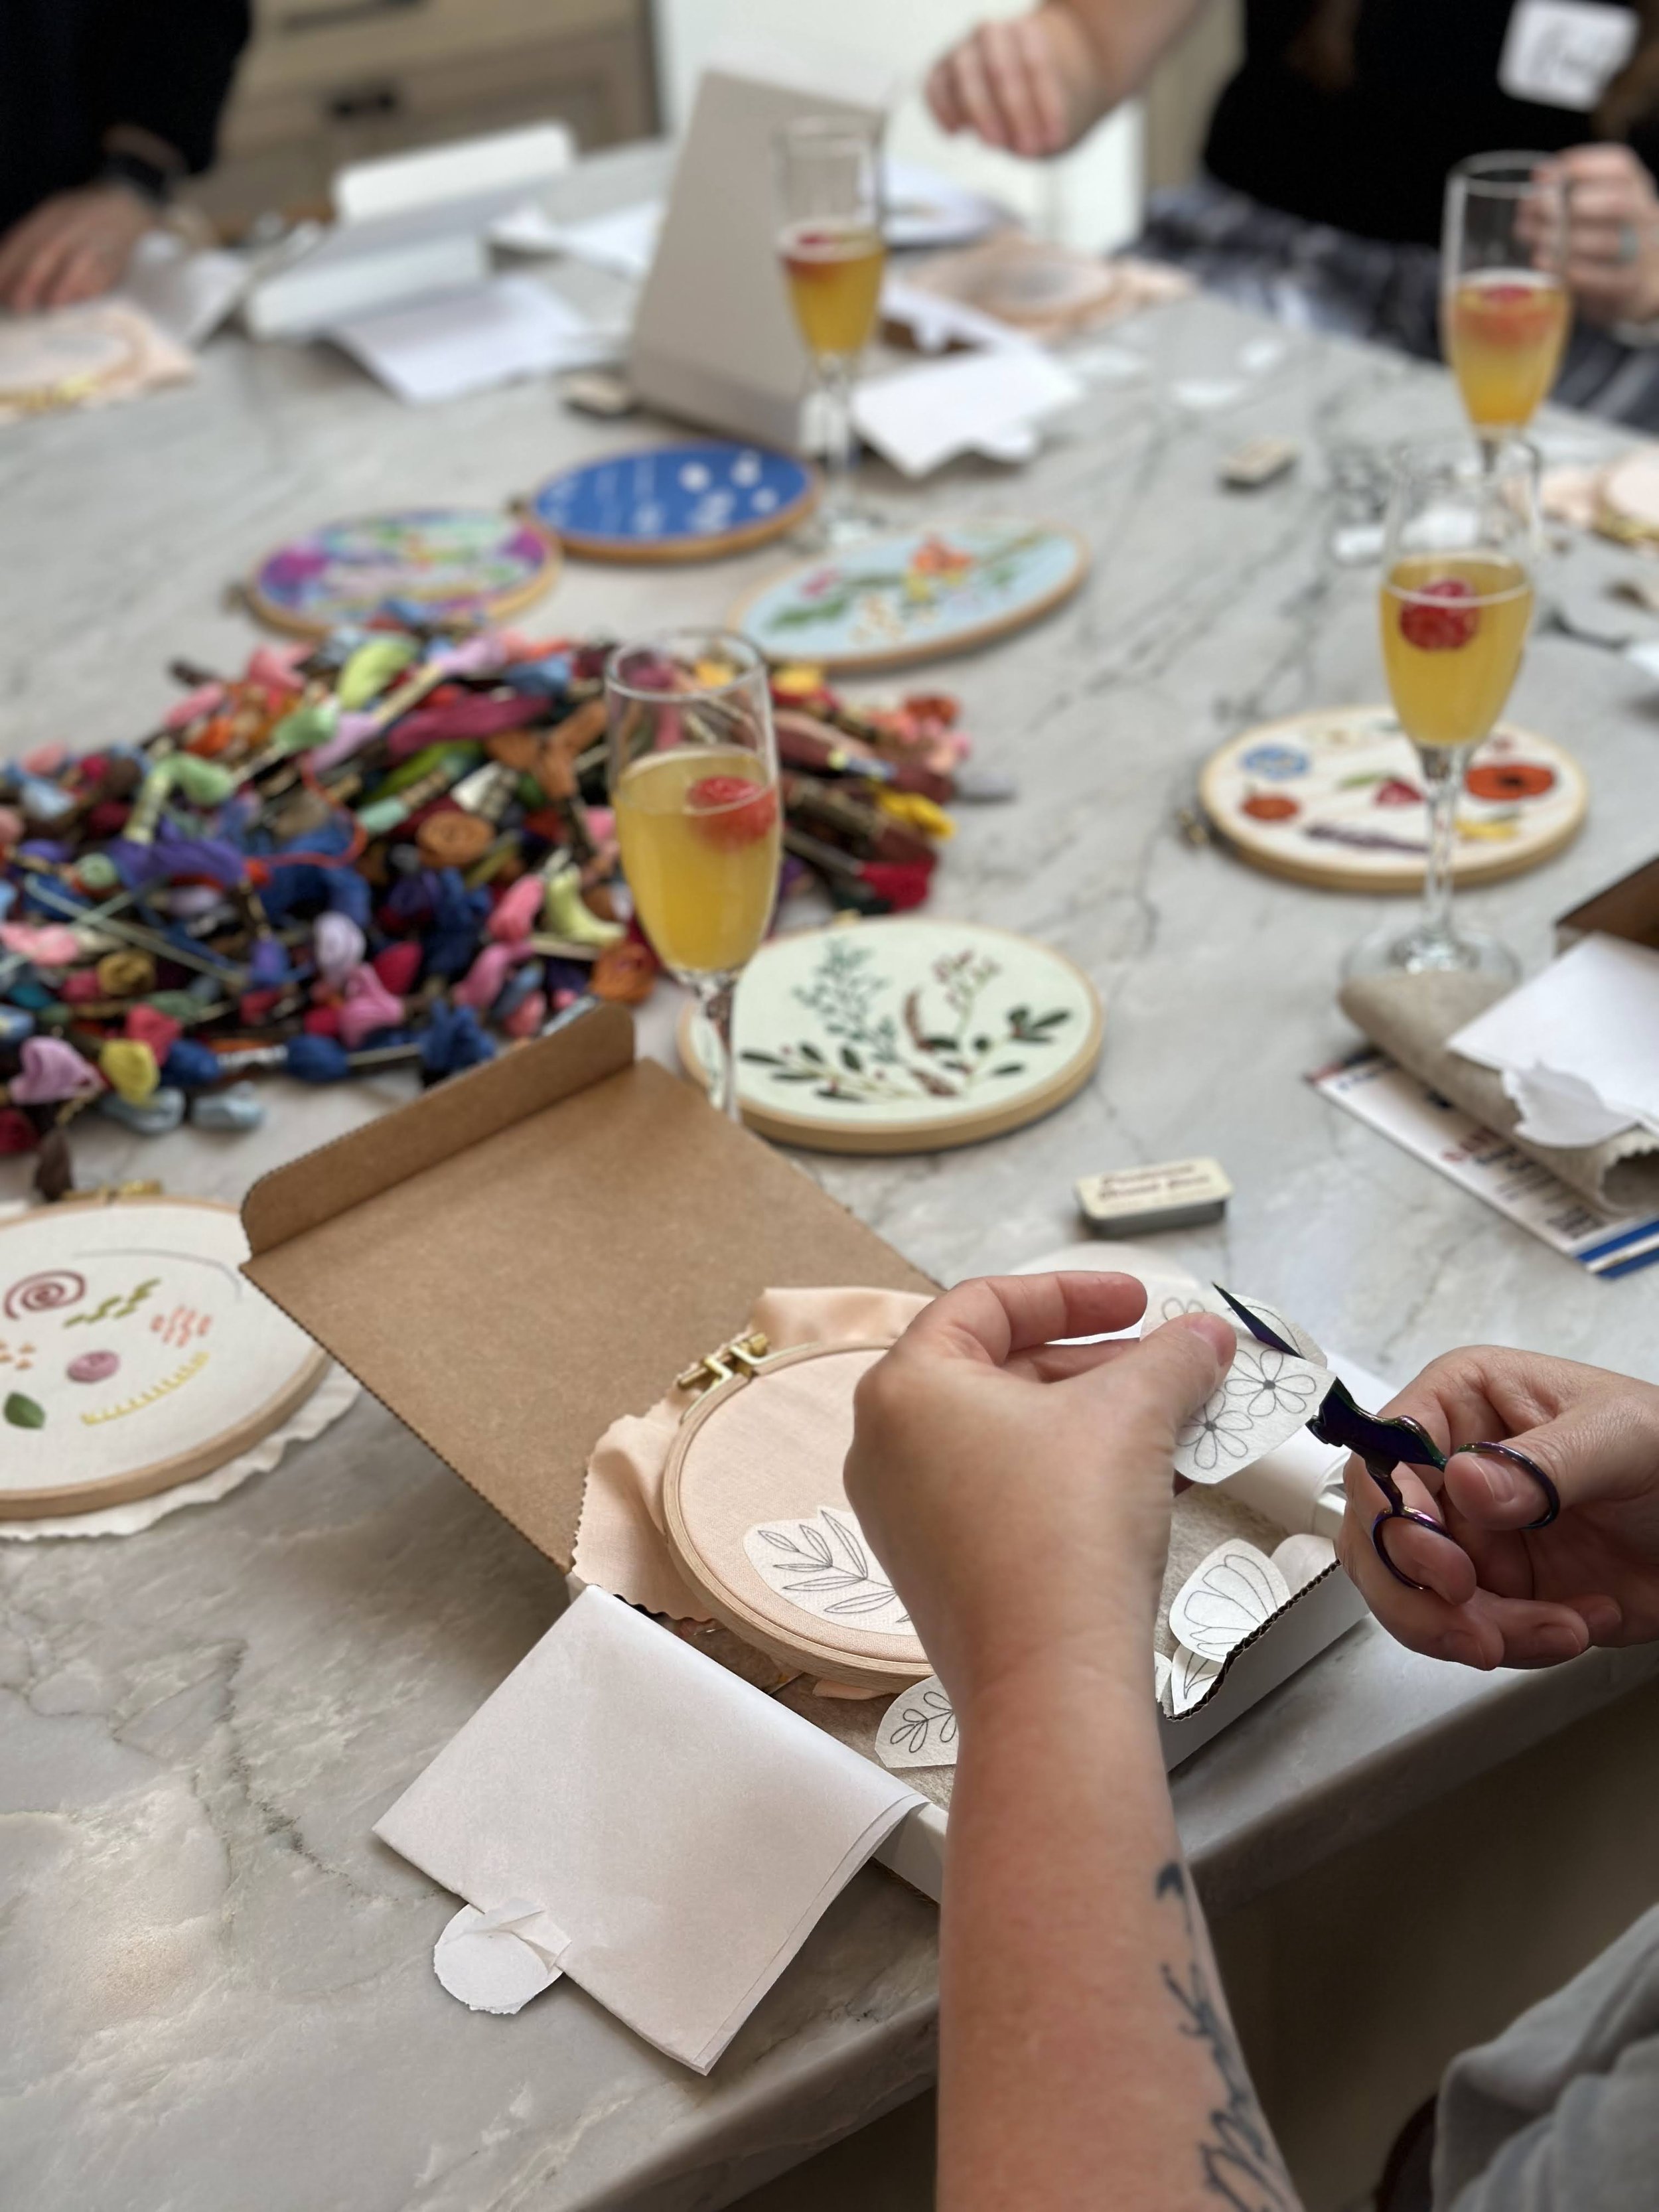
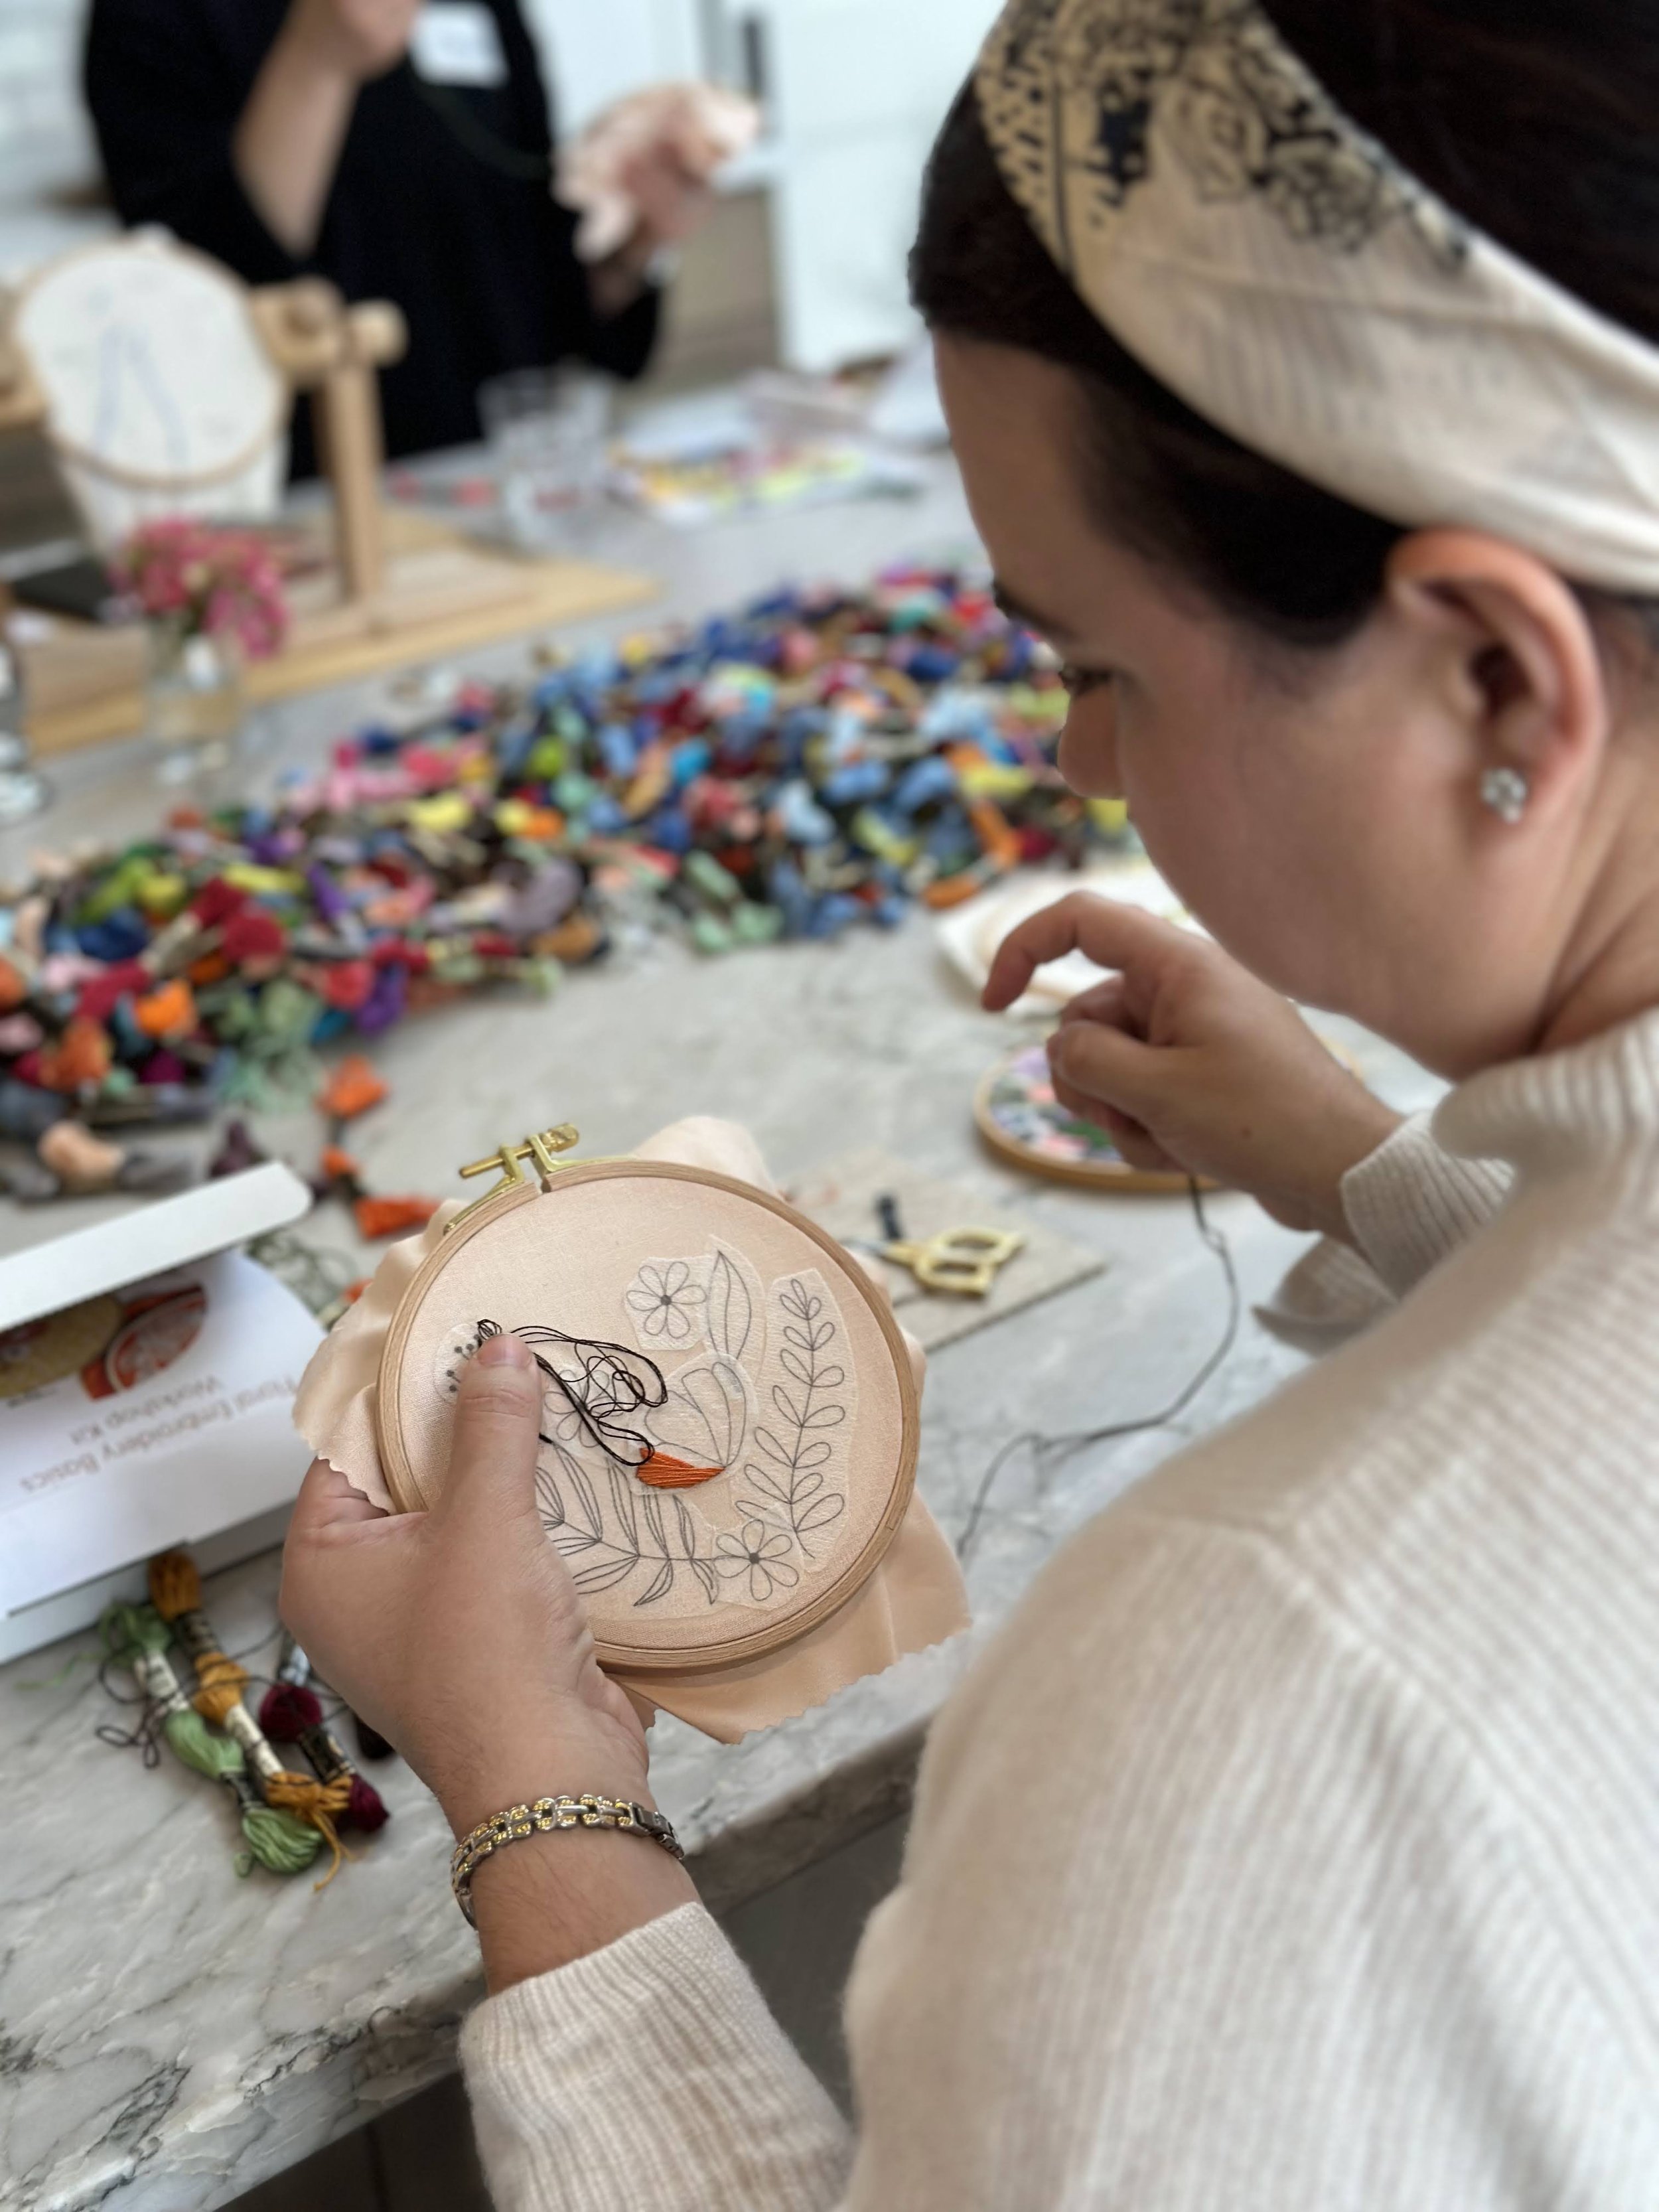
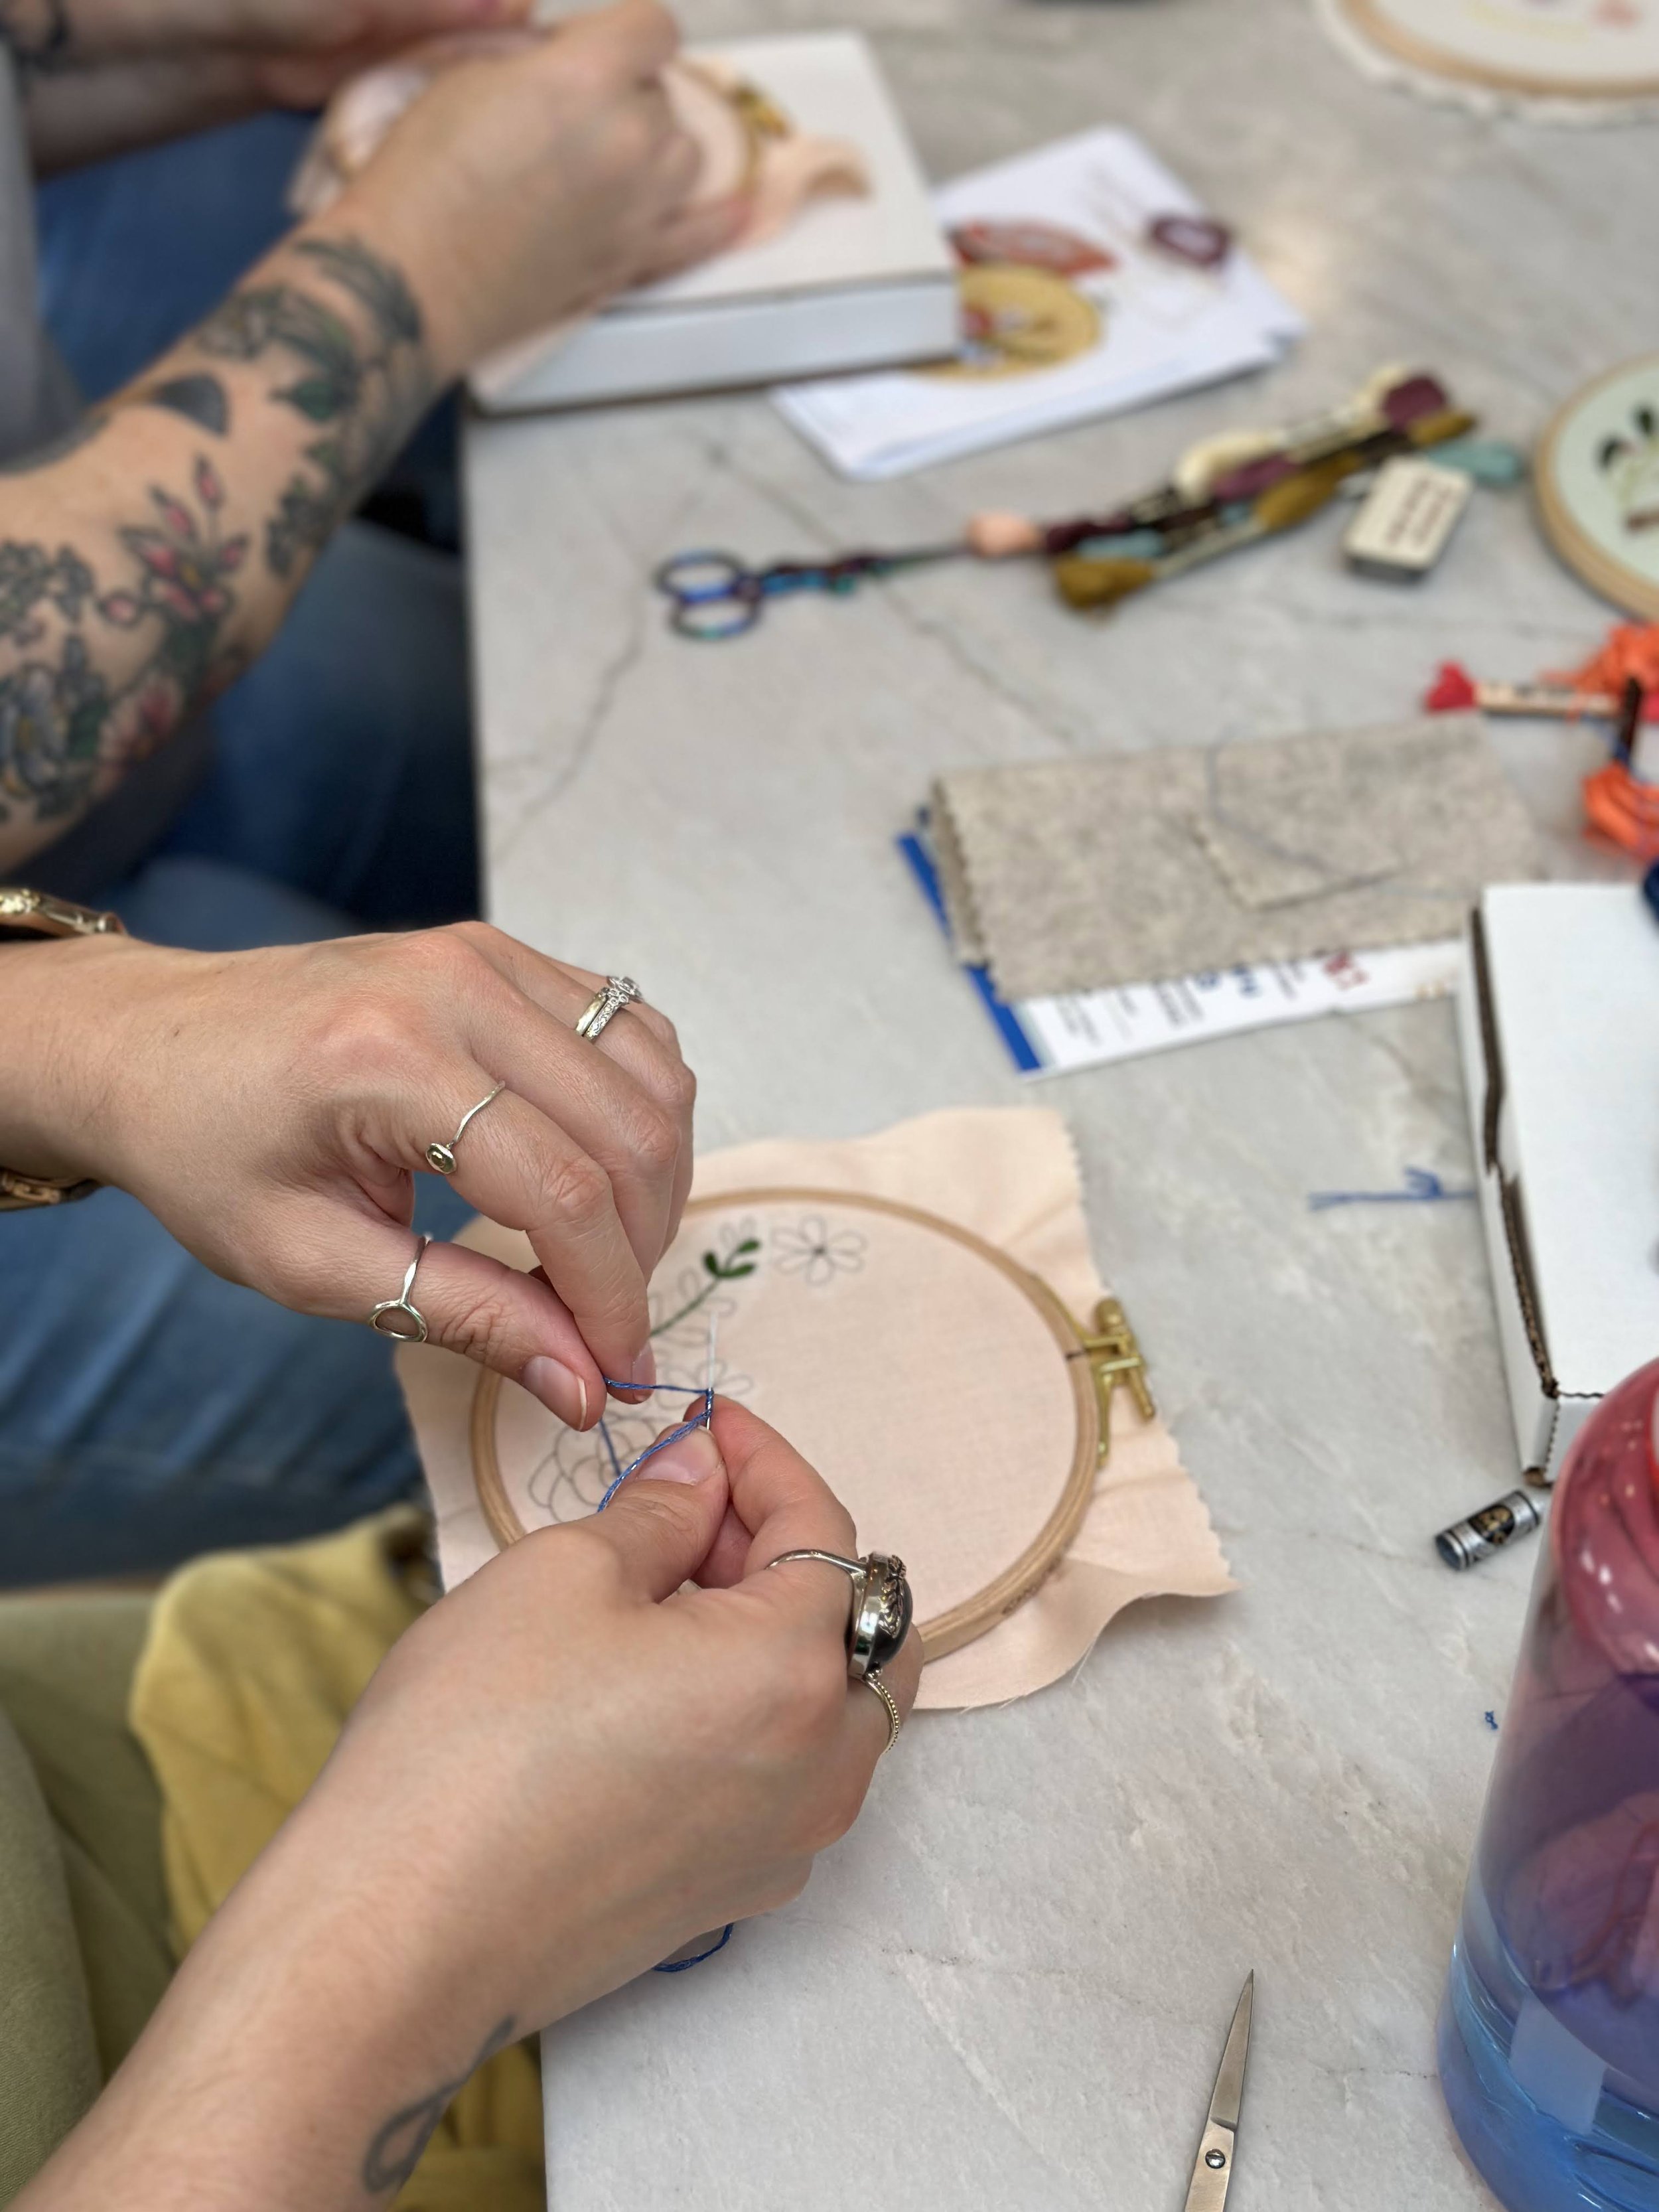
Our first step of the morning was for each guest to decide upon the floral design they wanted to stitch on their hoop. Each kit came with peel-and-stick flower drawings, so you could experiment with different designs before stitching. Once attendees were happy with the layout of their design they peeled the sticky backing off their floral motifs and stuck them to the fabric. The transfer paper is water soluble so it will wash away once the project is completed.
Embroidery time! With our designs finalized, we were eager to learn the basics of stitching. Melissa taught us how to separate individual threads from our floss, use thread gloss to prevent knots and tangles, and tie a quilter's knot (our favorite—it feels so magical!). She also explained how to choose the right number of threads for our projects, depending on the thickness of the fabric and the desired stitch texture. Thicker fabrics like denim and cotton can handle thicker threads, while thinner fabrics like satin require fewer threads.
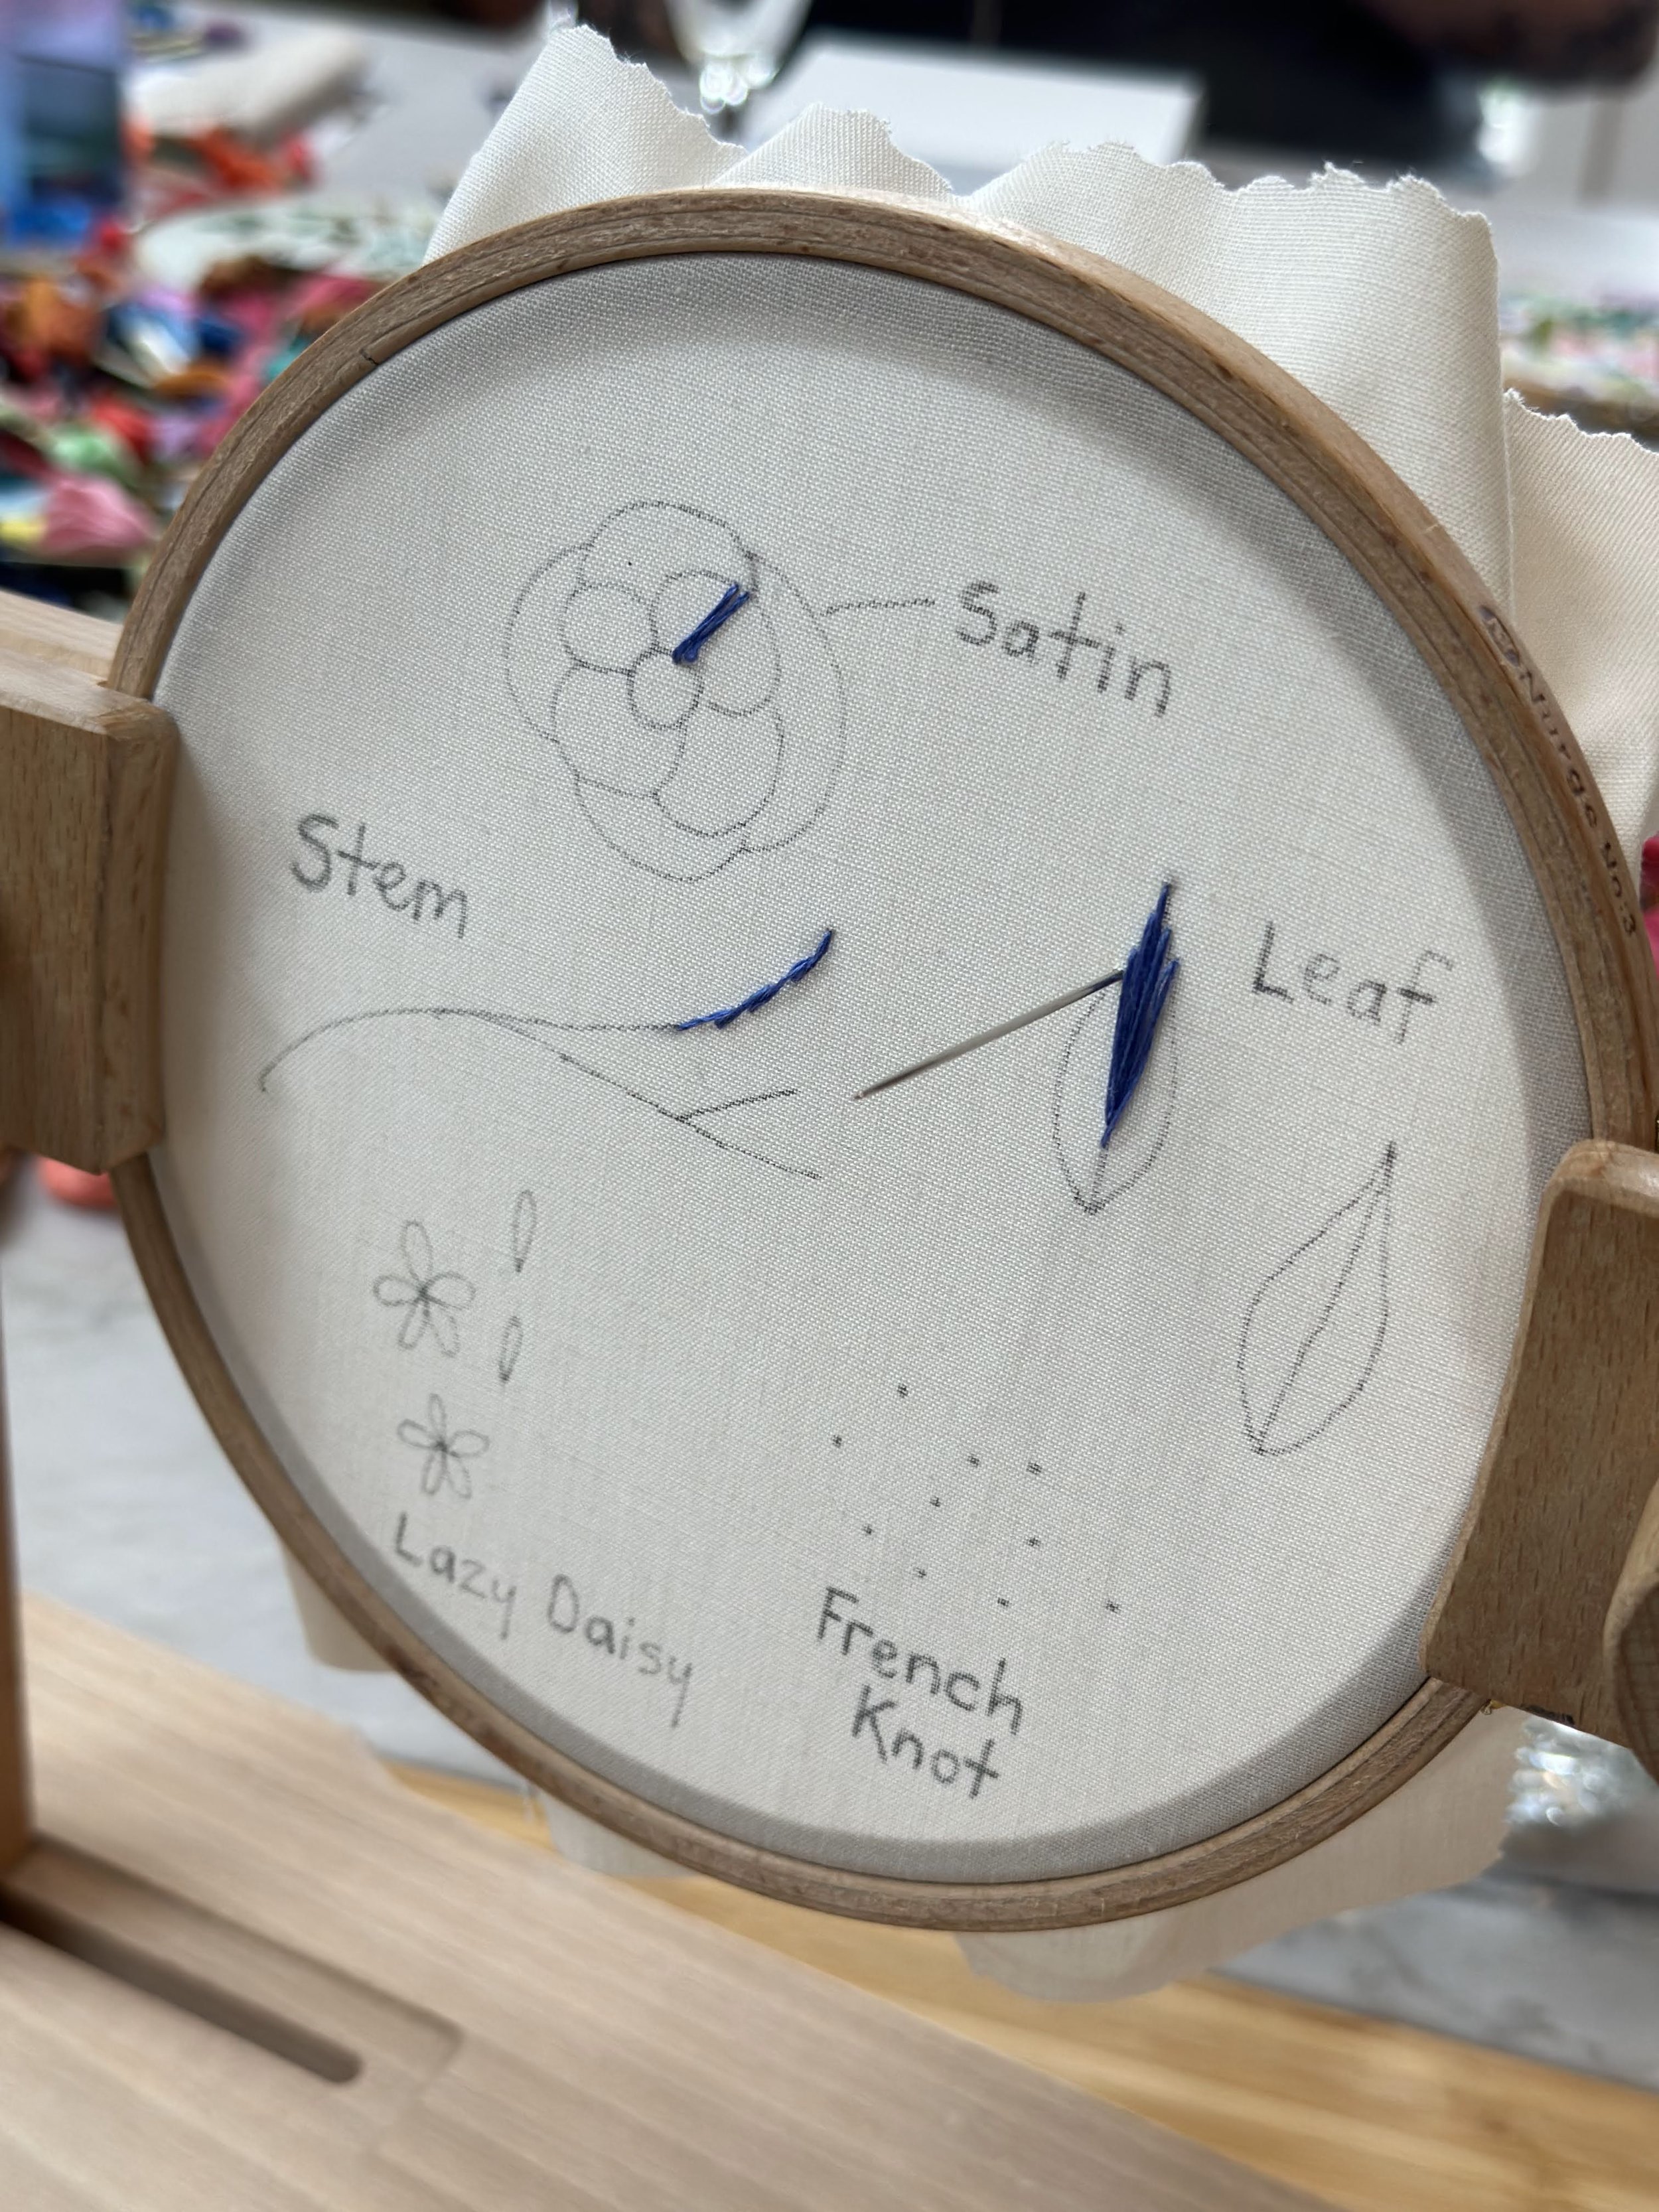
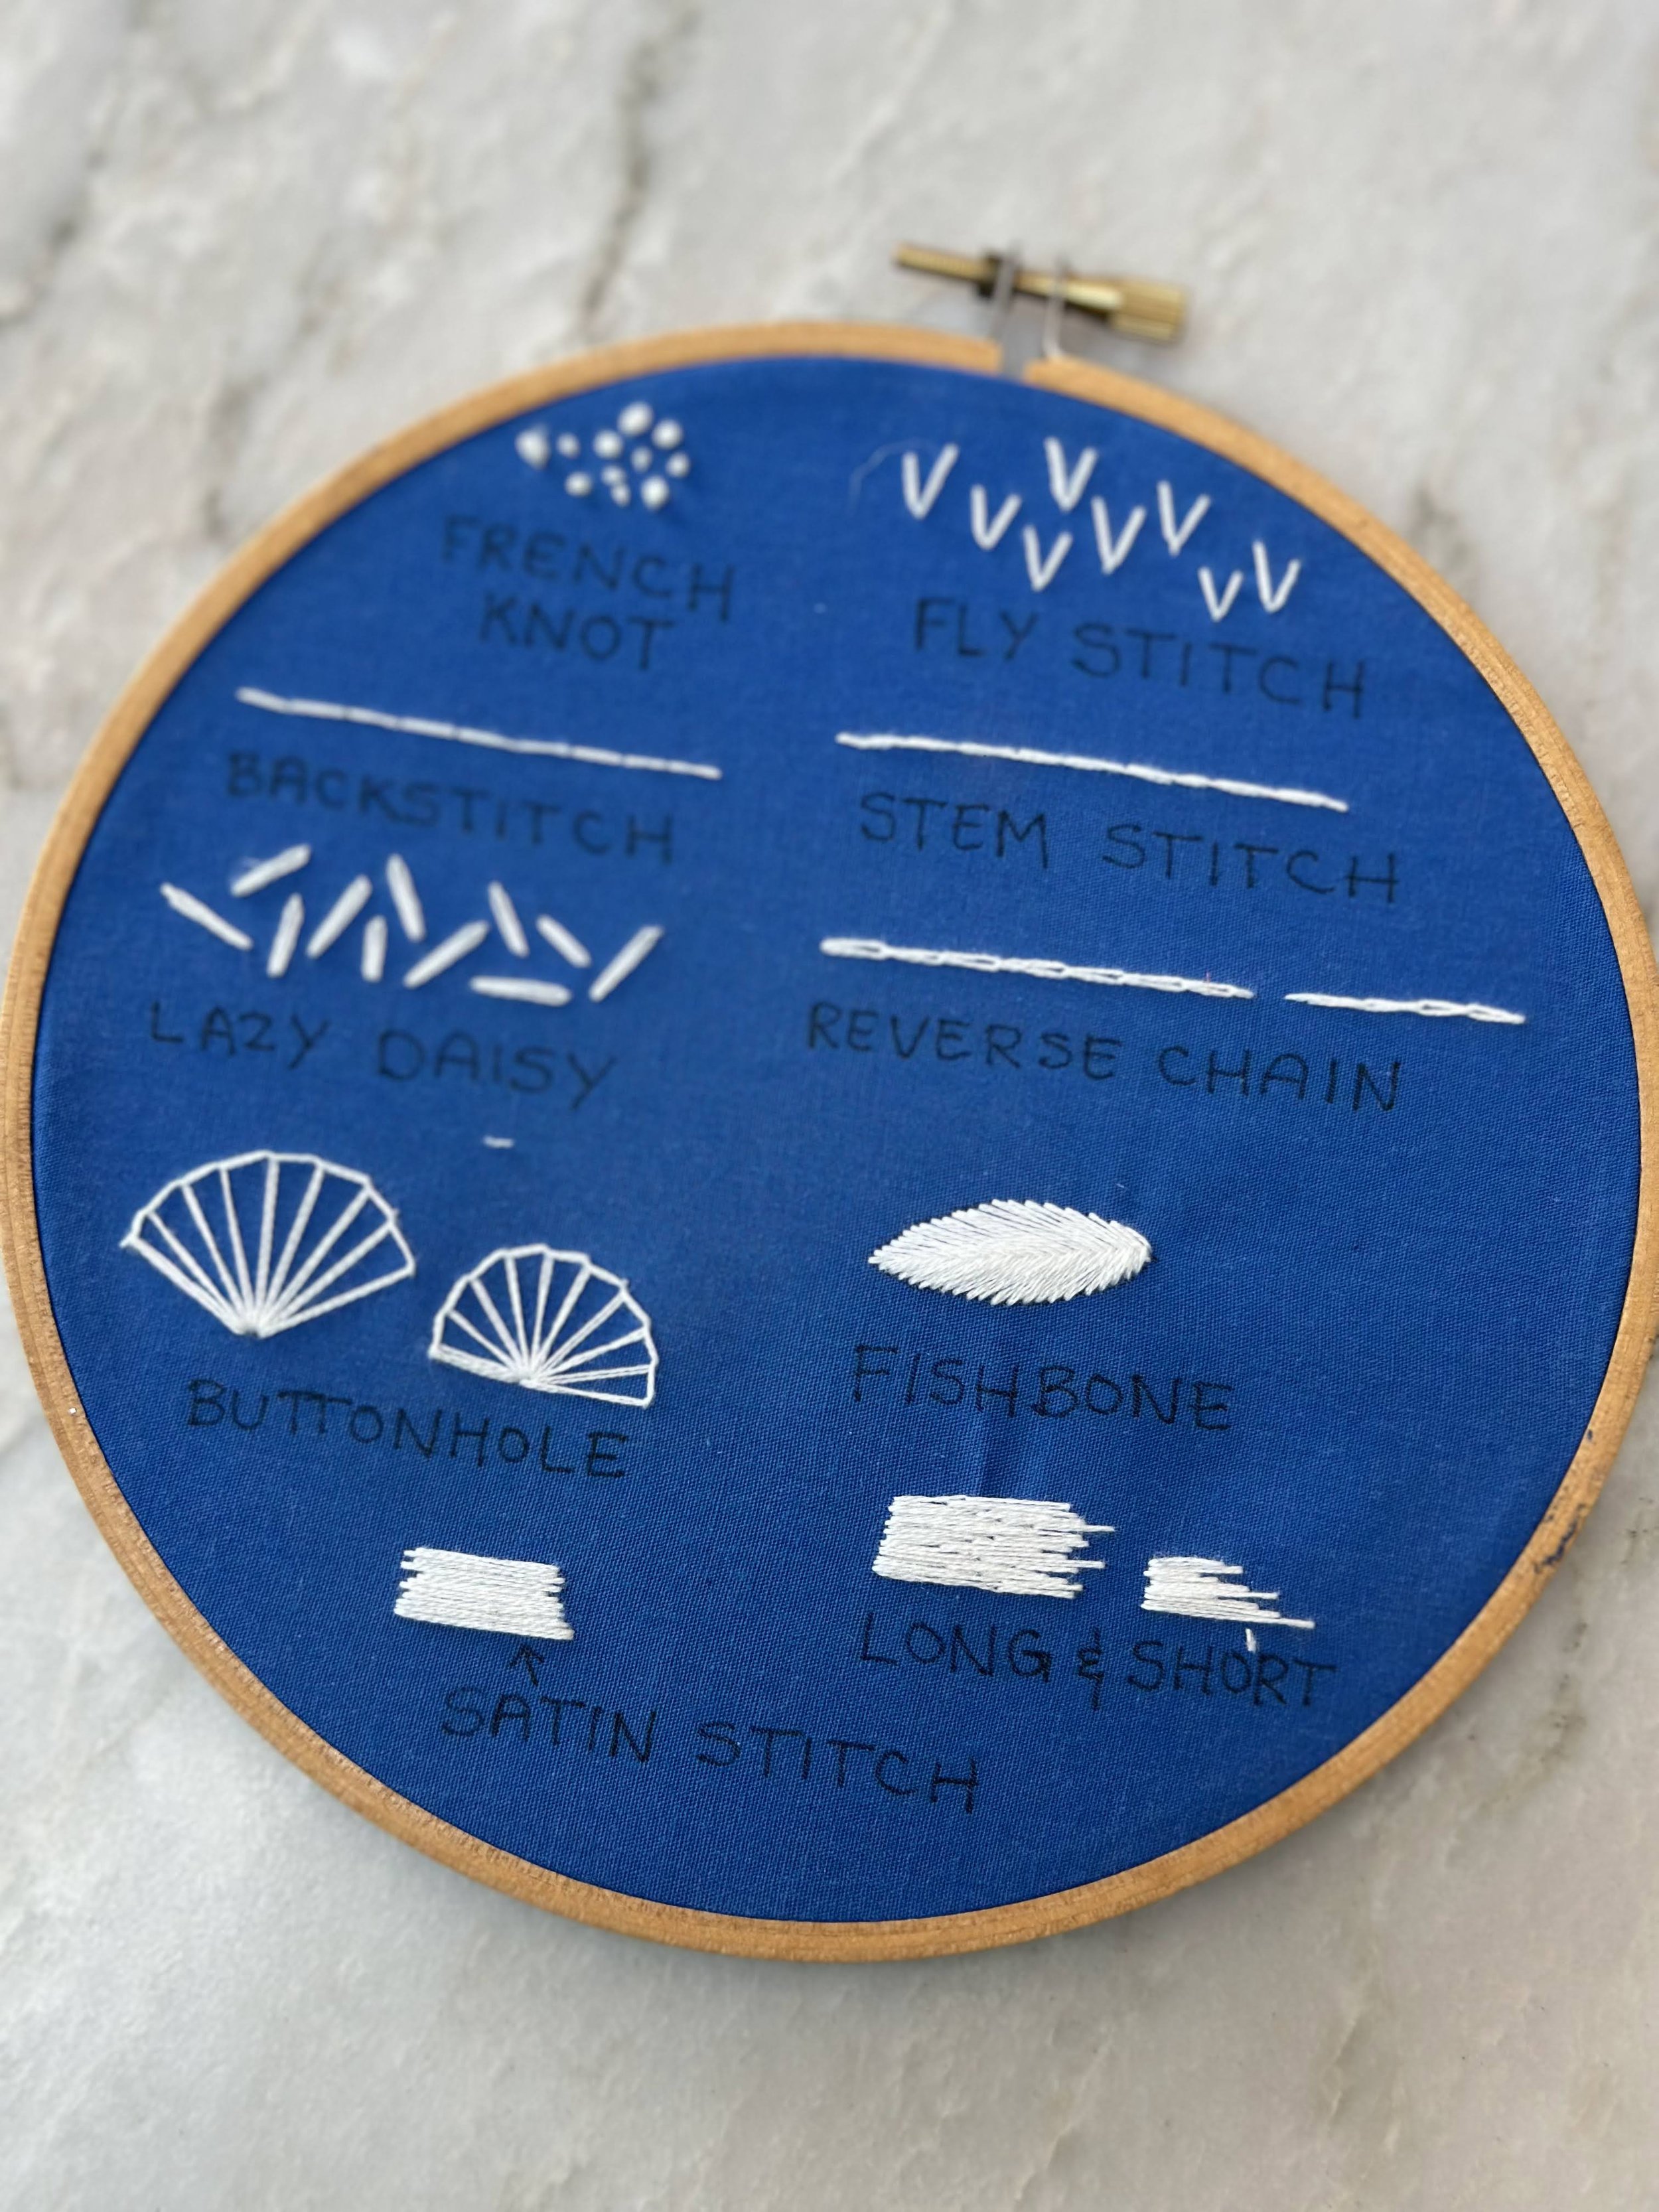
After mastering the quilter's knot, we learned the satin stitch, a great stitch for filling in large spaces like leaf petals. Next, we learned the slip knot, used for tying off your thread when switching floss colors. Moving on, we mastered the stem stitch, perfect for stems or outlining, and the leaf stitch, ideal for pointier leaves. We ended the morning by learning the French knot. We've provided full tutorials on each of these knots and stitches below—read on for all the details!
Melissa’s tips and tricks:
The number of threads you use for each stitch will depend on the texture of the stitches you’d like to achieve. Thicker materials hold up to thicker thread (like denim), while thinner materials like satin or cotton won’t hold up as well.
Thread Gloss helps you stick your threads together once you’ve separated them. You can wax the whole thread. The gloss acts as a conditioner which will help prevent tangles in your thread.
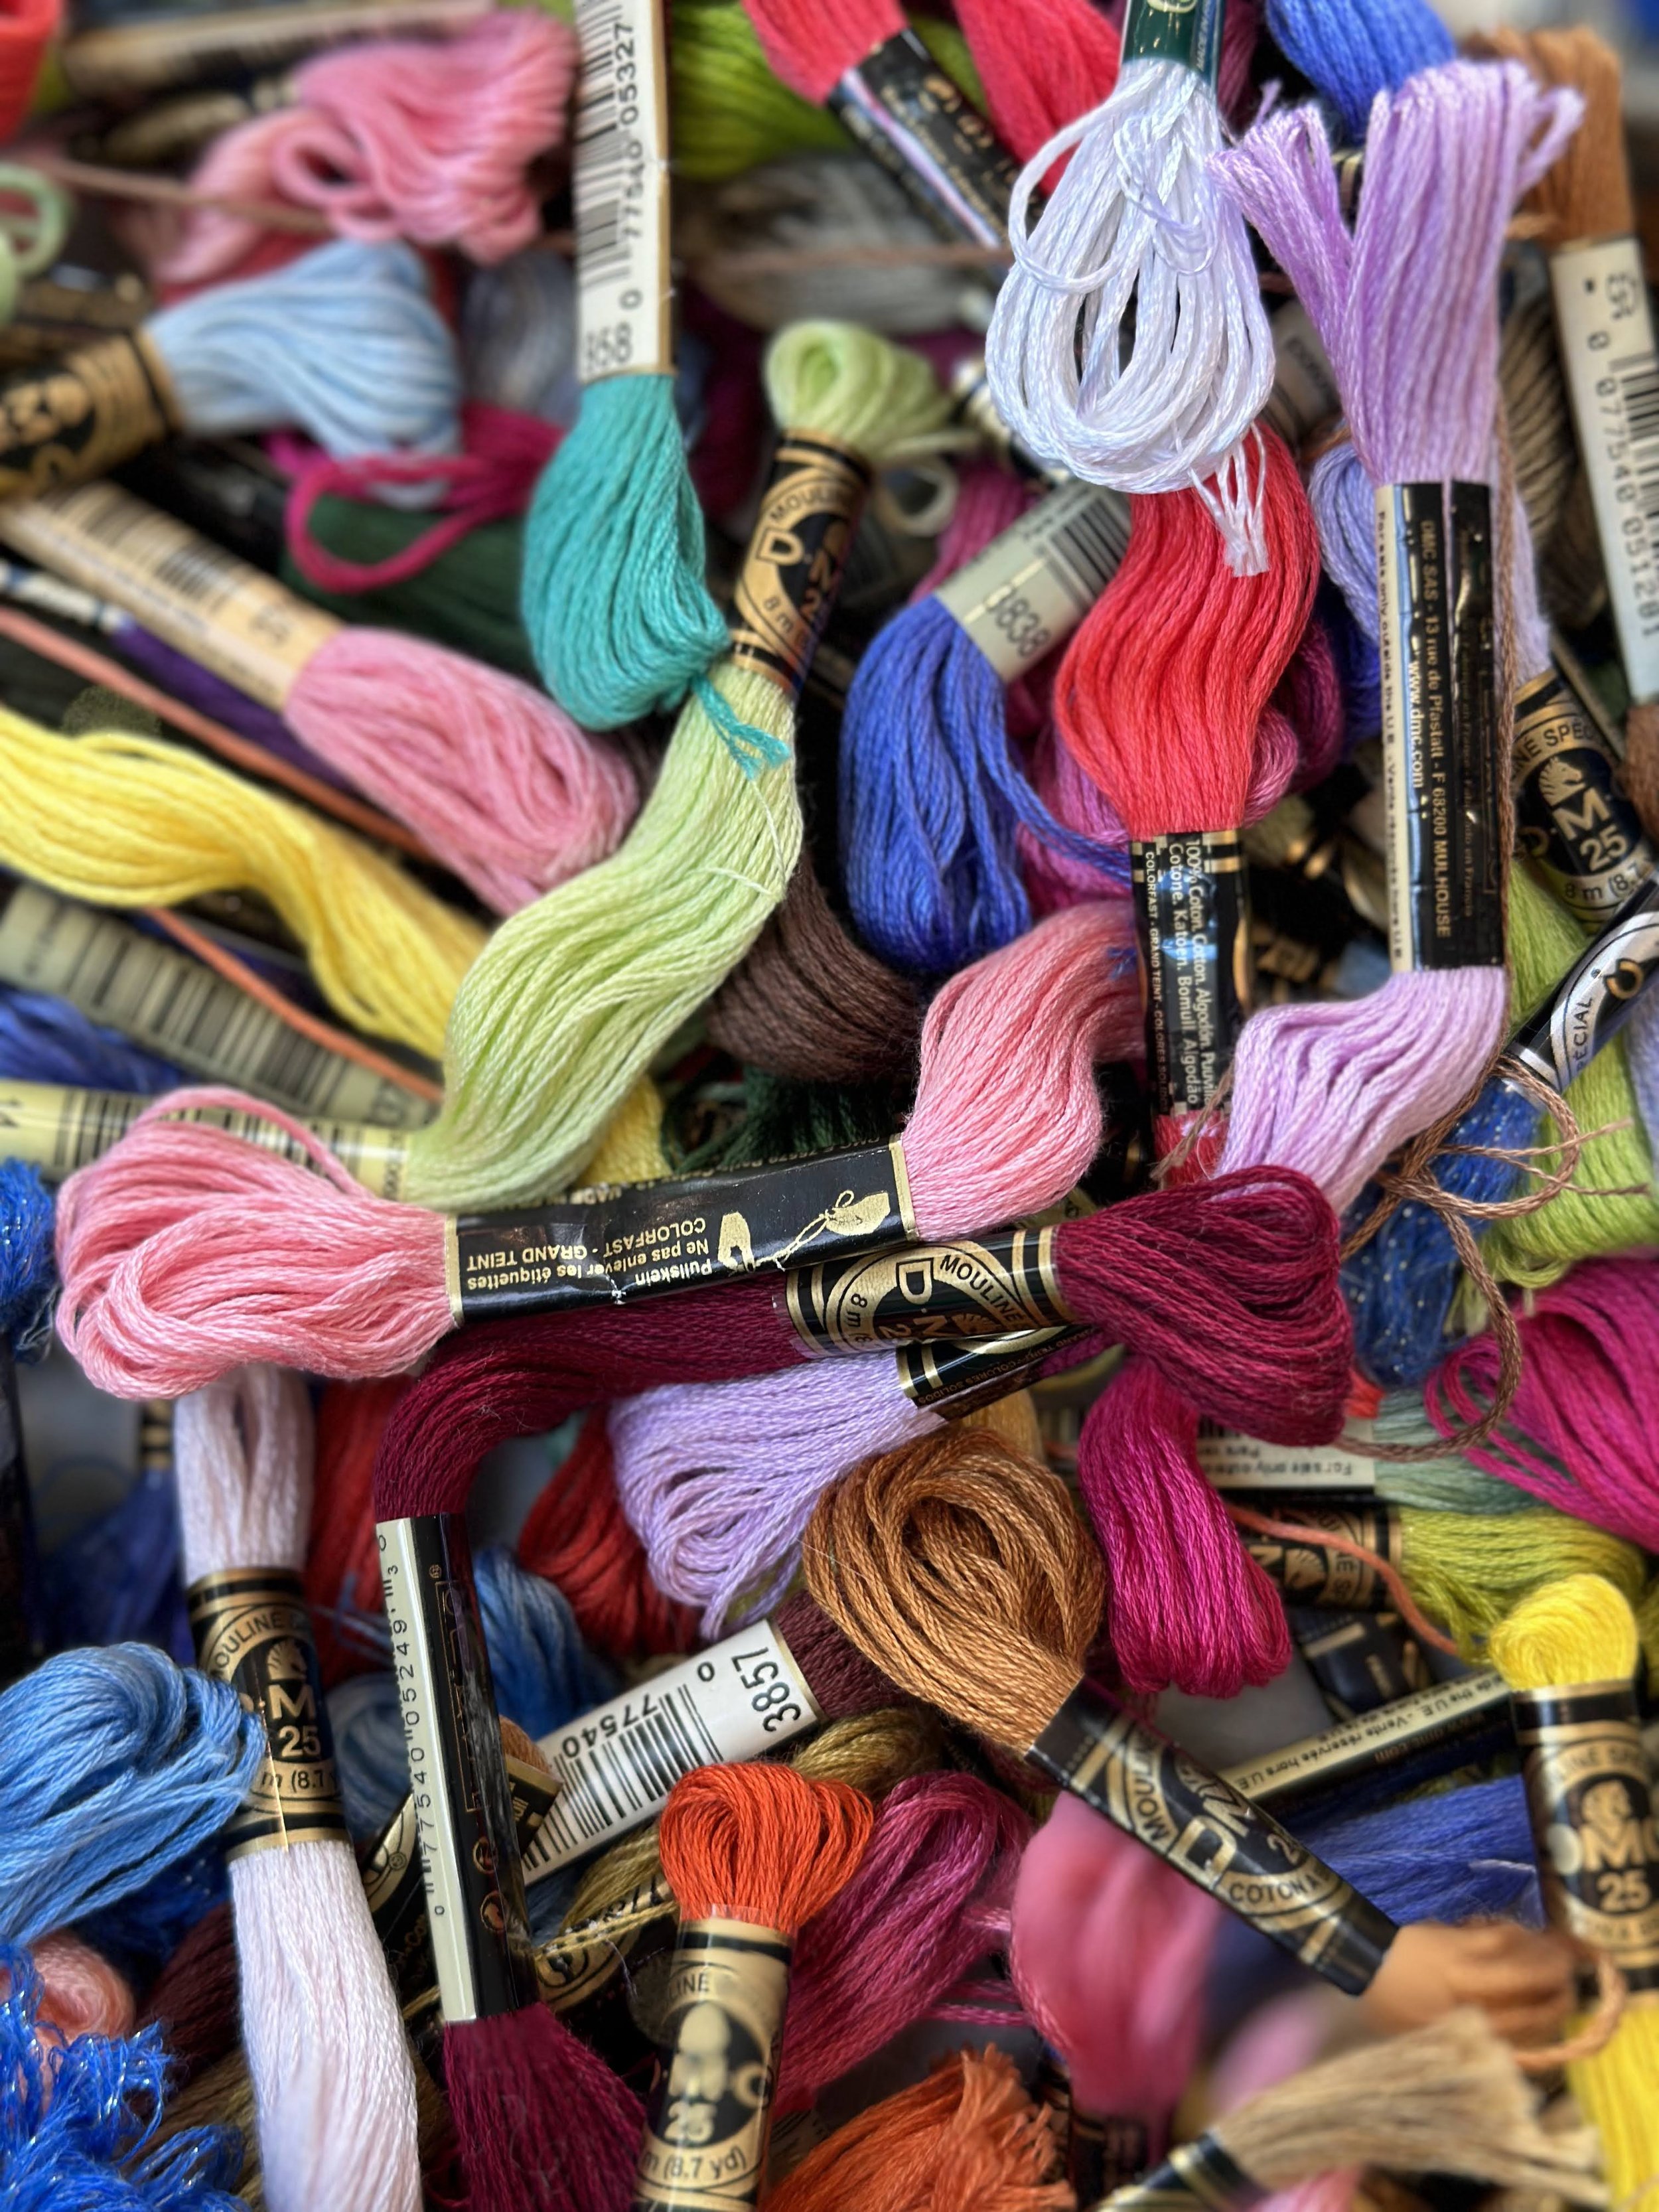
When getting thread from a new skein simply hold onto the sticker portion and pull out an arm’s length of thread (keeping the sticker on your skein will prevent it from getting tangled).
To separate out individual threads from a skein pull out one thread at a time. Let the threads bunch as you pull each out, then straighten out your thread and pull out the next. Taking out one thread at a time generally prevents tangling.
Sometimes you can accidentally create a slip knot while working. You can usually loosen it by sticking your needle in the loop.
Three threads is a great “go to” stitch thickness if you’re ever unsure!

India’s Grandma’s Blueberry Buckle Recipe
Batter: 3/4 cup sugar, 1/4 cup unsalted butter, softened, 1 egg, 1/2 cup milk, 2 cups AP flour, 2 tsp. baking powder, 1/2 tsp. salt, 2 cups blueberries
Topping: 1/3 cup AP flour, 1/2 cup sugar, 1 tsp. cinnamon, 1/4 cup unsalted butter, softened
Preheat oven to 350. Mix sugar, butter, and egg well in a standing mixer or with electric egg beaters. Beat in milk. In a separate bowl, combine dry ingredients. Add dry ingredients slowly to the wet ingredients while mixing on low. Turn mixer off and fold in blueberries with a spatula to distribute them throughout the batter while minimizing their breakage. Spread into a buttered loaf pan or divide evenly into a 12-cup muffin tin.
Crumble the topping ingredients together by hand until the texture resembles wet sand, then sprinkle on top of batter. Bake until a toothpick comes out clean (approximately 60 minutes if using a loaf pan or 40 minutes as muffins).
**Using tulip muffin cups is an easy way to dress up your baked goods (product linked below).

Each of our guests received a full floral embroidery kit that included floral transfer designs. The designs peel off from their backing so that you have flexibility to place them anywhere on your fabric for a completely custom design. They are water soluble and will wash away when your project is finished.

Unique floral creations, all from the same starting point! Every guest's embroidery hoop was a unique reflection of their creativity, even though everyone started with the same flower peel-and-stick cut-outs.
“I love seeing that ah-ha moment when learning something new clicks and you start to fall in love with it.”

The first stitch we learned was called the satin stitch. This stitch is great for filling in larger spaces like petals of a flower or leaves.


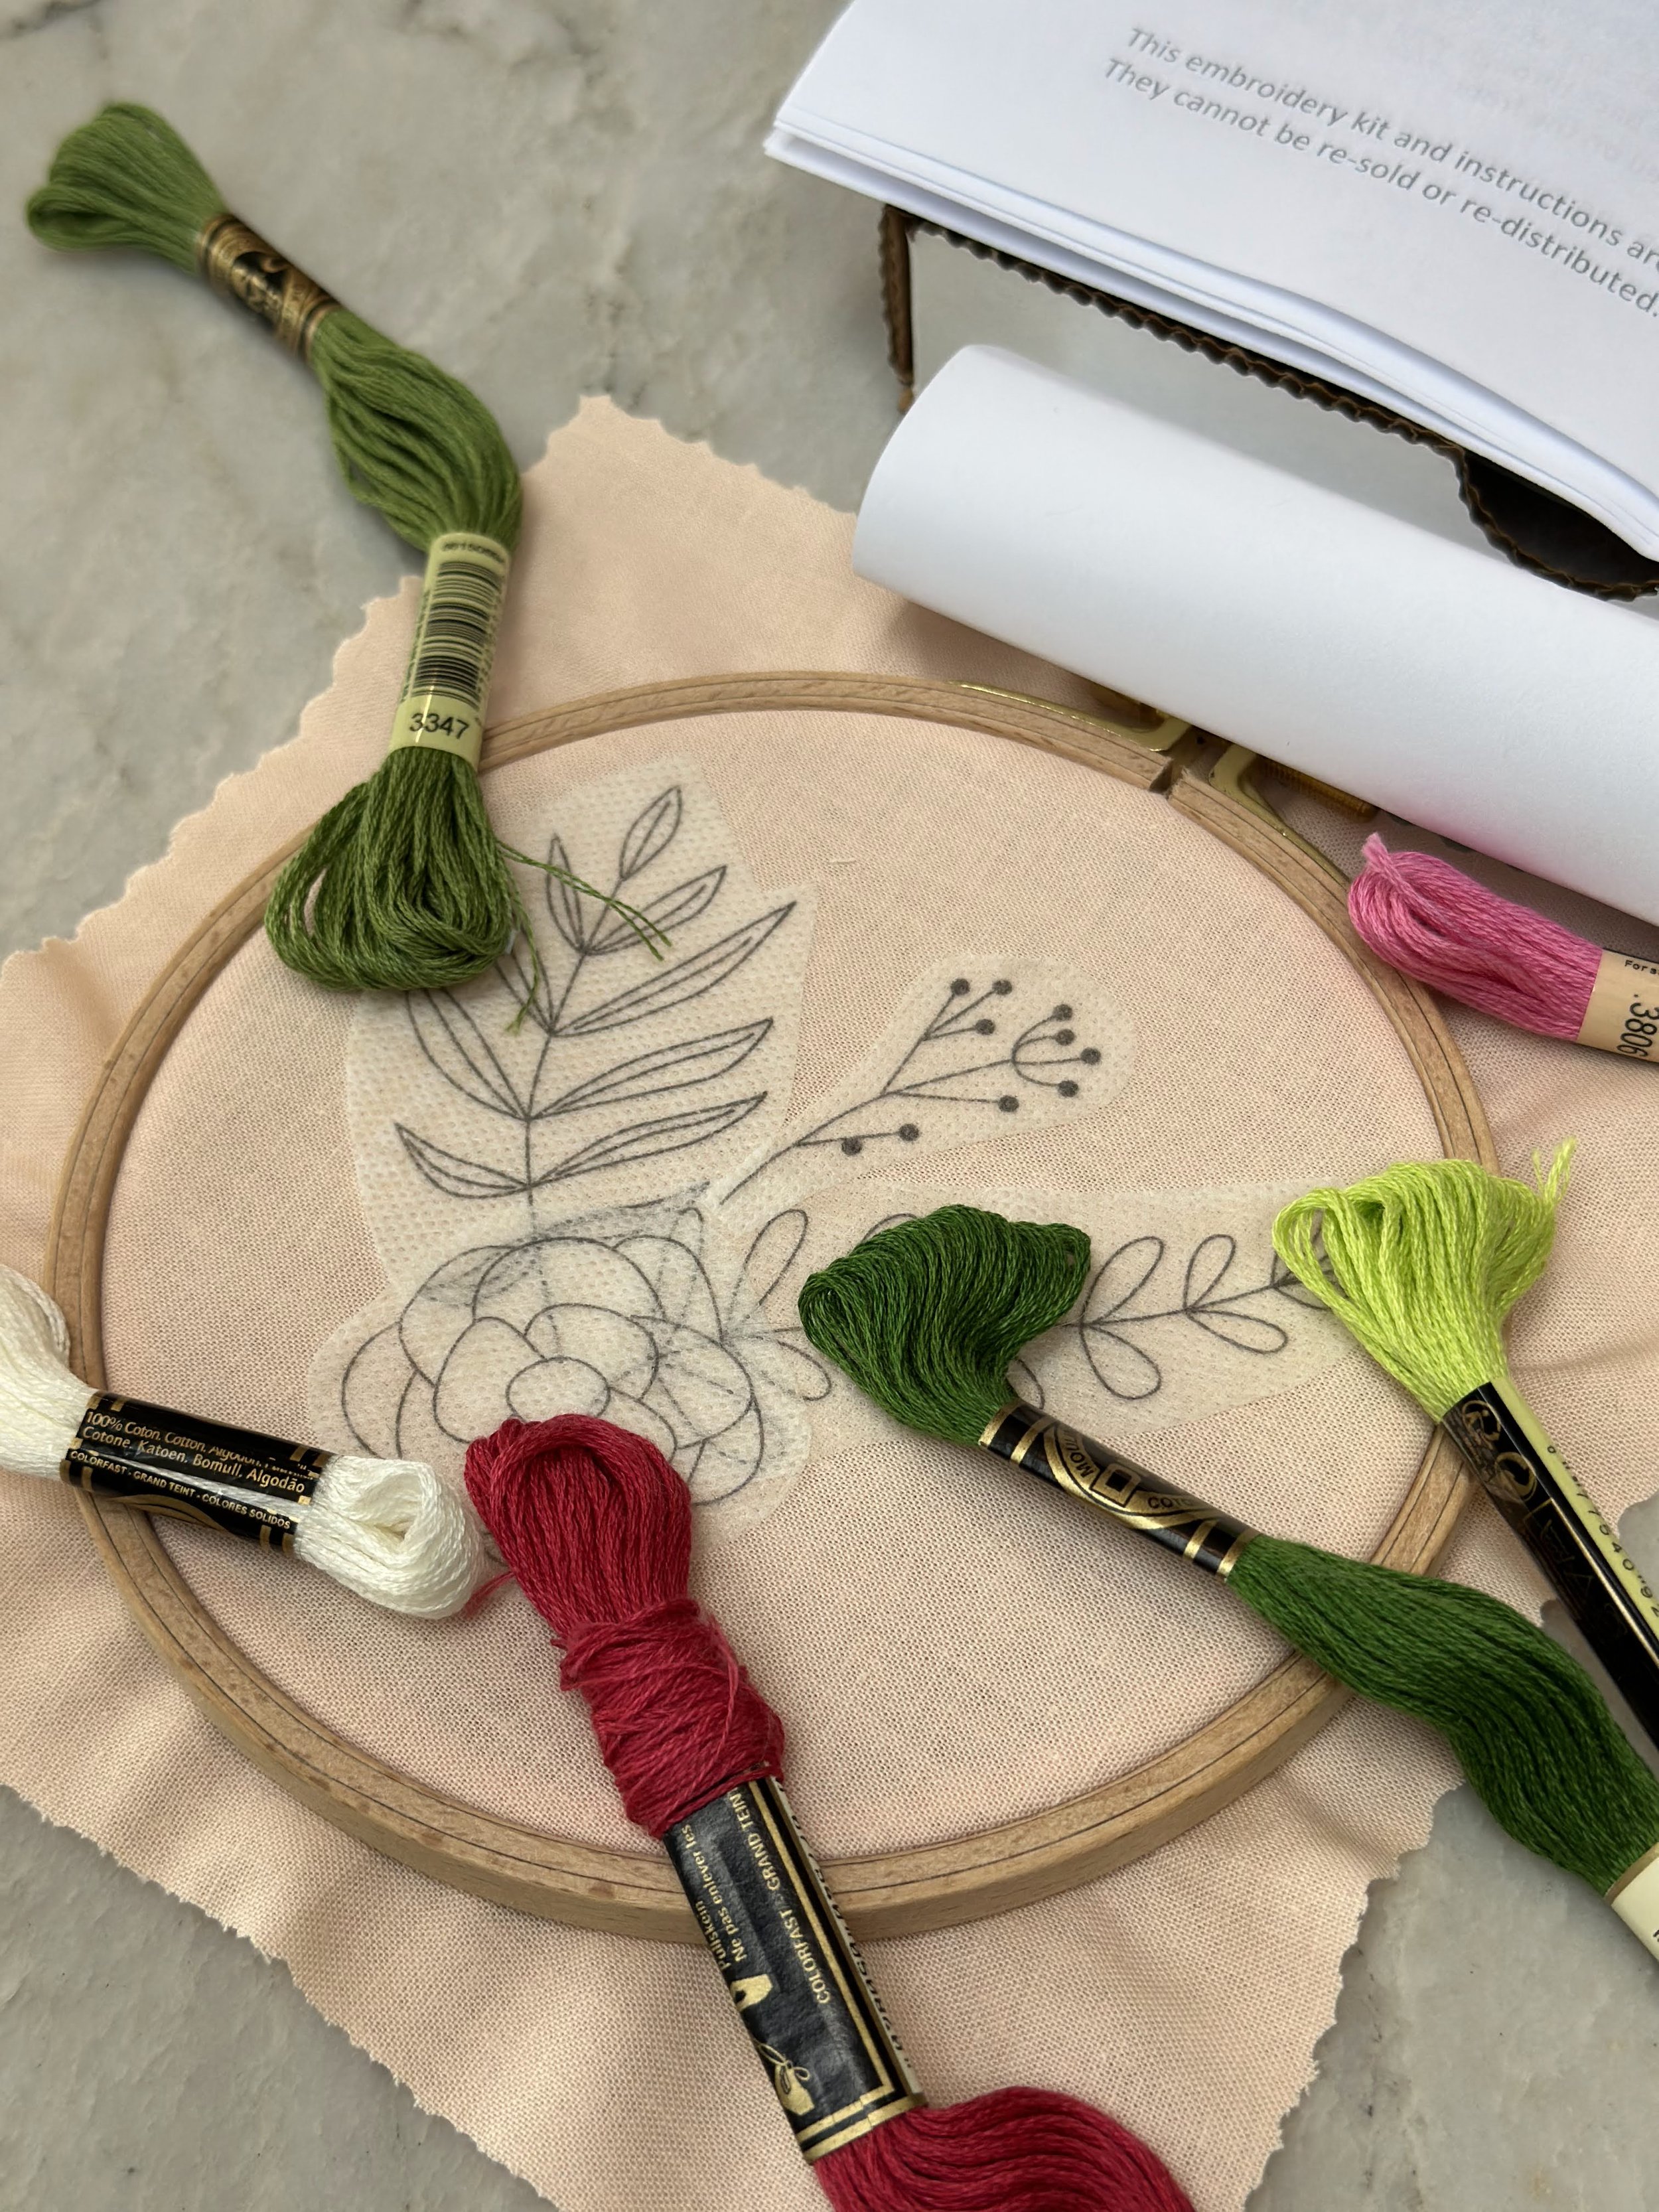
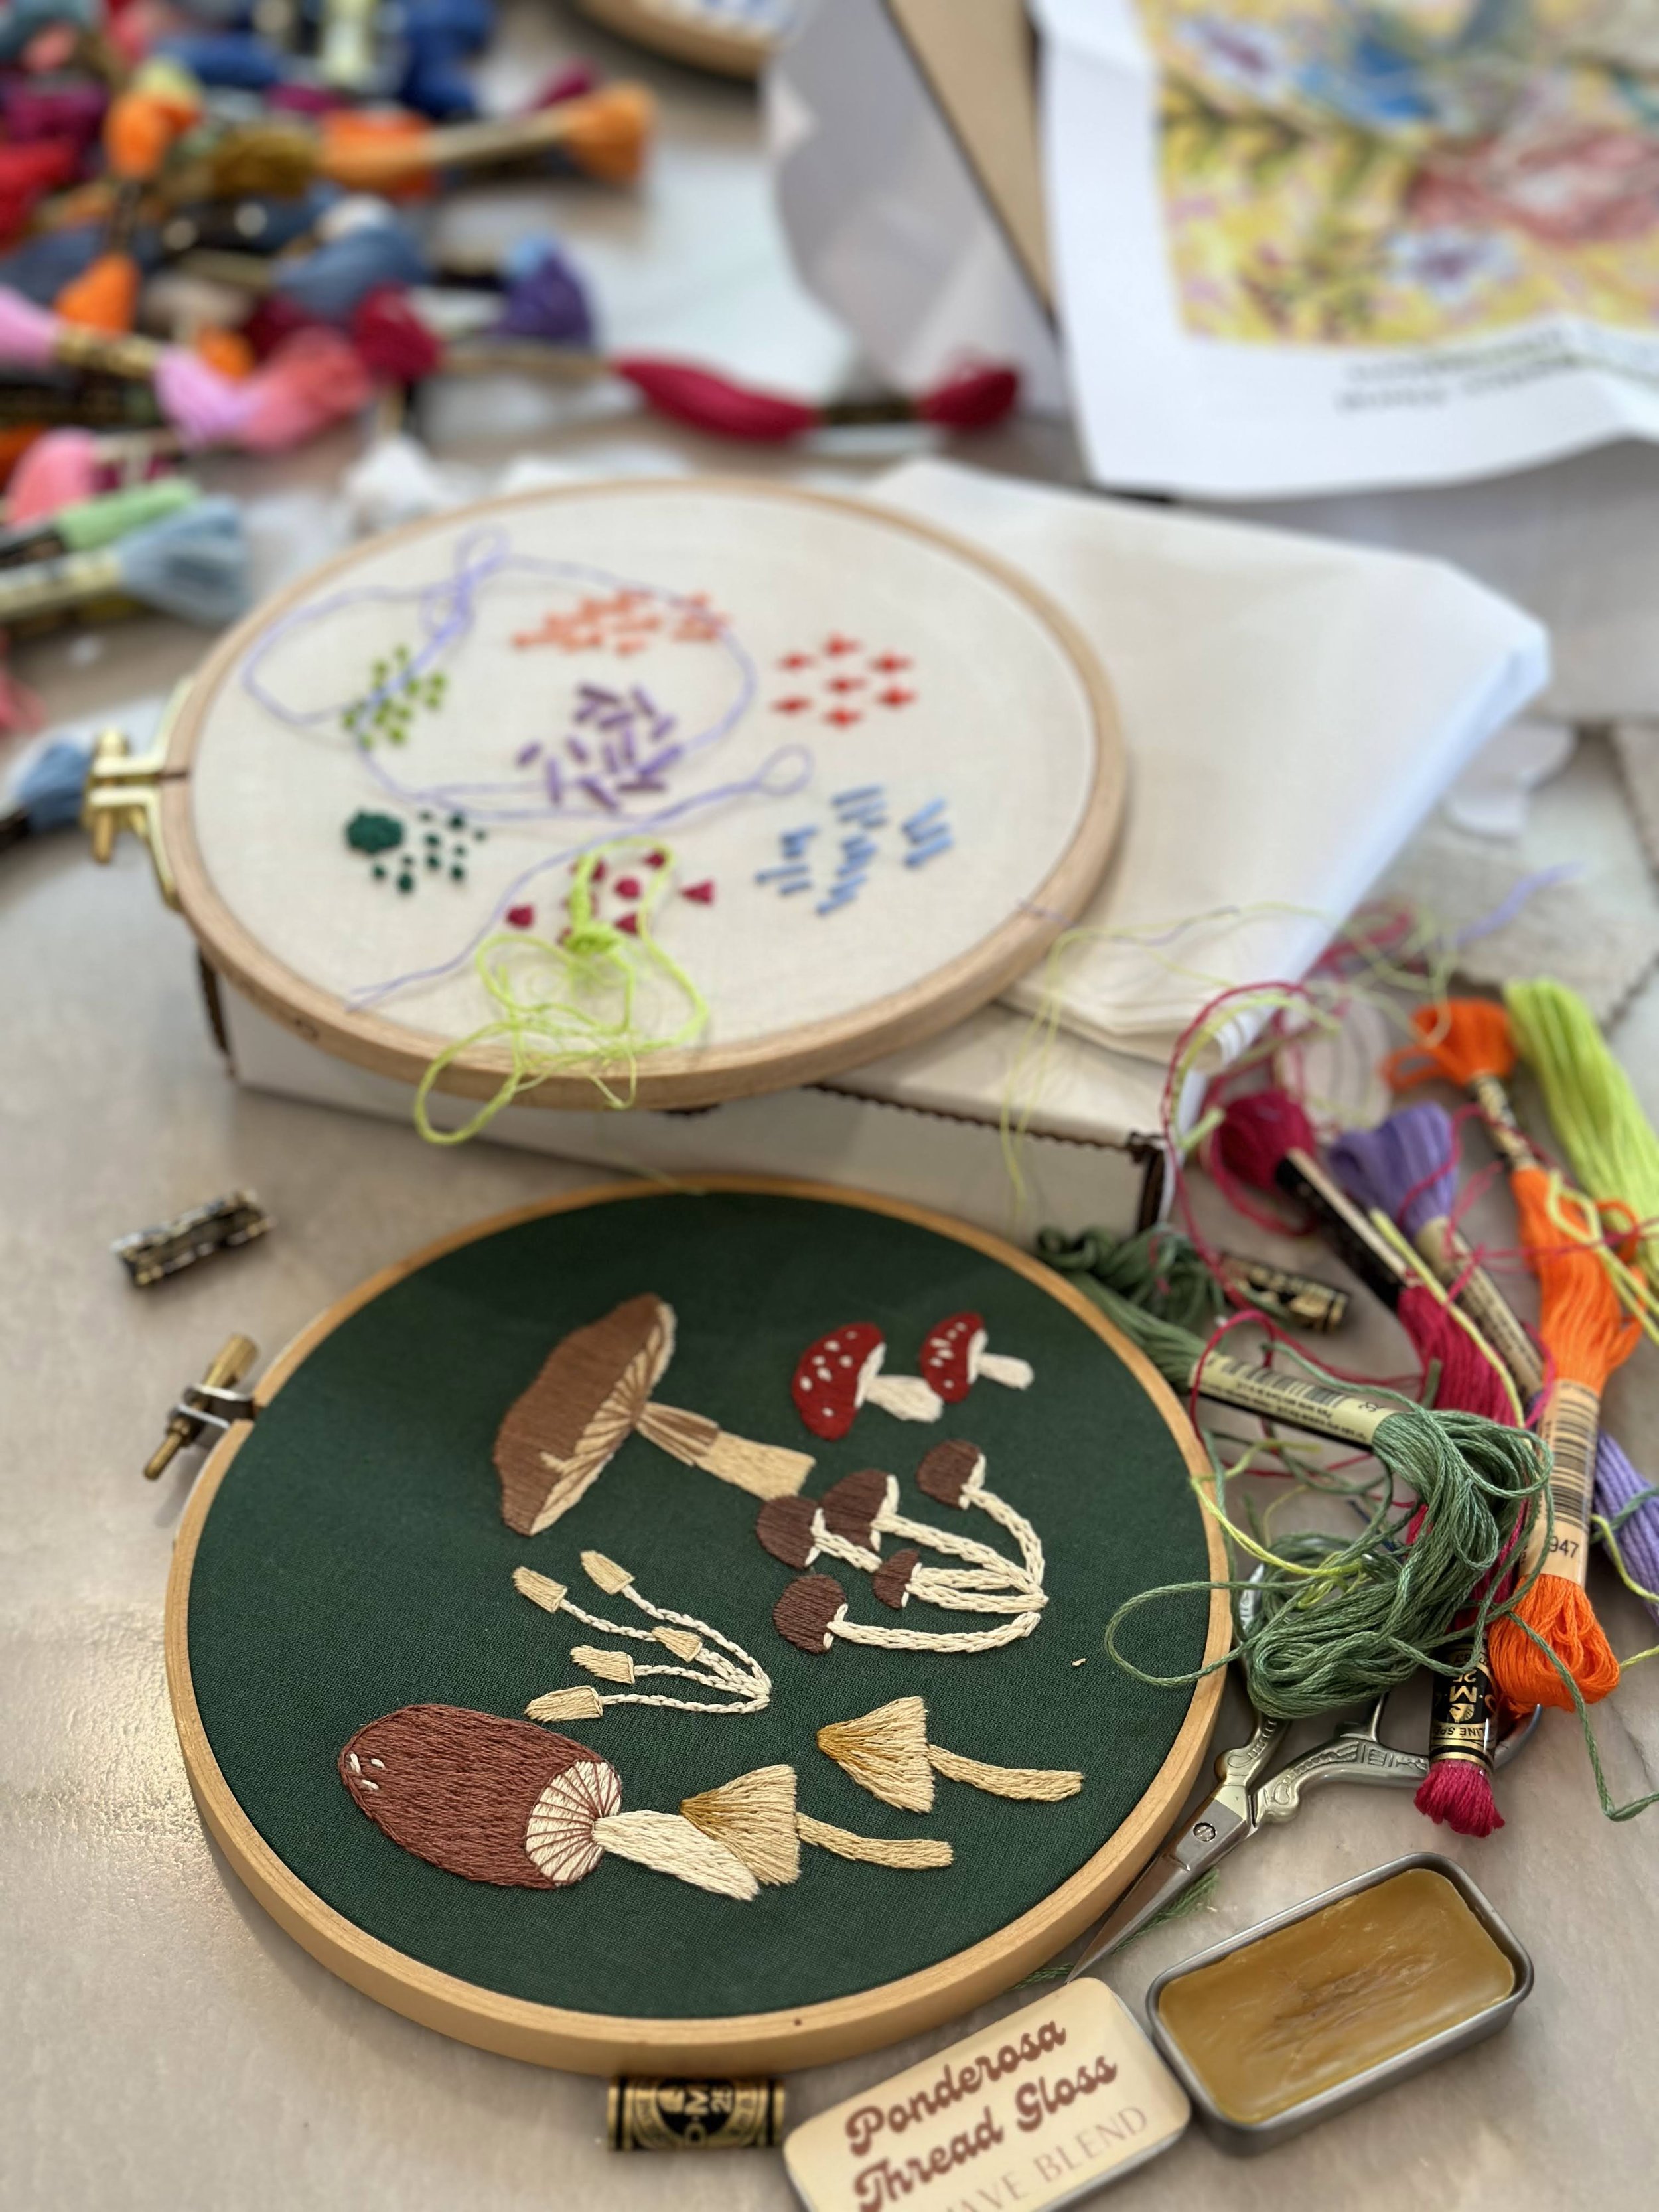
Each workshop attendee received a full floral embroidery kit that included floral transfer designs (water soluble), a wooden embroidery hoop, an embroidery needle, fabric, full skeins of embroidery floss in the colors of their choice, baking materials and printed instructions.
-
Begin with a threaded needle (single-ply), and hold it in your right hand. Pick up the end of the thread in your left hand.
Cross the needle over the end of the thread, and then pinch them together with the thumb and forefinger of your right hand. Your other hand is now free to work some magic.
Using your left hand, wrap the thread close to the thread end around the needle three times.
Once your needle is wrapped around several times, move your right forefinger and thumb up the needle just a smidge so they pinch the coil of thread. (They’ll also still be holding the needle and the thread end.)
Here’s the fun part: with your left hand, grab the needle and pull it and the thread through the coil. Keep holding onto the coil of thread with your right forefinger and thumb as you do this.
As the coil reaches the end of the thread, give it a good pull. Ta-da! There’s your quilter’s knot.
Tips: Make sure to leave a long tail on your floss when you thread the needle. This will give you enough floss to wrap around the needle and make the knot.
When you are wrapping the floss around the needle, be careful not to over-tighten the wraps. If the wraps are too tight, the knot will be difficult to pull through the fabric.
When you are pulling the knot tight, be careful not to pull too hard. If you pull too hard, the knot could break.
-
Make a loop in your thread, leaving a tail about 6 inches long.
Bring the tail end of the thread through the loop.
Hold the loop and tail with your thumb and forefinger.
Make a second loop in the thread, this time bringing the tail end of the thread through the loop from the back.
Gently pull on the tail of the thread to tighten the knot.
To secure the knot, pull on the loop.
Tips: Make sure to leave a long enough tail on your thread when you make the knot. This will give you enough floss to work with.
When you are tightening the knot, be careful not to pull too hard. If you pull too hard, the knot could break.
To secure the knot, make sure to pull on the loop, not the tail end of the thread.
-
Use 2-4 threads for this knot. Fewer strands will give you tiny and delicate knots.
Begin by coming up through the back of the fabric with your needle and thread.
Create a loop 4-5” away from the fabric. With your middle finger still holding the tail on the back of the fabric, take the thread you just looped in between your index and thumb finger. Wrap the thread around the needle 3 times.
Keeping the wraps snug with your fingers, take the needle back down directly beside where you initially came up. Start pulling your thread through the wraps you made. Pull so that the knot is tight and flush.
Tip: If your knot disappears it means you are making the stitch through the same hole you came up through. When you make the knot, make sure that you are going back down directly beside the hole you came up through. This will anchor the knot on top of the fabric and prevent it from slipping through to the back.
-
Use 3 threads for the Satin Stitch.
To begin, bring the needle up through the back of the fabric to the front anywhere in your shape. Gently tug so that your knot is flush with the back of the fabric.
Take the needle down straight across from where you brought the needle up, on the opposite side of the shape you are filling.
Bring the needle up on the side of the shape where you started, near where the needle came up on the previous stitch.
Take the needle down straight across from where you brought it up, near where the needle went down on the previous stitch.
Continue stitching in the same manner, repeating the steps above and making stitches side by side, covering your shape or area being filled.
-
Use three threads for the stem stitch (or as many threads as the thickness of the stem you’d like to see).
Begin this stitch with a Quilter’s Knot.
To begin, bring your needle up at your starting point (ex. end of the stem line), then back down about a 1/4 of an inch away. Do not pull the embroidery floss all the way through yet.
Now, bring the needle back up halfway between the stitch and along the stitch line. The needle should be coming out along the side of the stitch, not through the middle of the strands. Pull the thread tight.
Keeping your thread to one side, make another stitch, coming back through the last stitch hole along the line. Pull the thread through. Continue working your way forward in this way, keeping the floss along the same side of the stitch each time.
To finish, insert your needle down about a stitch length from your last stitch. This should make a seamless final stitch.
Tip: Always keep your loop to the same side while working.
-
Use 3-6 threads for this stitch.
To begin bring your needle up at the top point of the leaf and bring it down about 1/3 down the line.
Bring your needle up at the top of the leaf directly next to, but a little bit lower on the outline of that very first stitch.
Then take your needle and bring it down on that center line just below your previous stitch.
Next you will repeat that same stitch process on the other side of the leaf, creating a symmetry.
Continue this same process, alternating from side to side, as you work your way down the leaf following the outline.
Our top picks for embroidery
Now that you’re ready to get your stitch on it’s time to get the necessary tools. We’ve rounded up some of our team’s favorite embroidery products. We hope you love them!
Embroidery Floss: DMC Embroidery Floss comes in tons of gorgeous colors for all of your creative stitching needs. Use it for embroidery, cross stitch, needlepoint or even friendship bracelets! Embroidery Floss

Embroidery Scissors: We LOVE how adorable all the different embroidery scissors are. We especially love this two-pack that includes a gold stork and spectrum colored unicorn. Shouldn’t all scissors make you smile? Embroidery Scissors
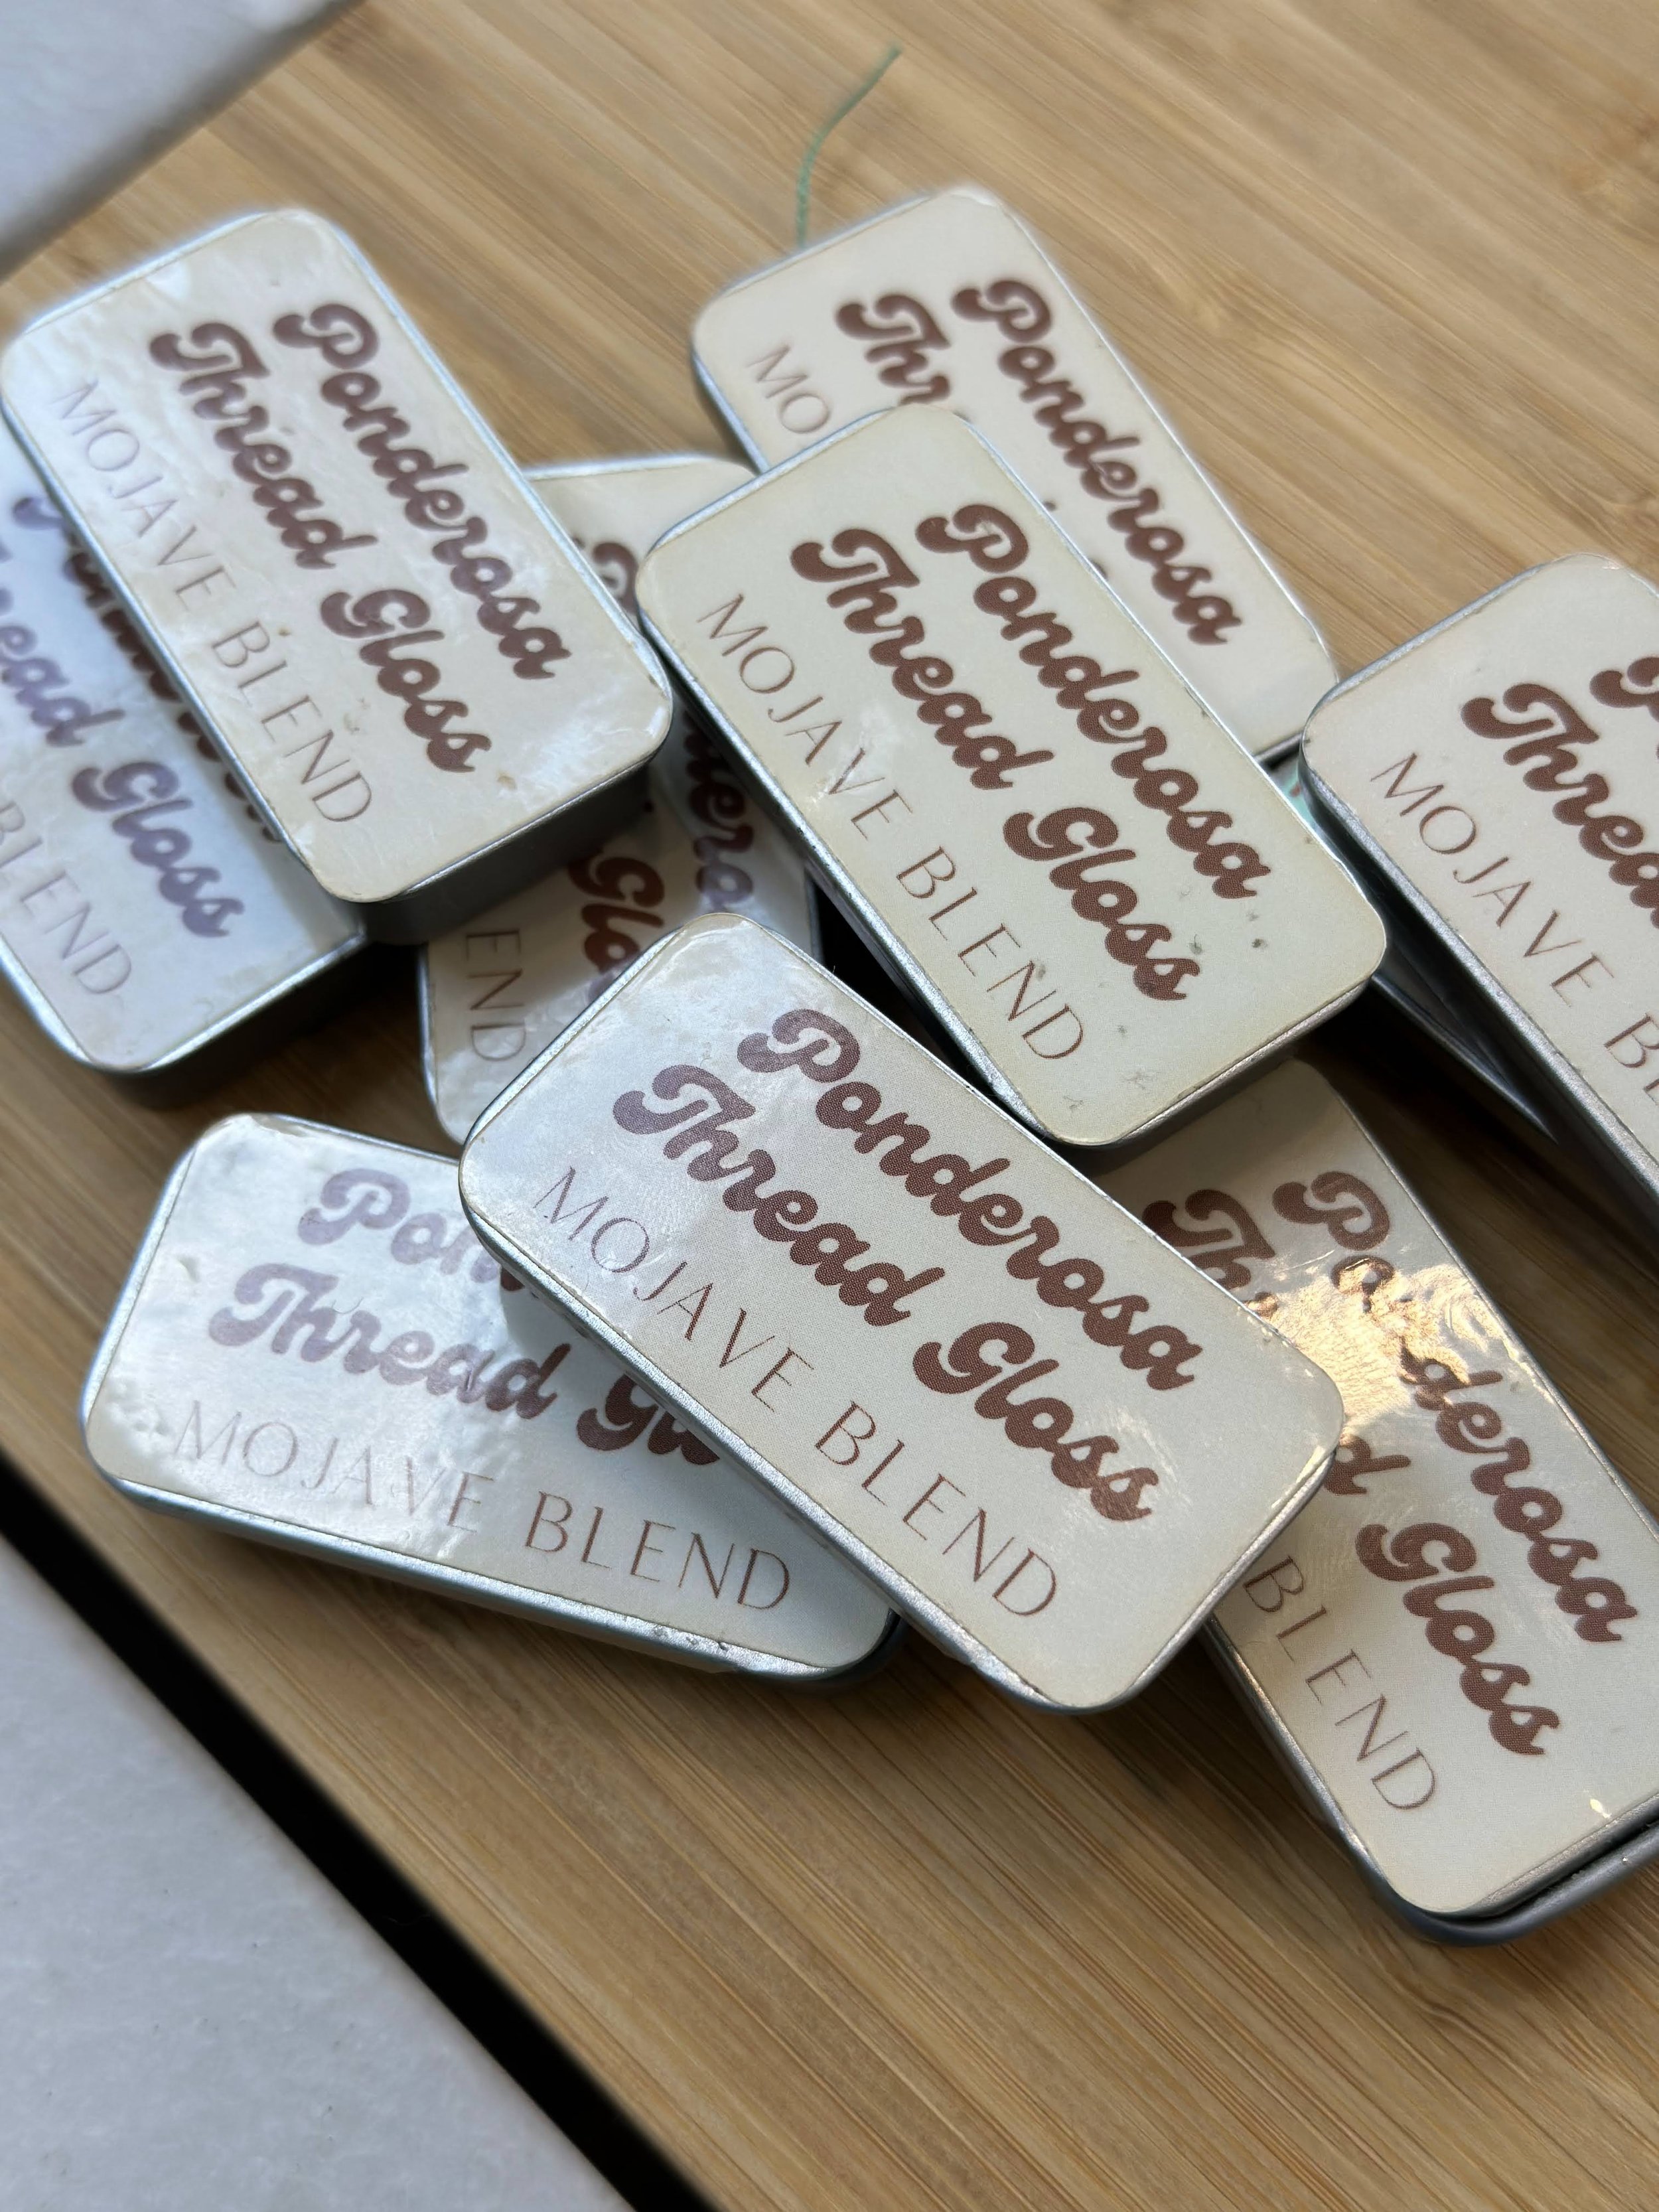
Ponderosa Thread Gloss: Why didn’t we know about this product years ago? Use it to smooth your floss, prevent knots, and smooth together individual threads. This brand is handmade in Olympia and woman owned and operated! Thread Gloss

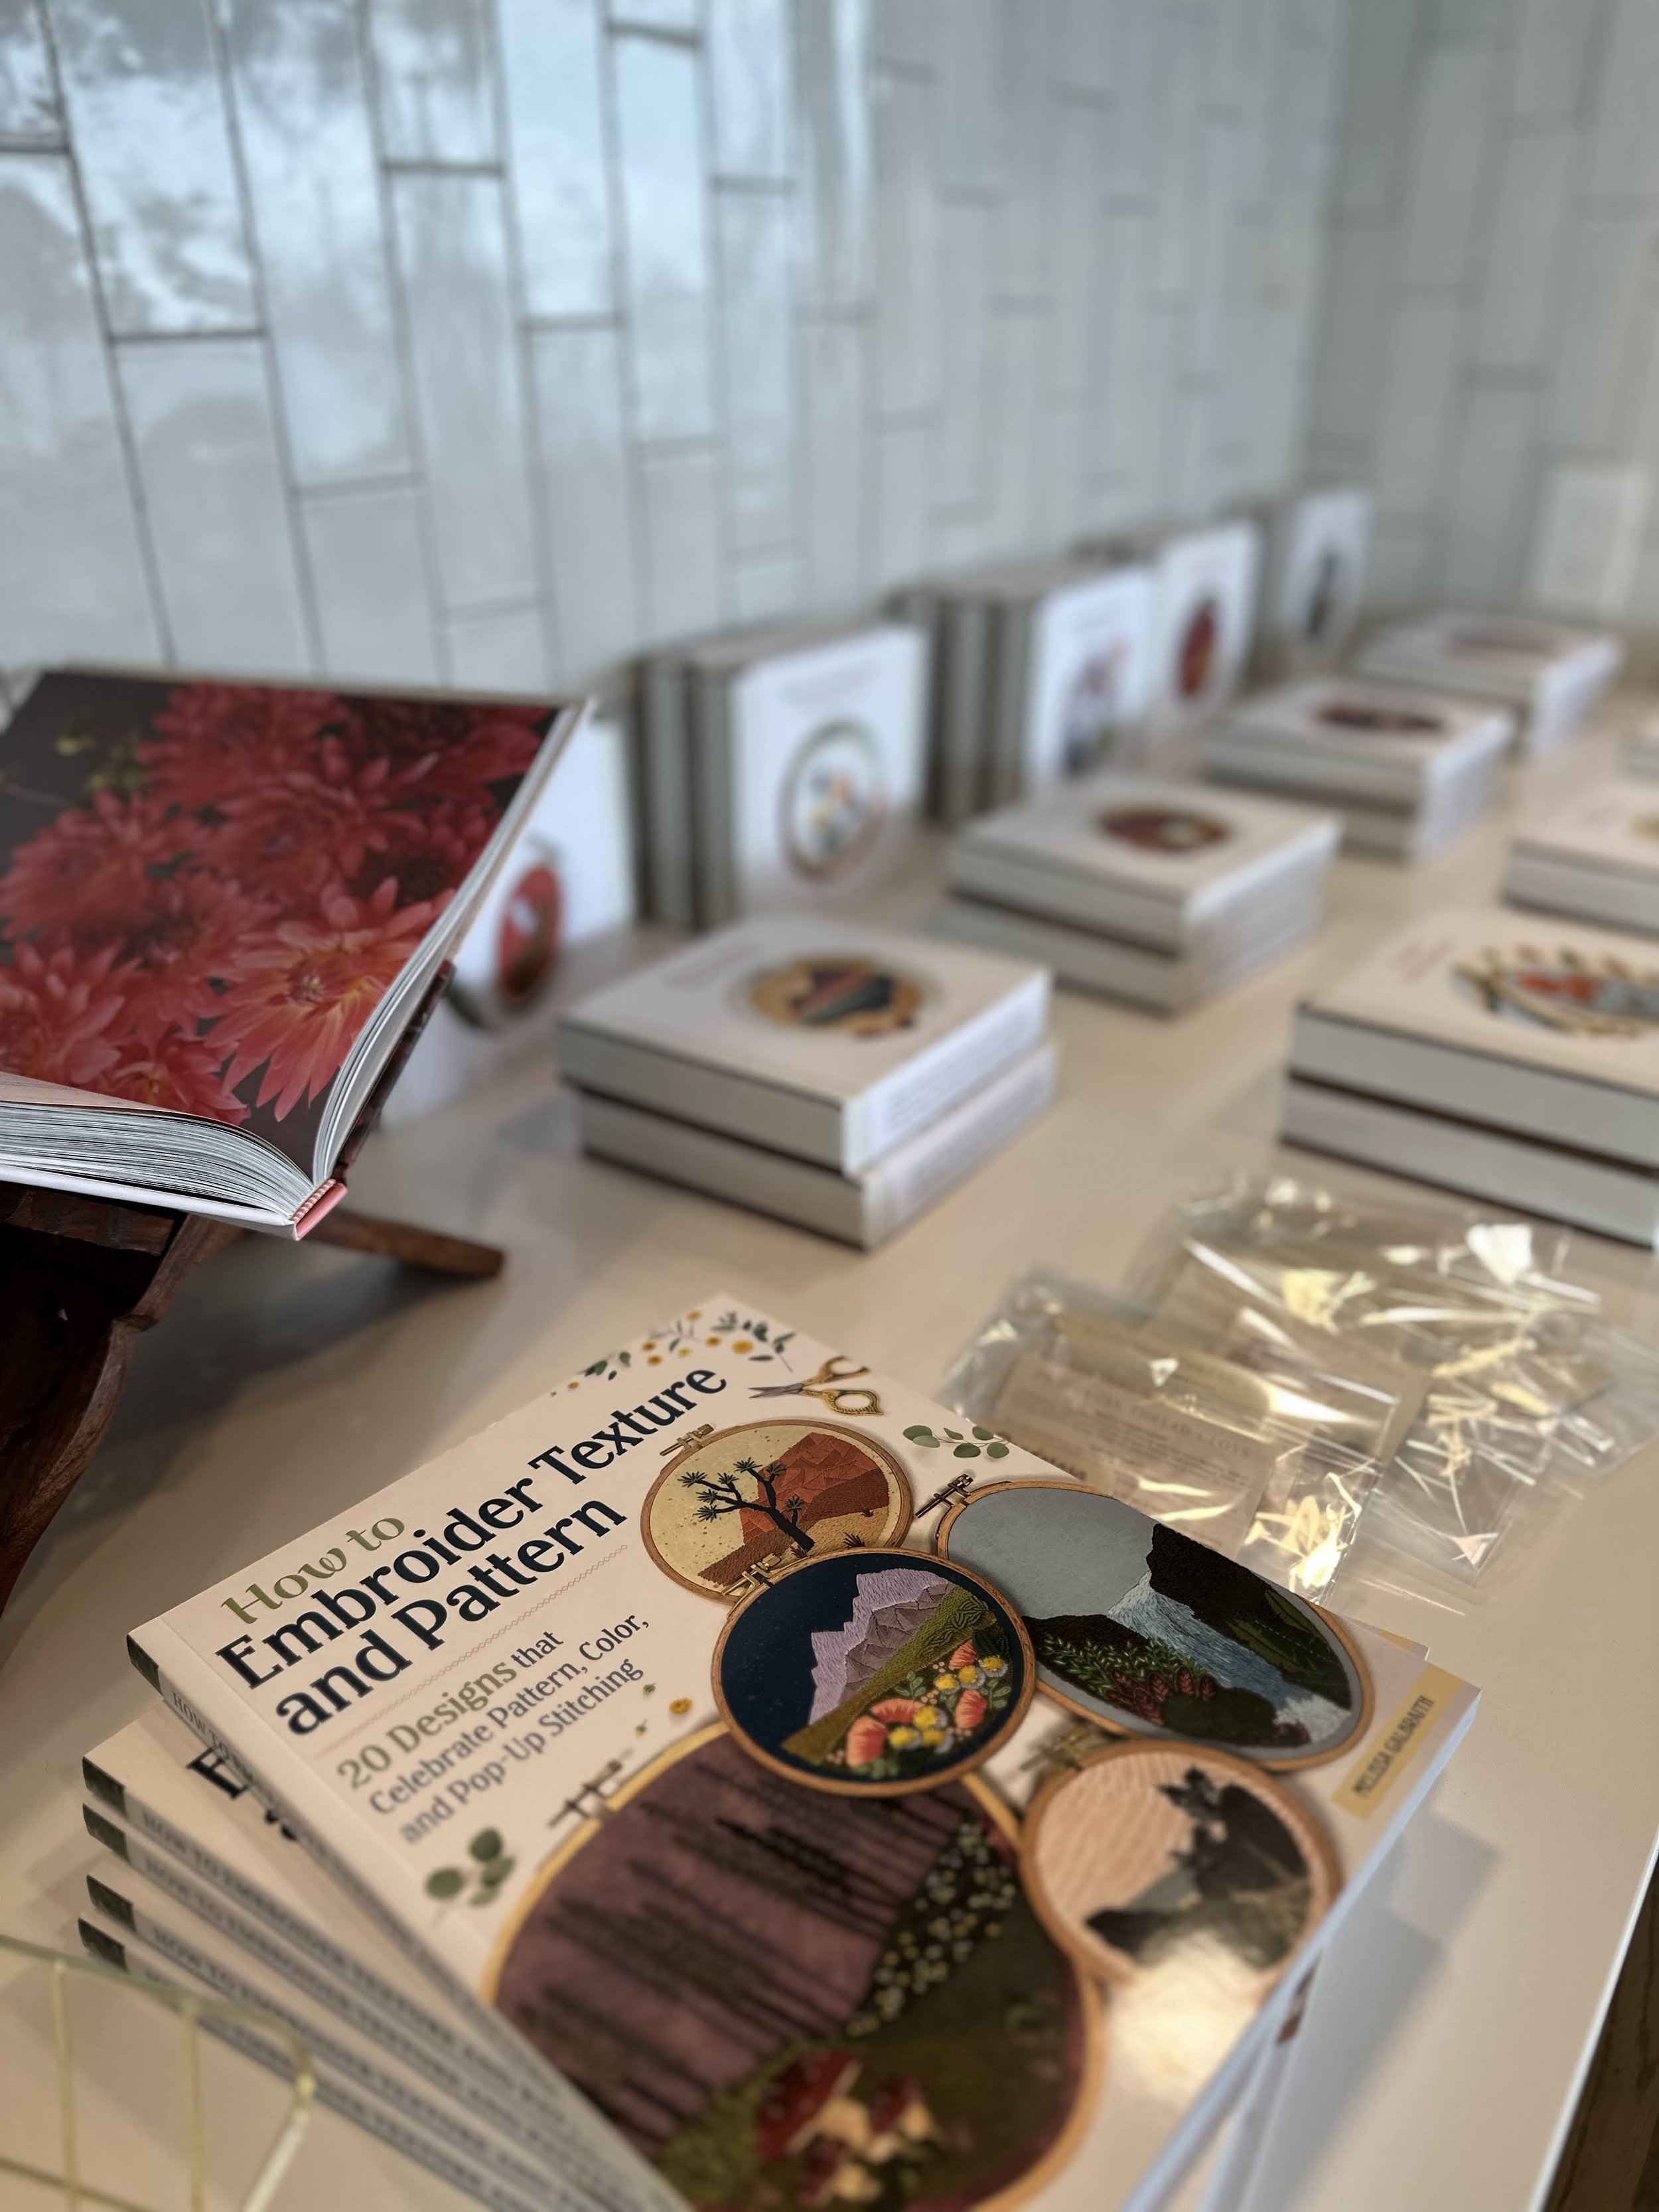
How to Embroider Texture and Pattern: Did you miss the workshop? Or maybe you’re excited to learn more? Grab a copy of Melissa’s book How to Embroider Texture and Pattern to learn more about pattern, color and pop-up stitching. Melissa's Book

Tulip Muffin/ Cupcake Liners: Use these liners when making muffins or cupcakes at home. They give your baked goods an instant touch of elegance. A must-have for any baker’s kitchen! Tulip Muffin Liner
Until we gather again!
**As Amazon Associates we earn from qualifying purchases.